1966 Chevrolet Impala 4-Door Sport Sedan
$6,995
SOLD!
Sold on July
27, 2013 to a collector who lives in Greece, NY (about 20 minutes
away) who plans to make it look even more like a police car.
I've always liked cars - especially 1960s full-size Chevys (they bring me back to my early childhood). My dream was to someday own a 60-something Chevy; I was blessed with a nice one in April of 1999.
A few months later, on December 24, 1999, while my wife and I were taking my parents out for my mom's birthday, the fuel line ruptured resulting in an engine/car fire. We had no sooner left our home when the motor started to miss, as if running out of gas. Within seconds we could smell raw fuel, then smoke started coming out from under the hood and into the car's interior under the dash. I pulled over and everyone bailed out. I was trying to stay calm, unlock the hood, get to the fire extinguisher in the trunk, and call 911 on my cell phone. By the time I got through to 911, thick, black smoke was pouring out from under the hood and dash. I rummaged around the trunk trying to get my fire extinguisher (while everyone was screaming for me to get away from the car!), but it was too late to safely try to put the fire out myself.
Fortunately, a Chandler, AZ Fire Department pumper truck was returning from another call when they saw the billows of black smoke. They were on their way before they even received the dispatch call! By this time sparks were flying from under the car as the electrical system shorted out. As if possessed, the starter cranked madly on its own for about 30 seconds--and then the car alarm went off. I'd disarm it with my remote, but it would sound off again moments later. Then, as if giving up the ghost, it stopped. The firemen, having arrived by this time, pulled a length of hose from the truck and started hacking away at the hood with large axes. They then took a large pry bar and ripped open the hood while dousing the engine and interior with water. Just like that and it was over.
We had the car towed home and spent over an hour trying to get the water out of the interior where it was 4" deep in the floorboards. We cleaned it up as best we could, I contacted my insurance company, we thanked God no one wsa hurt, and then went to dinner.
The insurance company appraiser came a few days later. Fortunately, the car was spared and retained a clean title.
At this point I must give credit to my friend, Michael Glandon, who is a mechanic by trade--and a very, very good one. He looked the car over and volunteered to keep it in his backyard while he supervised the rebuild (i.e. he did most of the mechanical work!). Together, we worked on the car from January to July, 2000. All told, I figure that we easily have over 200 hours into the car. The end result is that this car's better than ever and appraised for over $1,000.00 more than it did before the fire.
I continue to work on this car and, not by my original design, it has taken on the persona of an undercover police car as over the past few years I've added wig-wag lights in the grill and on the package shelf, a mechanical siren, dummy antenna and police radio, black rims with dog-dish caps, and a few other items. I'm regularly asked the question, "Was that an old police car?"
The pictures tell the story:
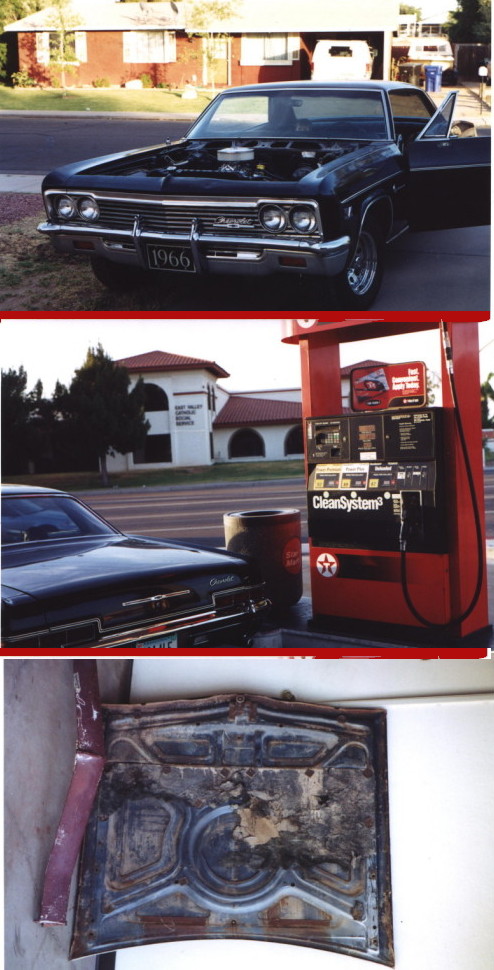
Here's how the car looked when I bought it in April, 1999. The car had 50k original, documented, miles and was nearly all original. Even the seats, which looked new, were original. Under the hood is a 325 horse 396 Big Block. |
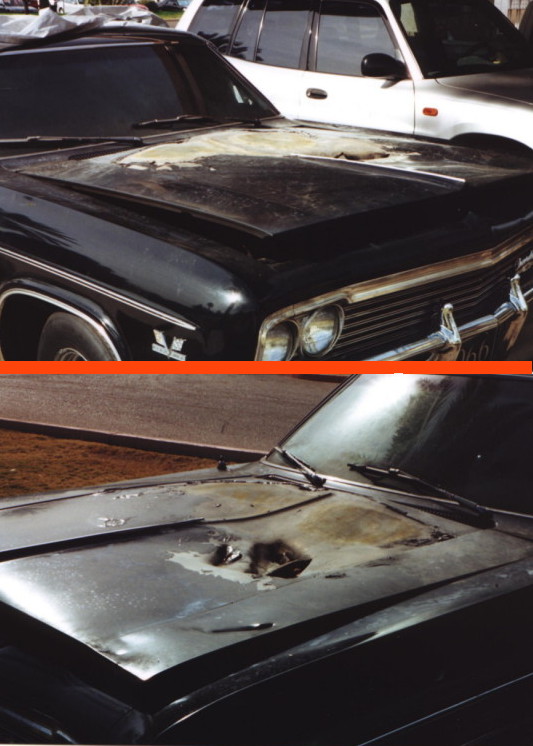
Here's how the car looked when we got it home after the fire on December, 24, 1999. Note the paint literally blistered off of the hood. Note also the "hatchet job" the Chandler FD did on the hood. There's actually a purpose to making this "fire hole" before opening the hood (helps to avoid a face-full of oxygen-angry flames). Good thing I didn't open it myself or I may have been badly burned. I'm also thankful that the one axe blow wasn't a few inches off or I would have been looking for a new front fender! |
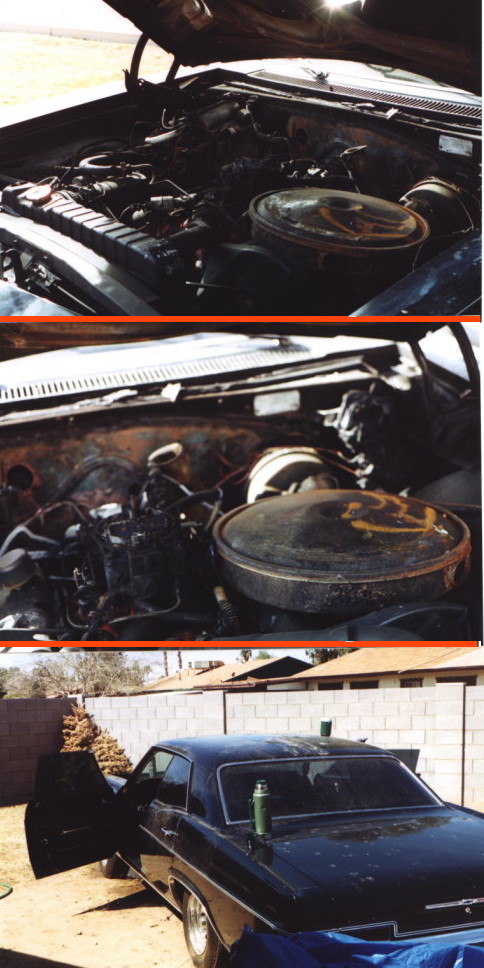
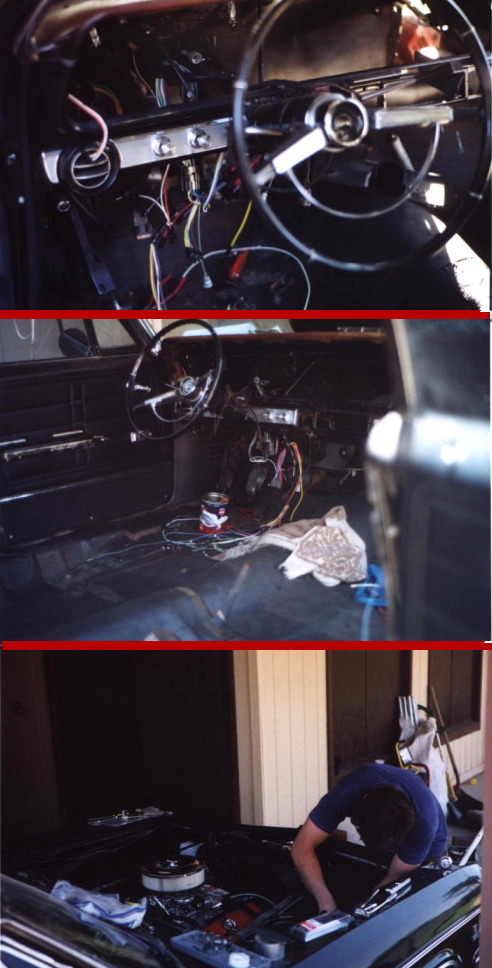
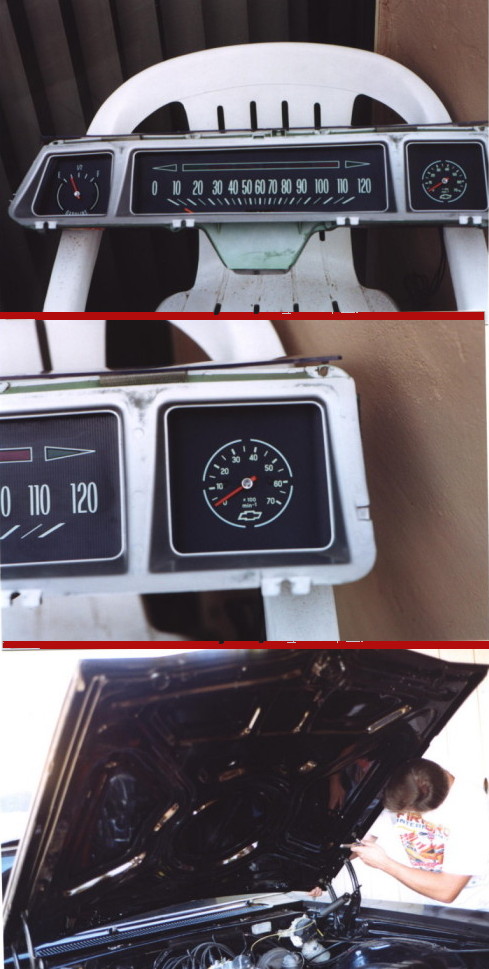
The first two pictures are of the interior. Fortunately, only a few weeks before the fire I took the dash apart and removed the radio and clock to have them both repaired. I had left the large plastic-chrome "bezel" that goes all the way around the intstrumentation and radio in the trunk. The result was that these three parts were spared (note the blue shoestrings I was using to keep the instrument pod in place). The center of the dash area was where the interior damage was most severe. The bottom picture shows the engine. Note the break in the fuel line just before the fuel filter. This is what the FD determined caused the fire. |
Pictures 1 and 2 are more of the burned out engine compartment. Interestingly, the fire did most of its damage from the carb to the firewall. The upper radiator hose had burst and the fan shroud and battery had melted some, but the drive belts and radiator fan were fine. The bottom picture shows the back yard where "Senor Smoke" would spend his next 5 1/2 months. |
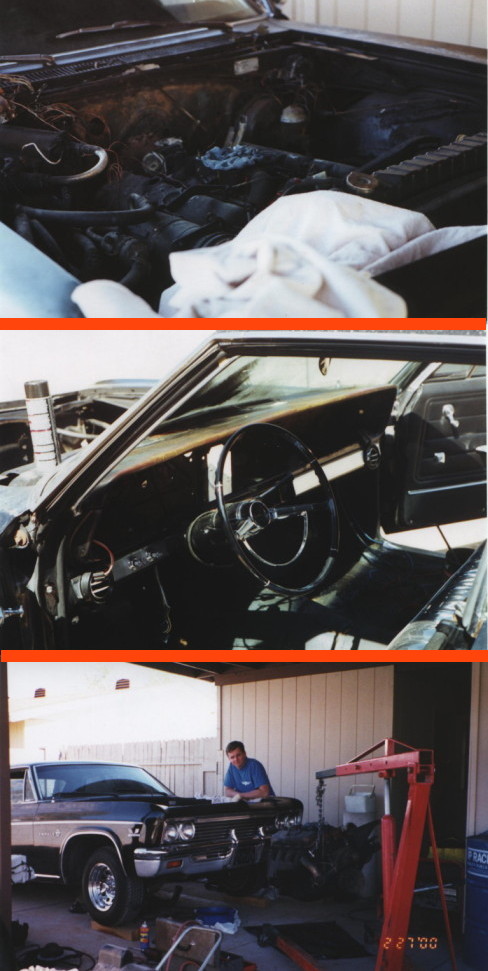
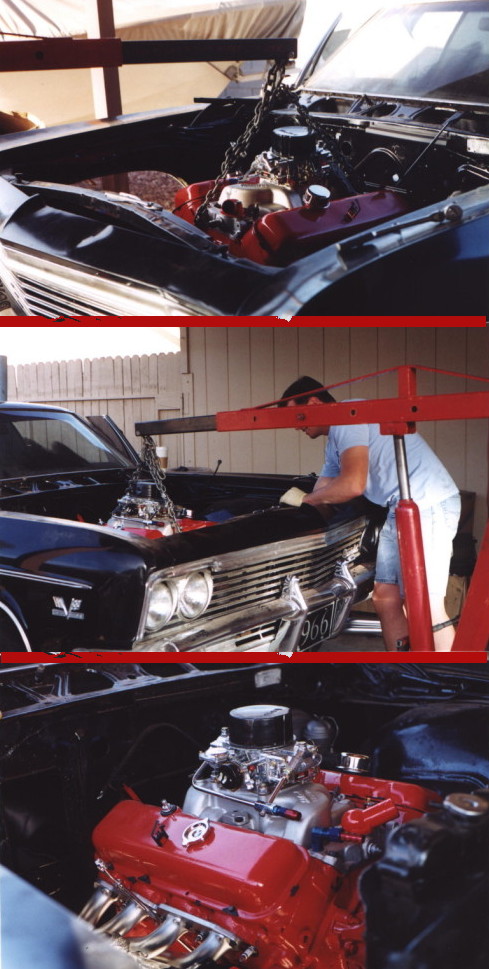
Pictures of the engine and interior right after we started tearing things apart. Note the rust from the water and condensation that was in the car for days. The bottom picture is that of "Mechanic Mike," having just pulled the engine. |
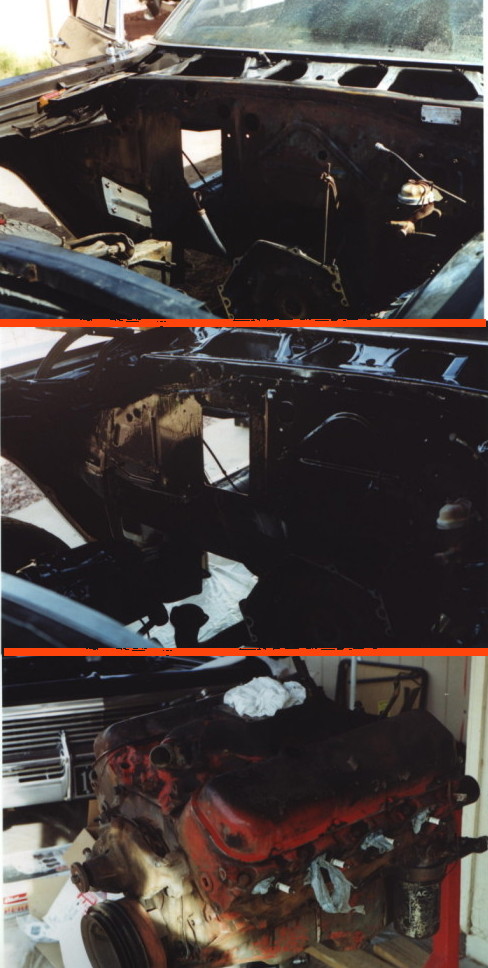
The engine compartment with, engine removed, before and after. The last picture is that of the dirty, smokey motor on the engine stand ready for cleaning and paint. |
Here I am admiring my work. The transformation of a Chevrolet 396 Big Block can be a beautiful thing! |
Here's the "new" engine going back into the engine compartment (oh, man, were those headers a pain!). |
Top
two pictures: New wiring going in with interior
carpet removed. |
Top
picture: New carpet installed and seats back in
the car. |
It's
alive! The car's first time out of the back yard since it
was towed and pushed there back in January. Now we're
driving it out! We then had to make a quick stop to the
Texaco Station for some gas. Boy those open headers were
loud! |
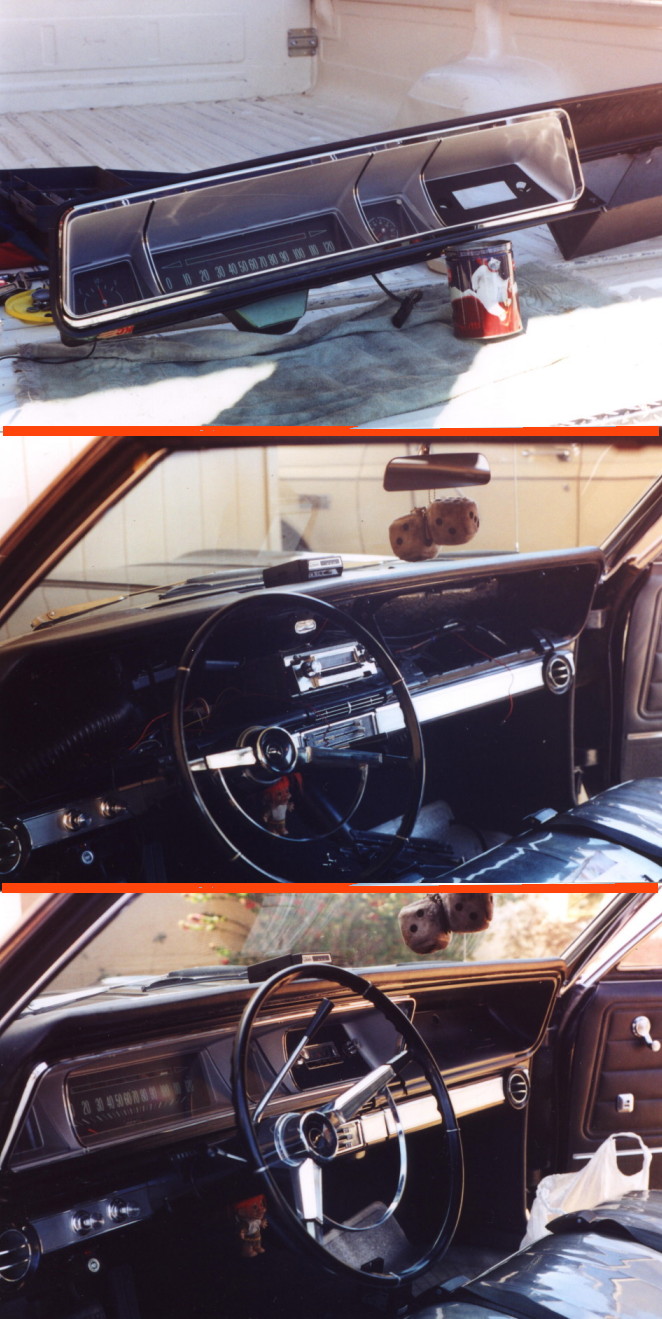
My new
instrument cluster which came out of a 1966 Bel Air. I
happened to find one with almost the exact same mileage.
Then a great idea happened upon me: What if I took the
dummy clock face (standard in Bel Airs) and had a shop
make me a custom in-dash tachometer in its place? After
making some calls, North Hollywood Speedometer came
through for a reasonable price. I sent them the dummy
clock face and a matching needle from the extra gas guage
I had. They used the needle I supplied (see how it
matches the one on the gas guage?), Chevy green graphics
and logo, and sent me a tach that nearly looks factory.
Beats a clock any day! |
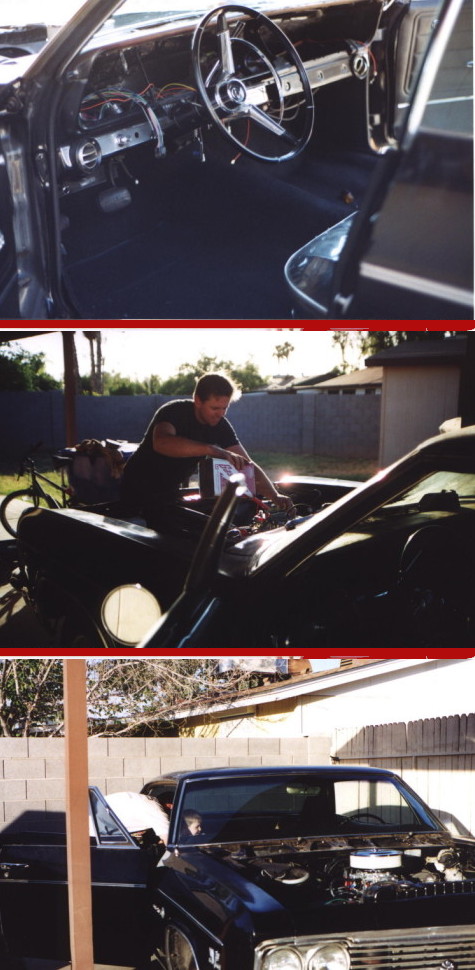
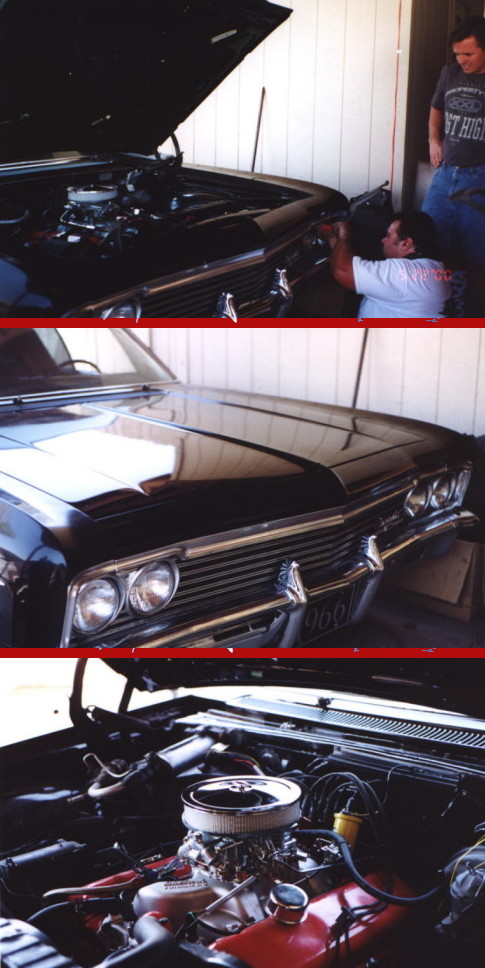
Top picture: Yours truly hard at work installing the header panel (that was tough; they rivit those things on!). Middle picture: The job completed. Bottom picture: The 396 almost done. |
The big
day: May 23, 2000, I drove the car home to stay. It
wasn't quite finished, but it was road worthy. Middle
picture: Had the exhaust redone with 2.5"
pipe over the rear axle and out the side. Now those
two-chamber Flow Masters sound real nice! |
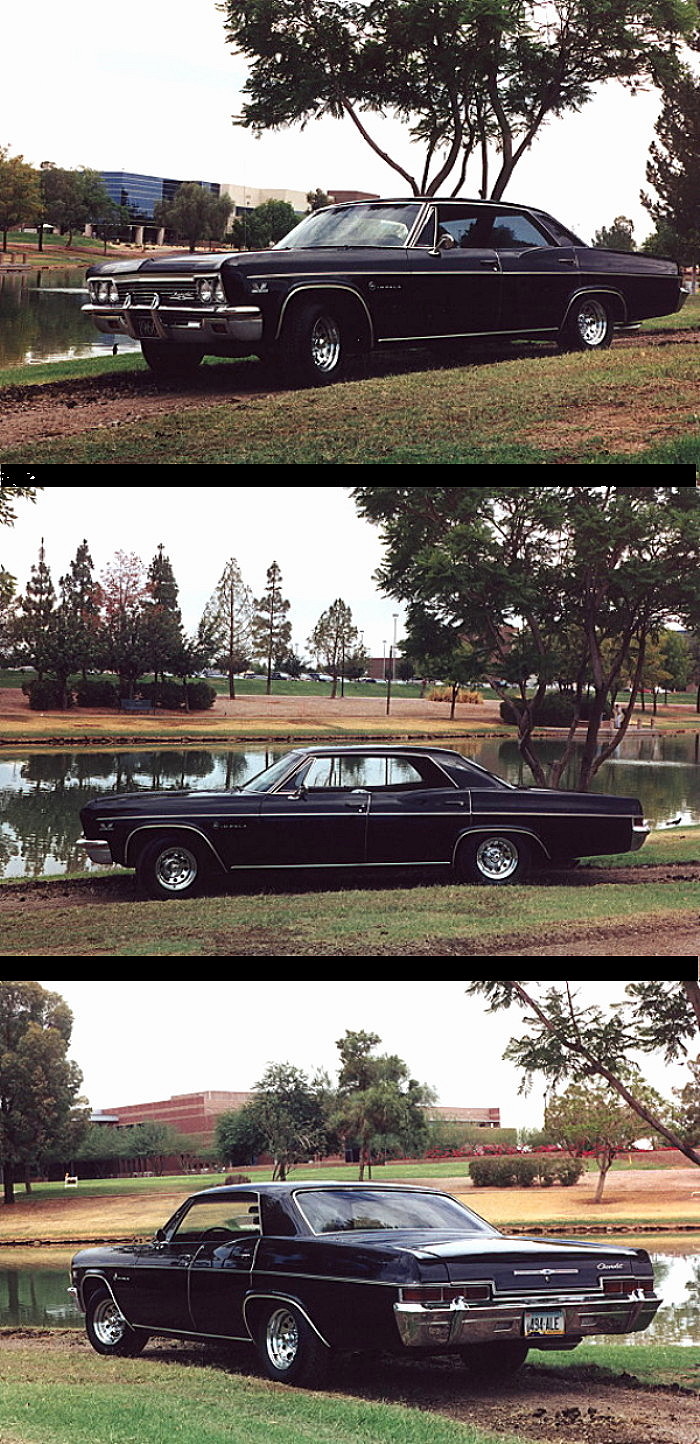
Three pictures of the completely detailed exterior at beautiful Arizona State University Research Park in Tempe. Just finished putting in a new set of Moog Cargo Coils in the rear. All that's left now is the dash area of the interior. |
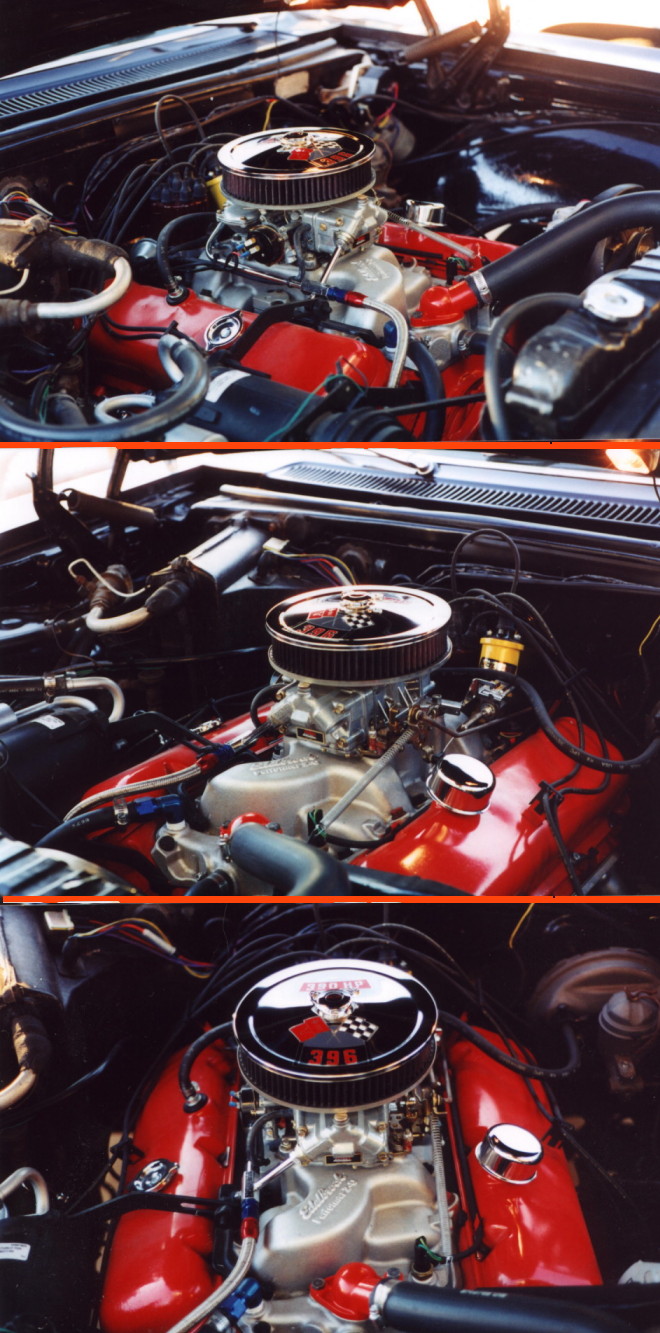
Three larger pics of the completed 396. It looks fast anyway! |
Interior
Part 1. The dash was a real pain to finish. |
Interior Part 2. The completed dash! |
One finishing touch that I just had to have was the center rear-seat speaker. This was an option that my Chevy didn't have. What to do? Just get yourself a speaker grill, speaker and wire. Then have the local upholstery shop fabricate the spot in the seat for the speaker. Walla! I must admit that had I known that the car was going to morph into an official law-enforcement vehicle I probably would not have added the speaker. |
Here's Where the Change Begins I bought the car with no real agenda as to its future. Maybe change the tires and wheels. That was about it. From this point onward, the car starts a slow evolution to its incarnation as a retro undercover FBI car. It just sort of happened! As a side note: I ran into one of the car's former owners, a collector, who told me that in light of the rare way this Chevy was optioned from the factory as an Impala (black on black, big-block, four-door, climate control a/c) it may have been ordered as a government vehicle. |
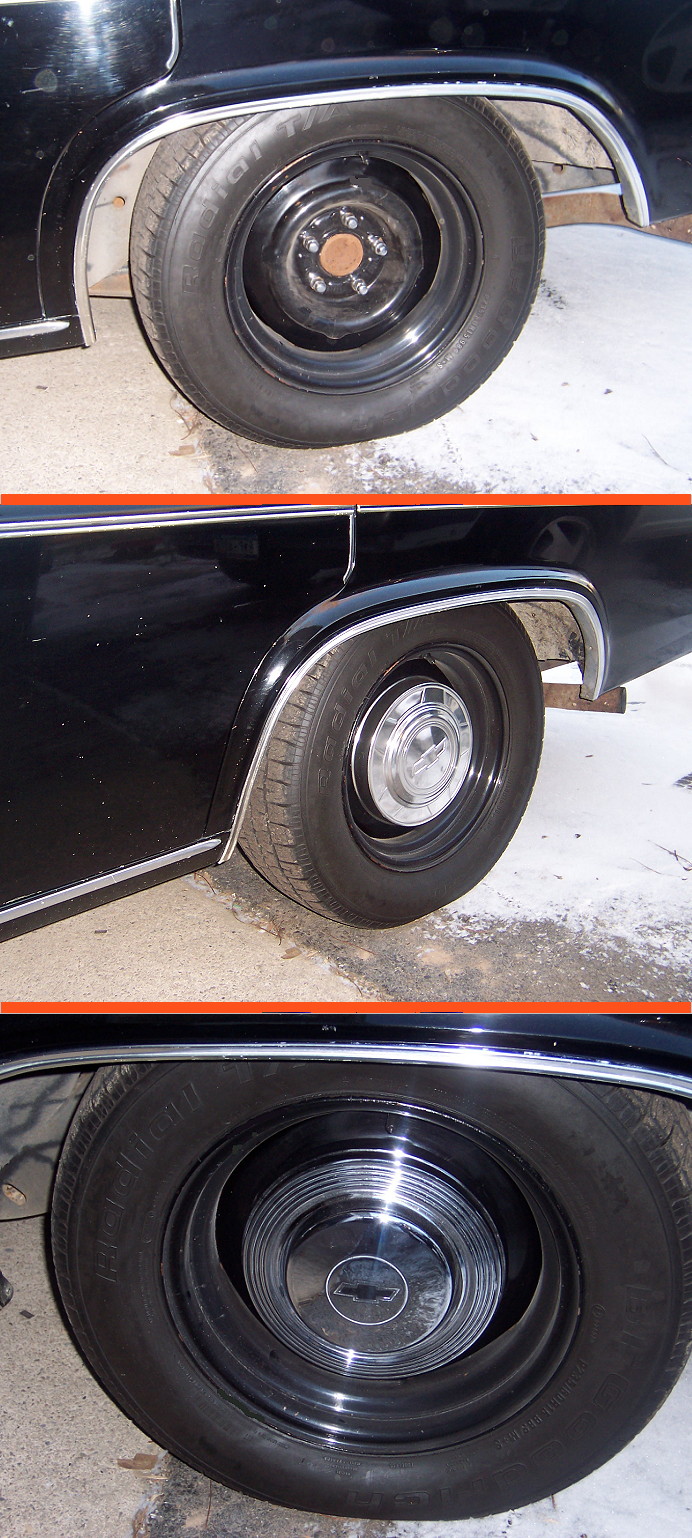
First, new 15" tires and wheels. I decided to forego the 14" chrome mods that were on the car when I purchased it in 1999. In their place I went with stock 15" x 7" steel wheels, stripped and powder-coated black, with blackwall P235-60R15 tires. The hubcaps are actually Chevy truck caps that I stripped and polished. I went with these due to the high price of originals. Bottom Pic: I later found a very nice set of originals on Ebay for a mere $50.00 which replaced these truck caps. |
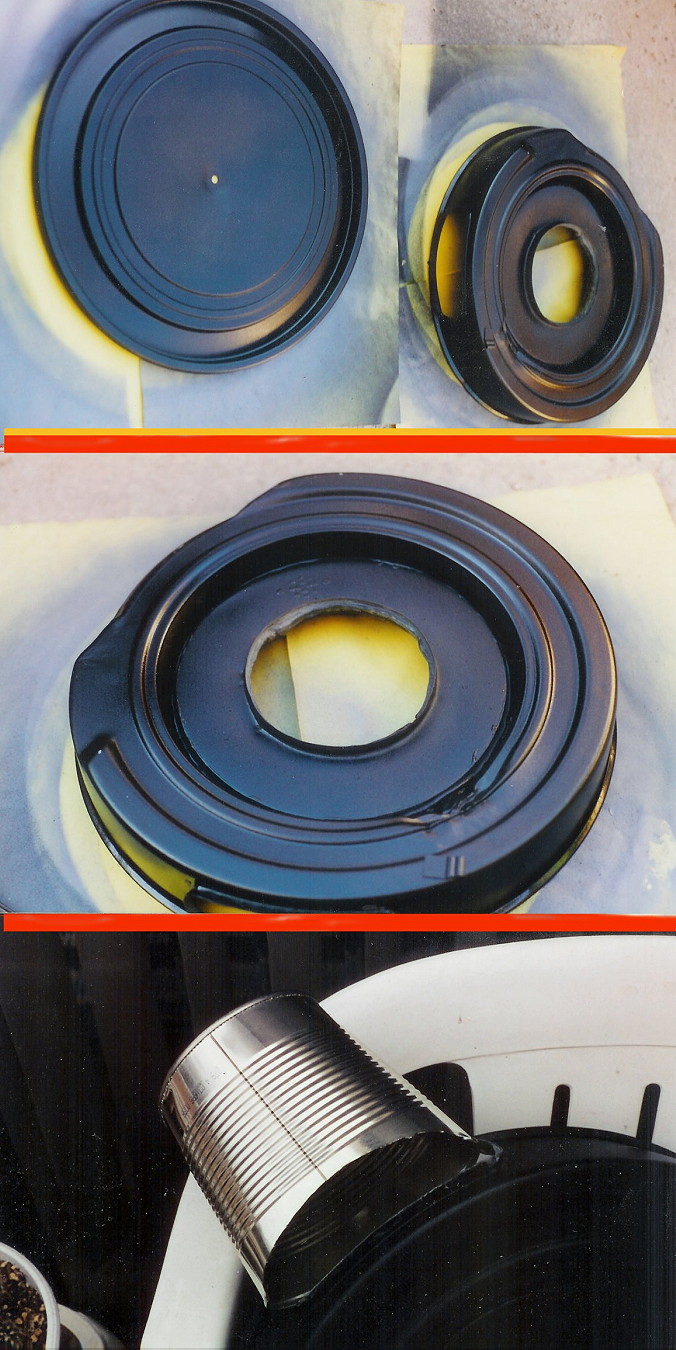
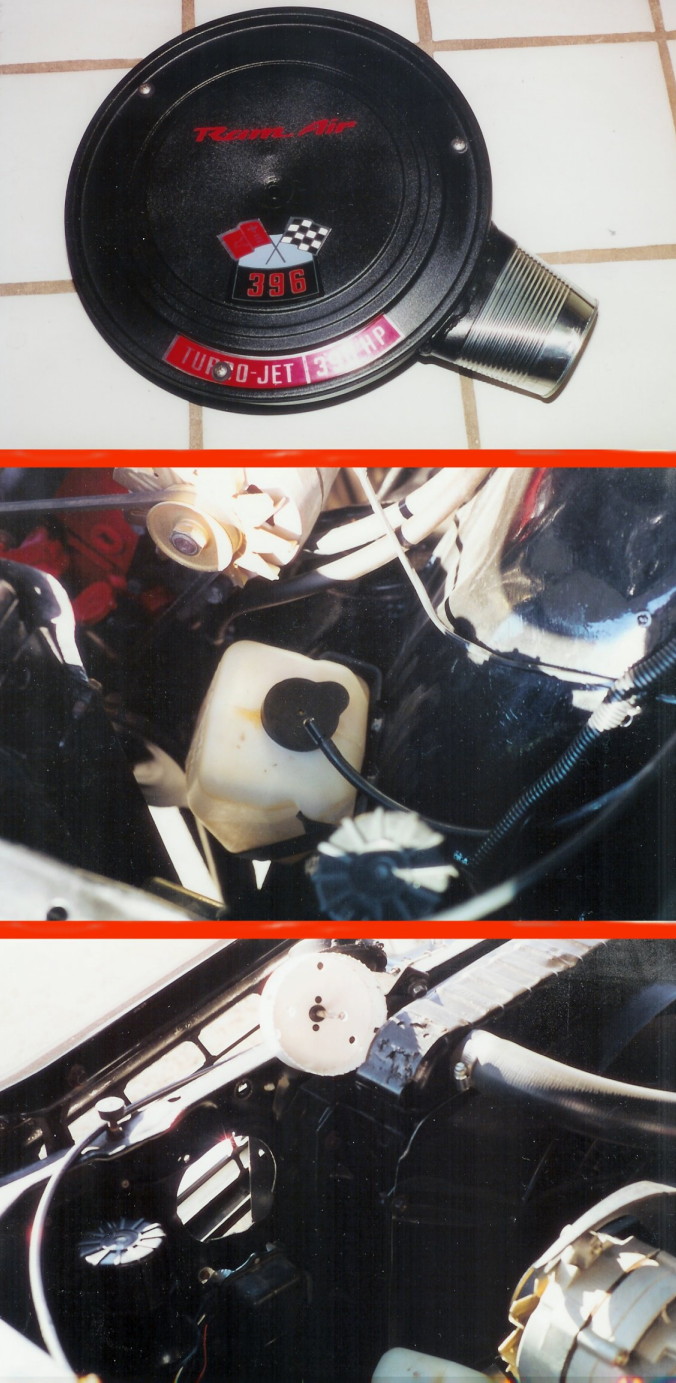
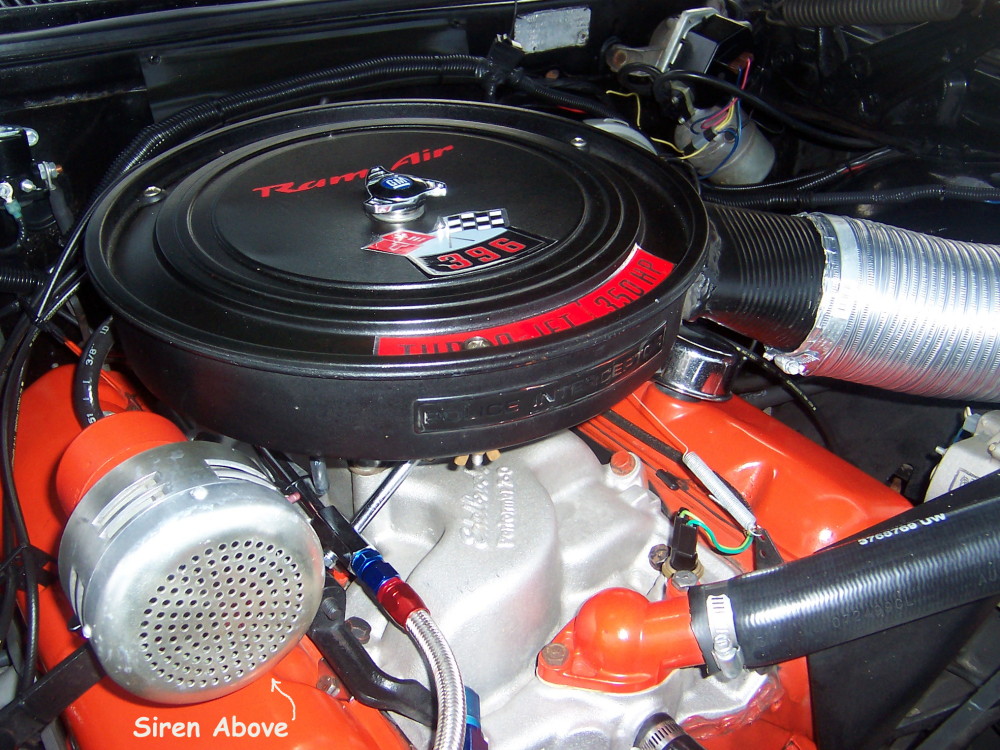
Ram-Air Intake Part 1. Here I got ambitious and fabricated my own "Ram Air" intake. The air cleaner housing that I purchased from a local salvage yard. It was from a GM V6 donor car. I had to remove the original snorkle. I replaced it with a coffee can! |
Ram-Air Intake Part 2. Attaching the new snorkle with copious amounts of JB Weld Quick-Set. |
Ram-Air
Intake Part 3. |
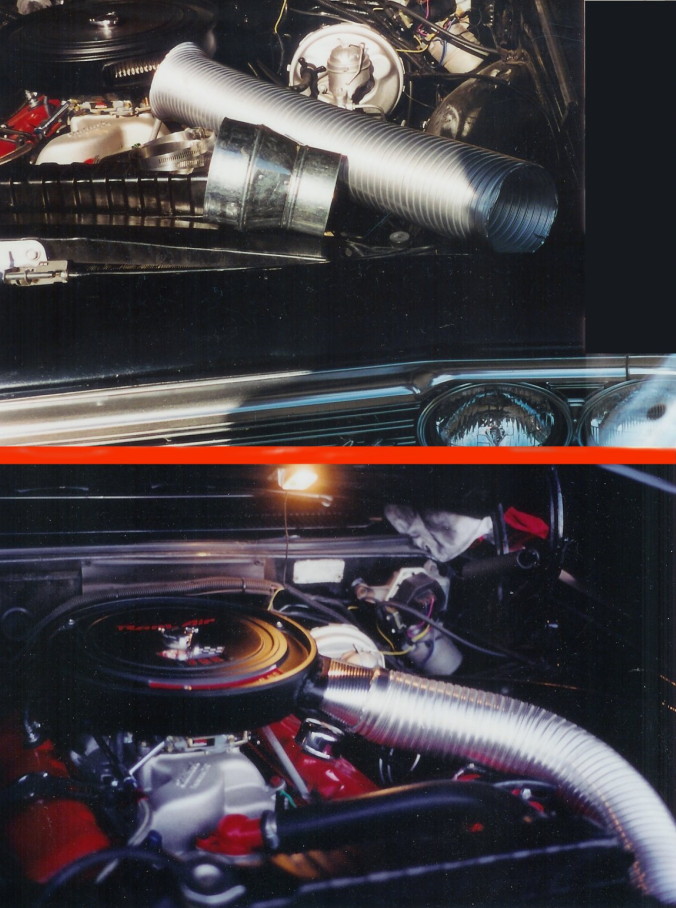
Ram-Air Intake Part 4. The initial engine installation. Note the 5" to 4" collector that I used to catch the air through the grill and channel it into the duct to the air cleaner housing. |
Ram-Air Intake Part 5. Here is the finished product. I do notice an improvement in performance, especially on cold days! |
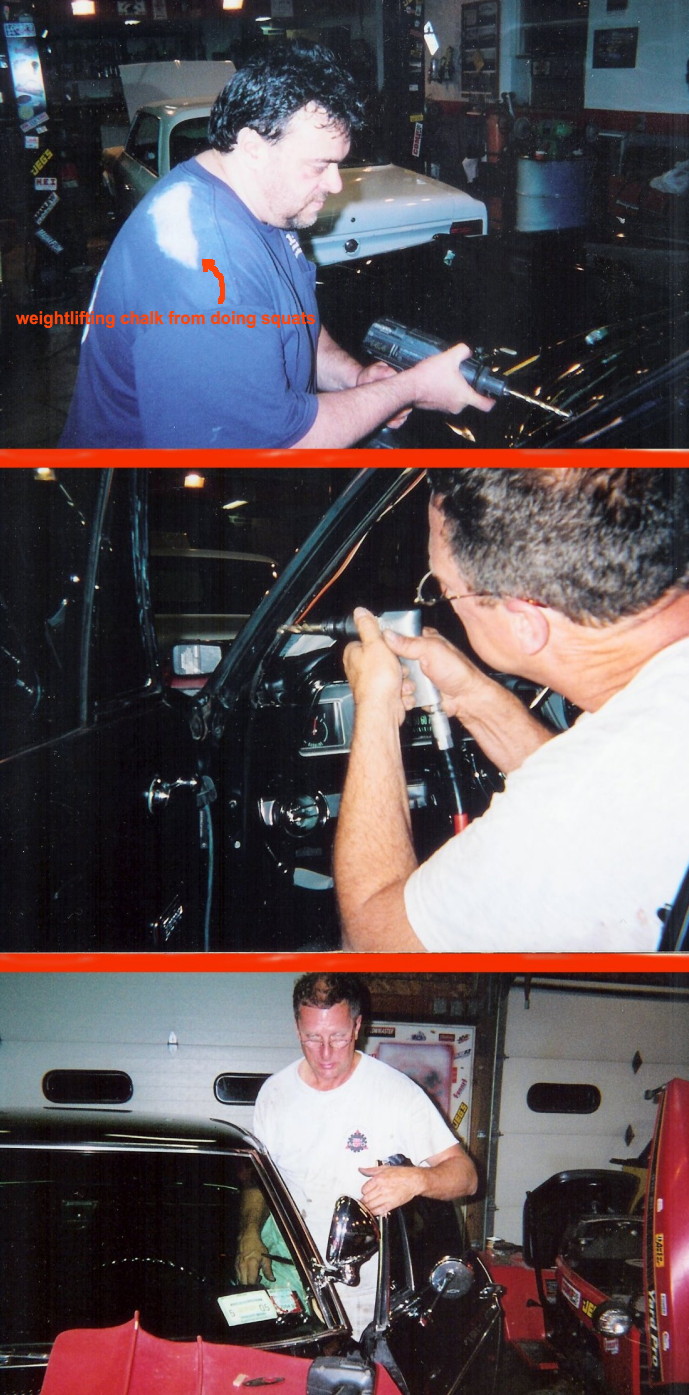
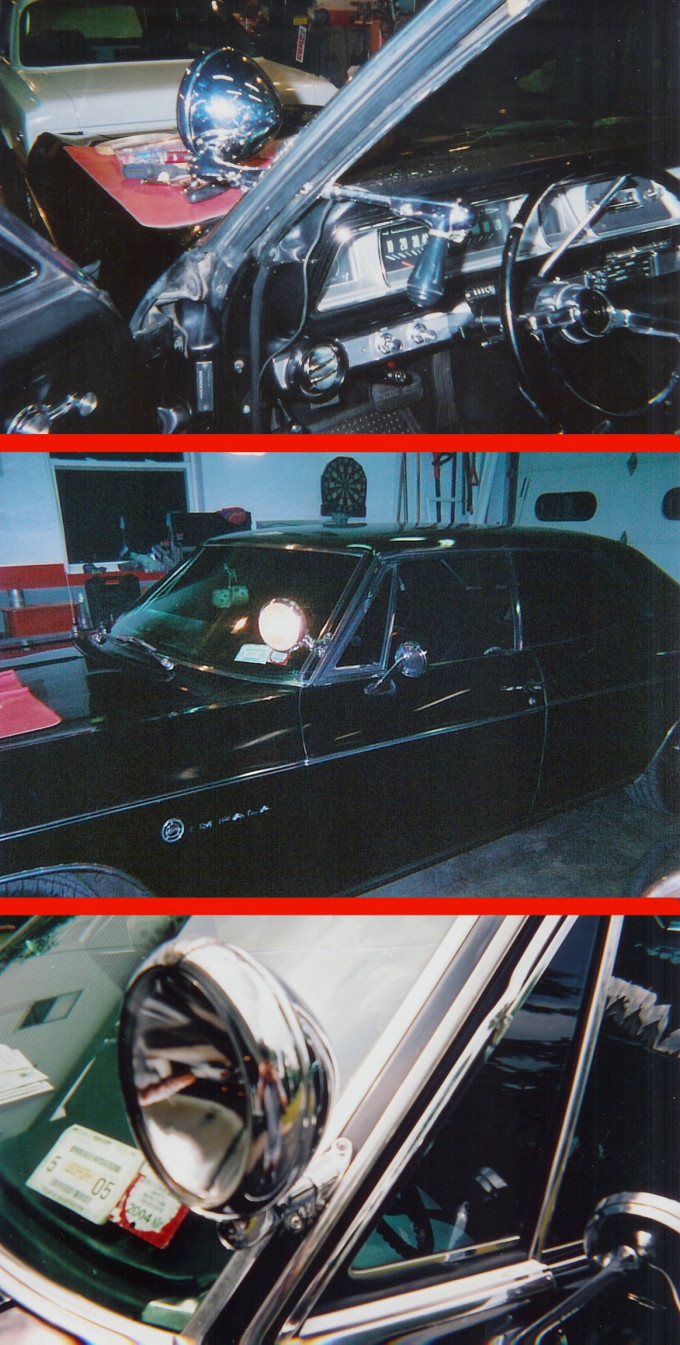
Spotlight Part 1. I decided to add a police-issue Unity Spotlight to the front driver's pillar. This is the real thing. The white spot on my shoulder is chalk (just returned from the gym where I was doing some heavy squats). It was a bear drilling through the front post. We found a large pinch-weld structure in there that was no doubt added for stability. Hated to drill through it, but once we started there was no turning back. (Thanks to my friend Tom who supplied the garage, power tools, and needed expertise) |
Spotlight Part 2. The thing really works! A while ago I was driving home at night when a young college girl ahead of me decided to pass a guy in front of her on the shoulder of the road, cutting him off. She got stuck at the light ahead in the left turn lane. I was one lane over and as I got close to her I hit her with the spotlight, illuminating the interior of her car. She panicked and started looking around. She never did see me, but she was so stricken that she missed her left turn arrow! |
I couldn't resist and added a vintage mechanical siren which is neatly installed under the hood. The siren operates from a duplicate high beam switch on the floor board. |
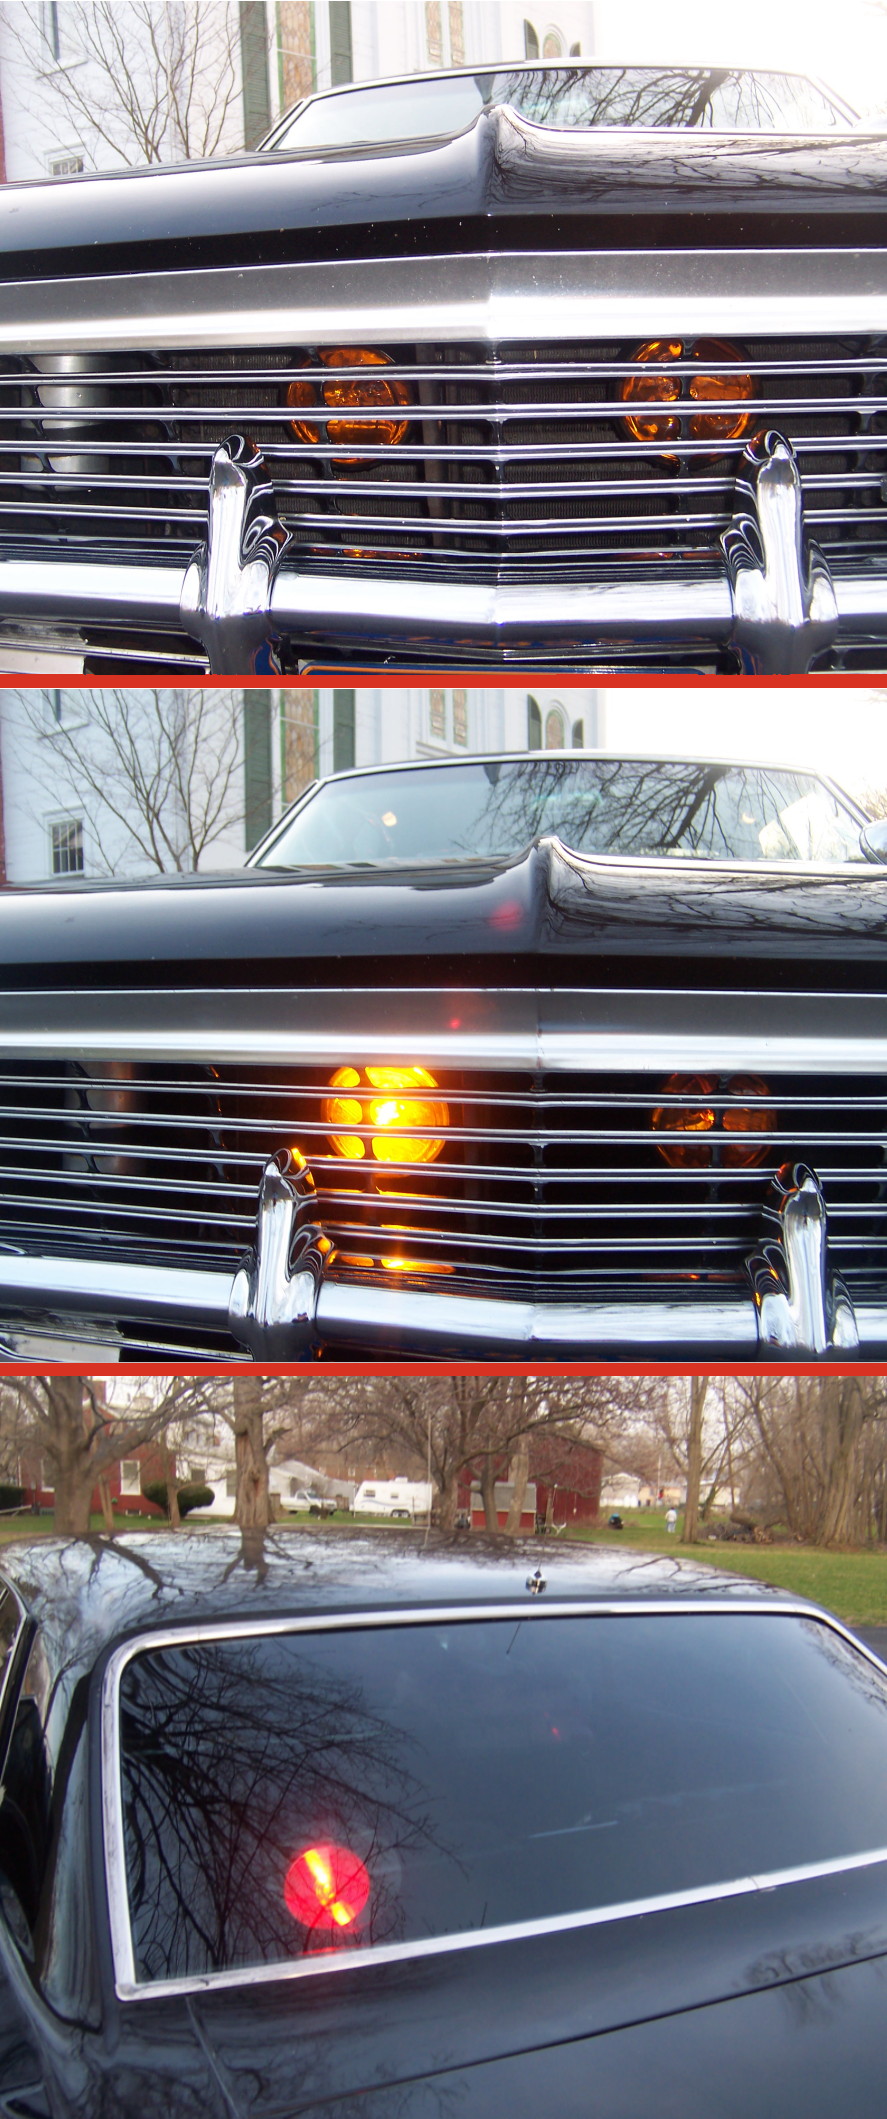
Here I've added amber wig-wag lights with a matching flasher unit. The unit wig-wags the red rear deck lights as well. |
|
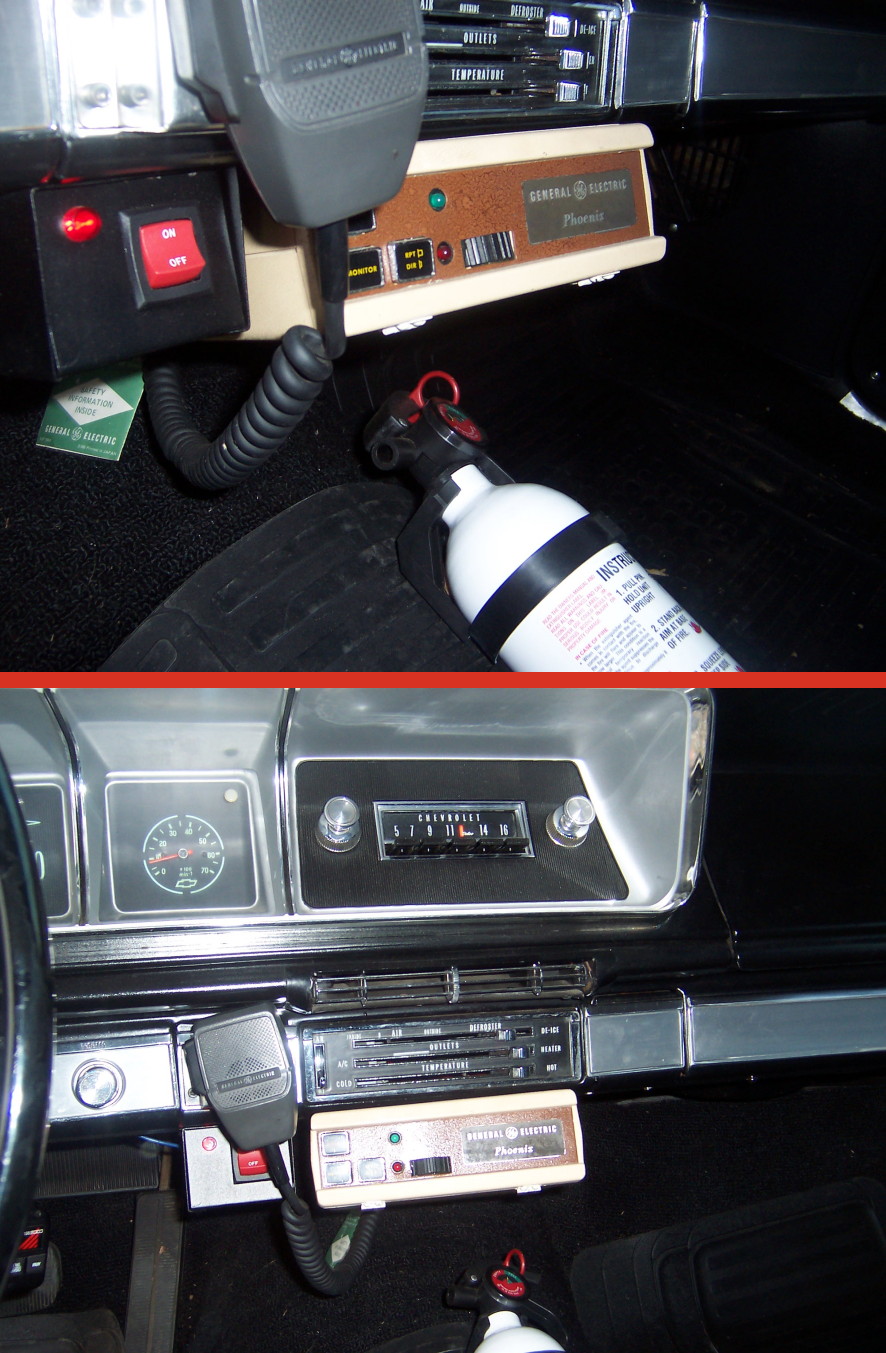
You can see the wig-wag flasher control unit as well as the dummy police radio I installed. |
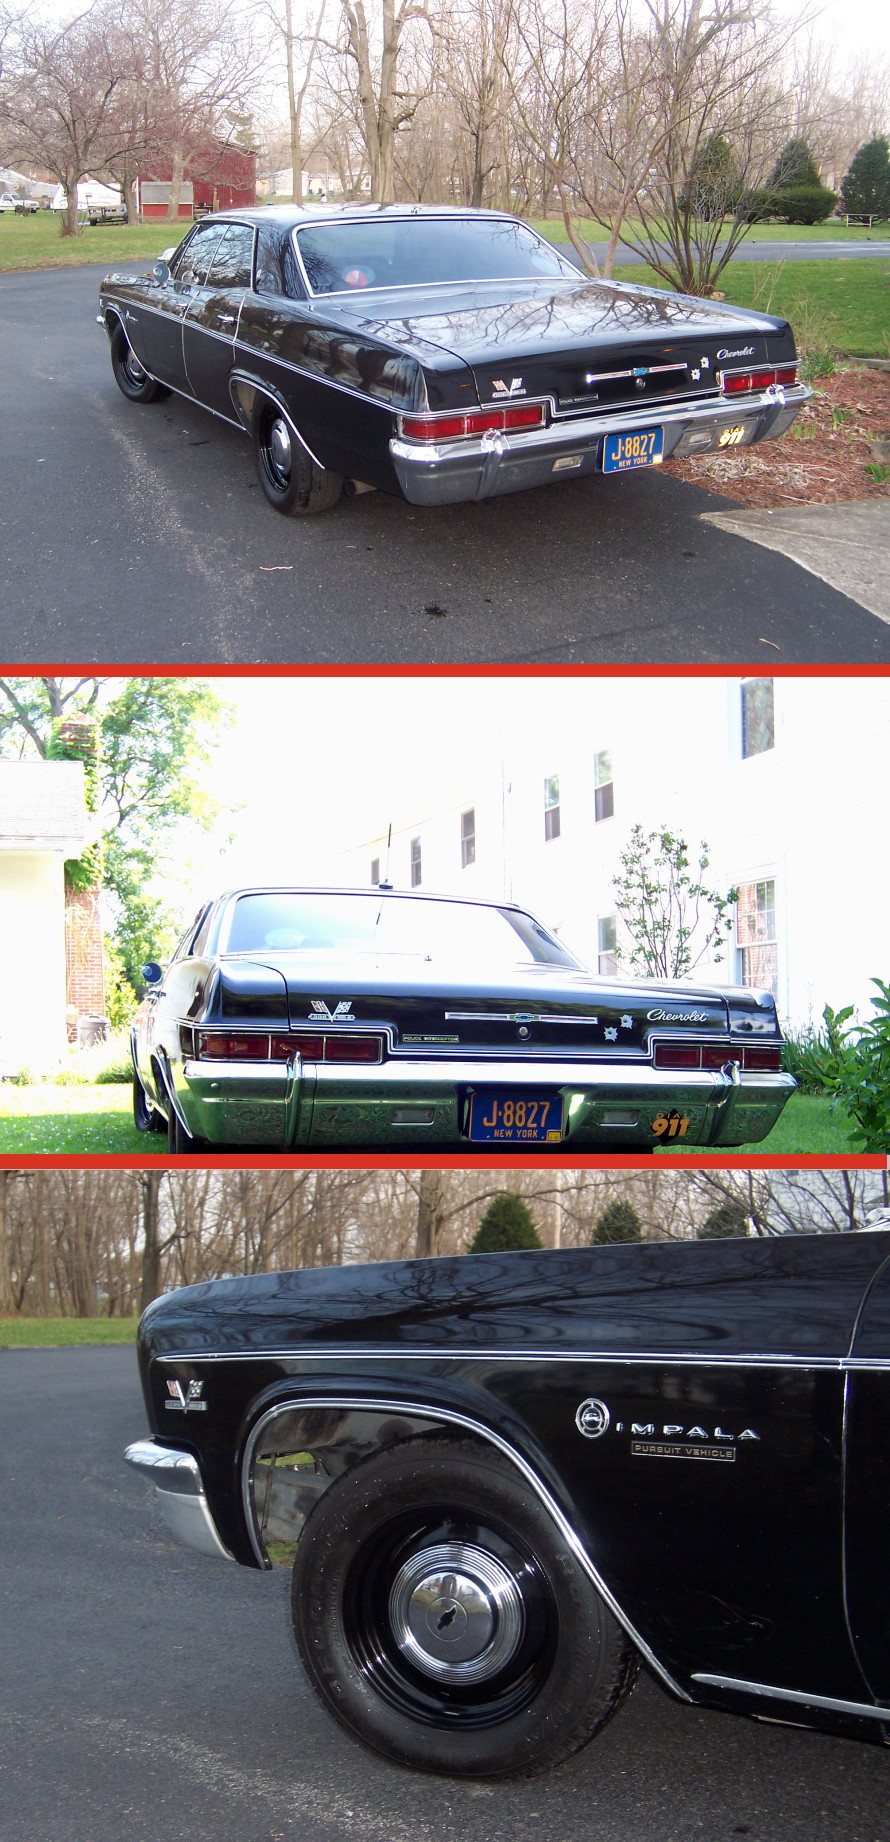
Note the "Police Interceptor" and "Pursuit Vehicle" badging as well as the dummy antennas and faux bullet holes. Just for the car shows I added a magnet-mount red bubble gum machine. I bring a seperate battery jumper pack so that I can leave it running. |
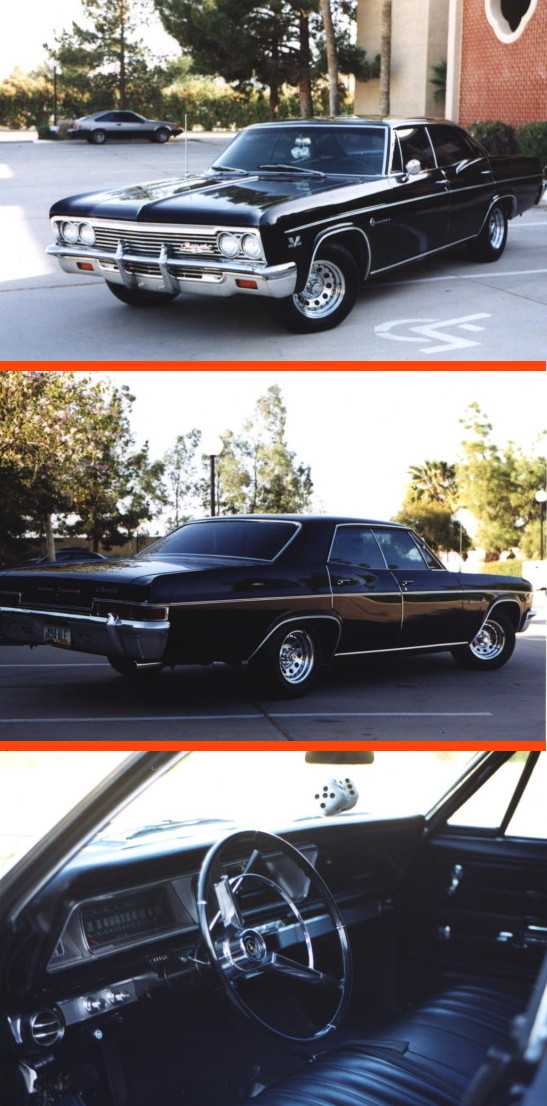
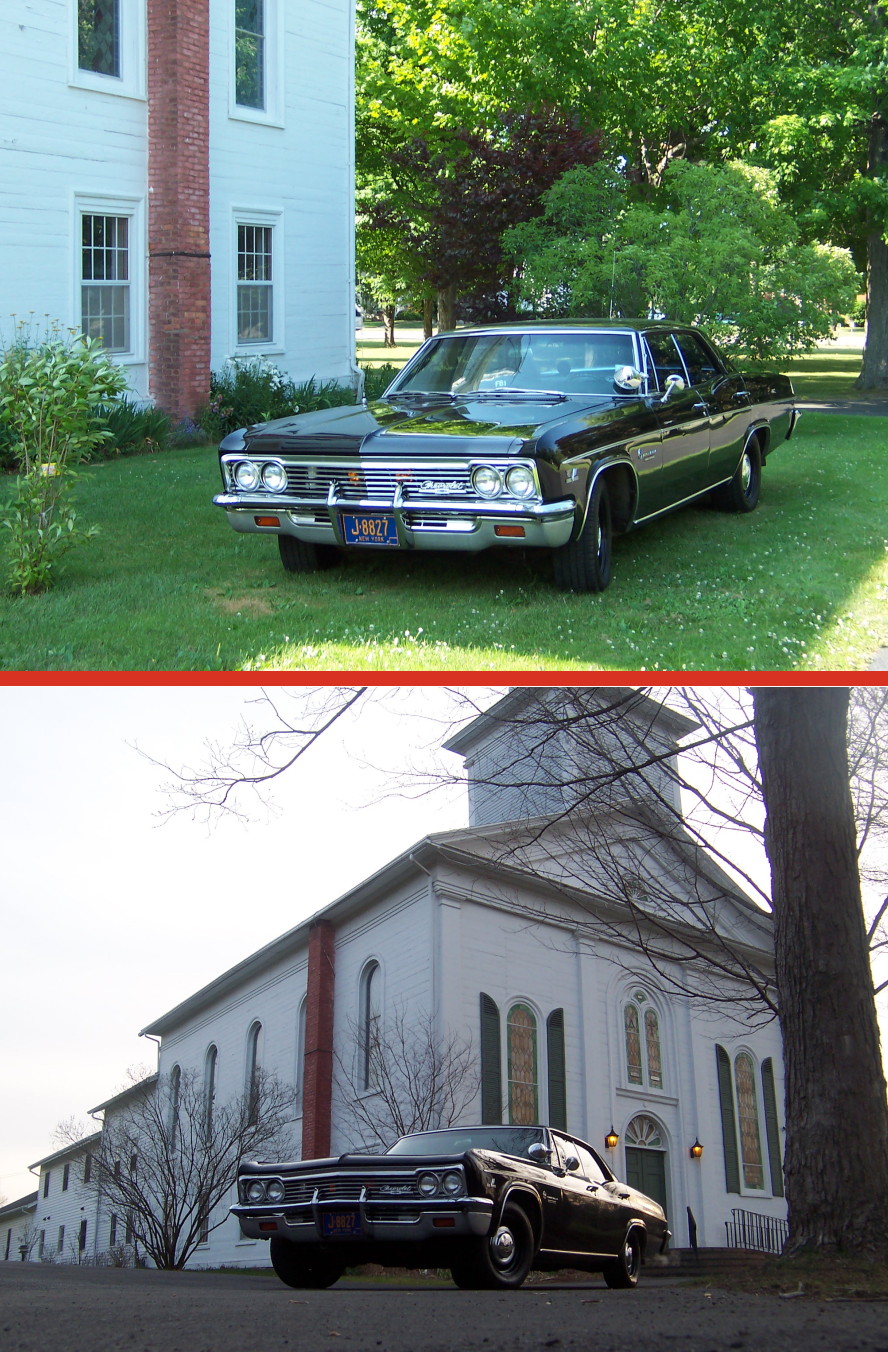
Here is the car as it looks now. She's been living in upstate New York since 2002 and we've parked her in front of the historical Clarkson Community Church (circa 1825) near Rochester. |
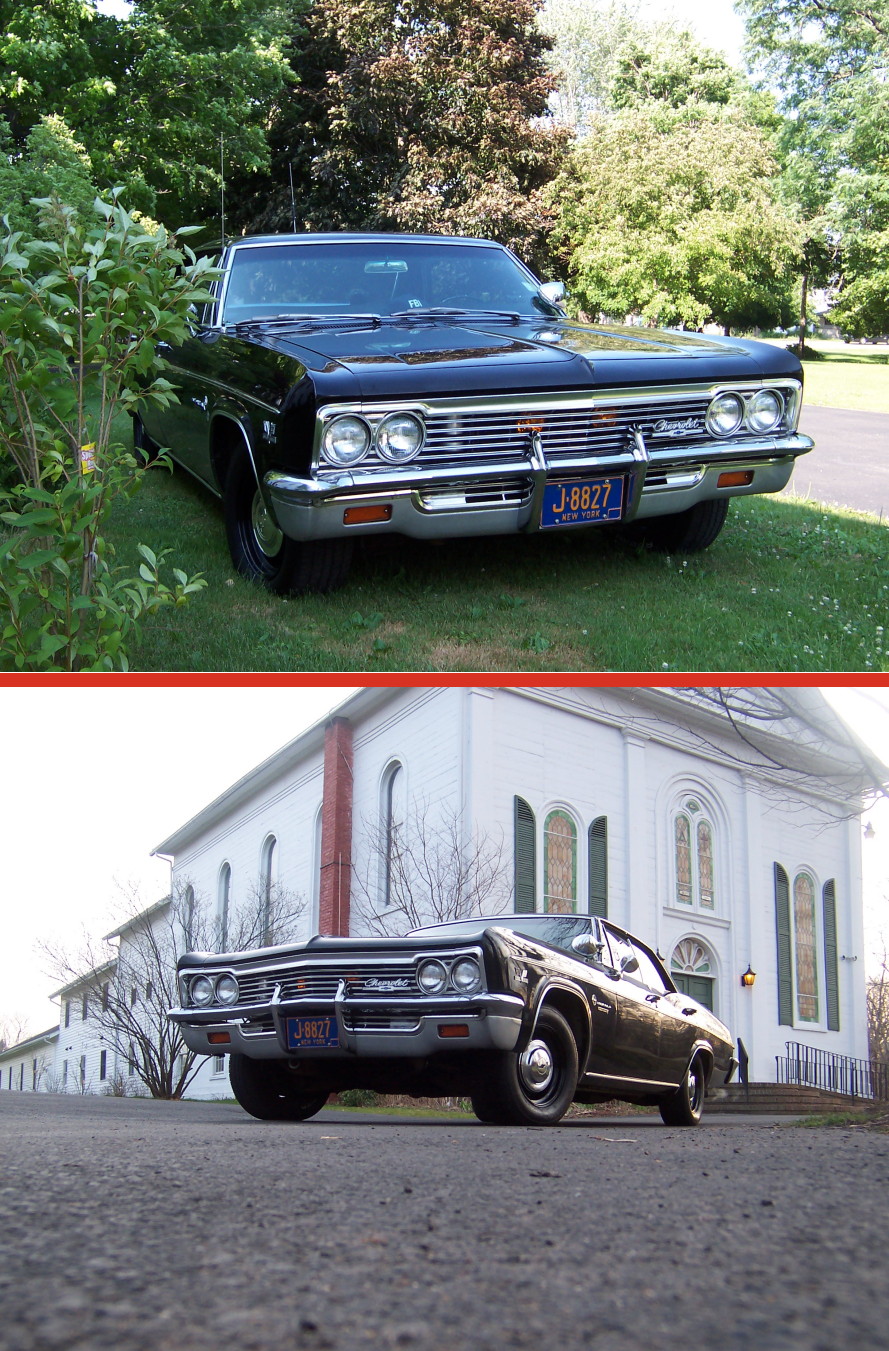
More pictures of the current incarnation of this 1966 Impala sport sedan. |
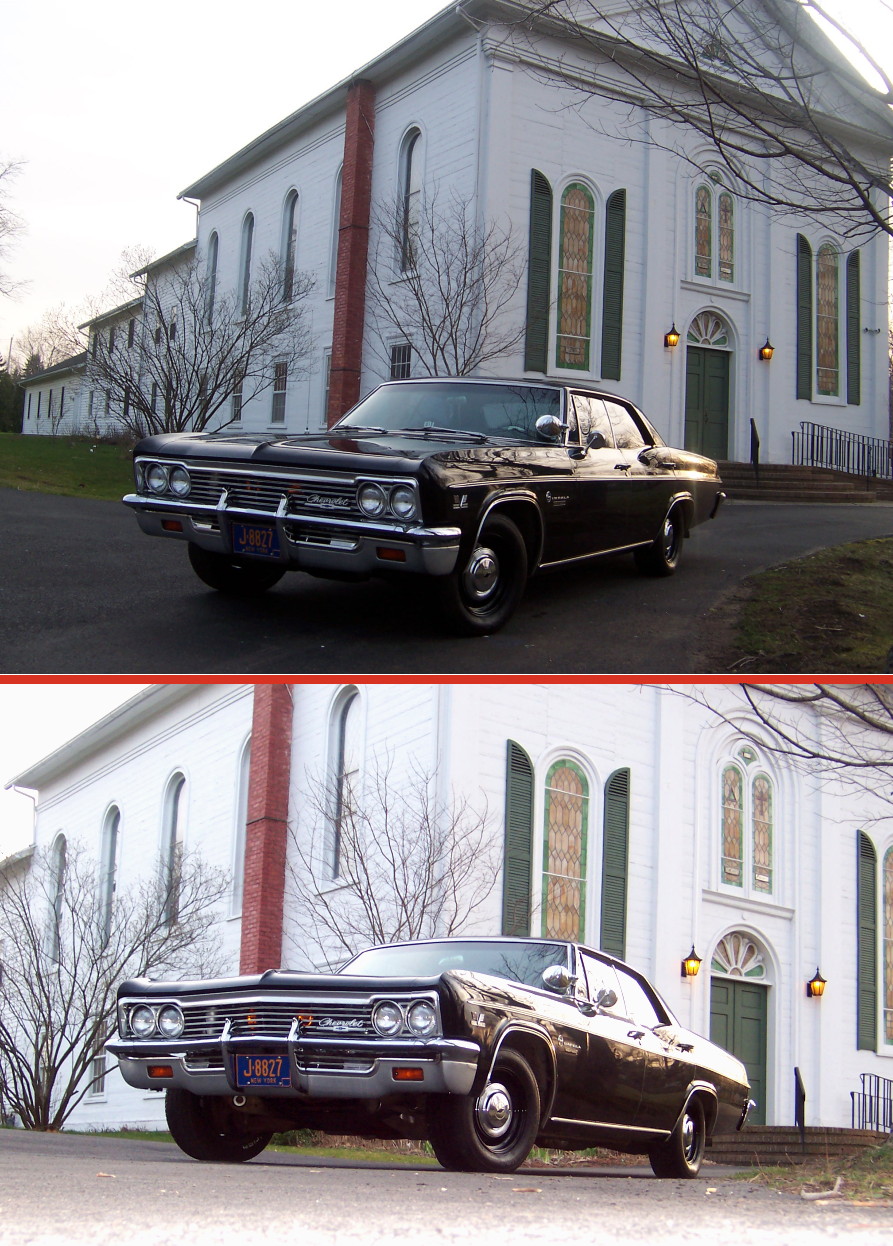
Two more pictures of the current incarnation of this 1966 Impala sport sedan. |
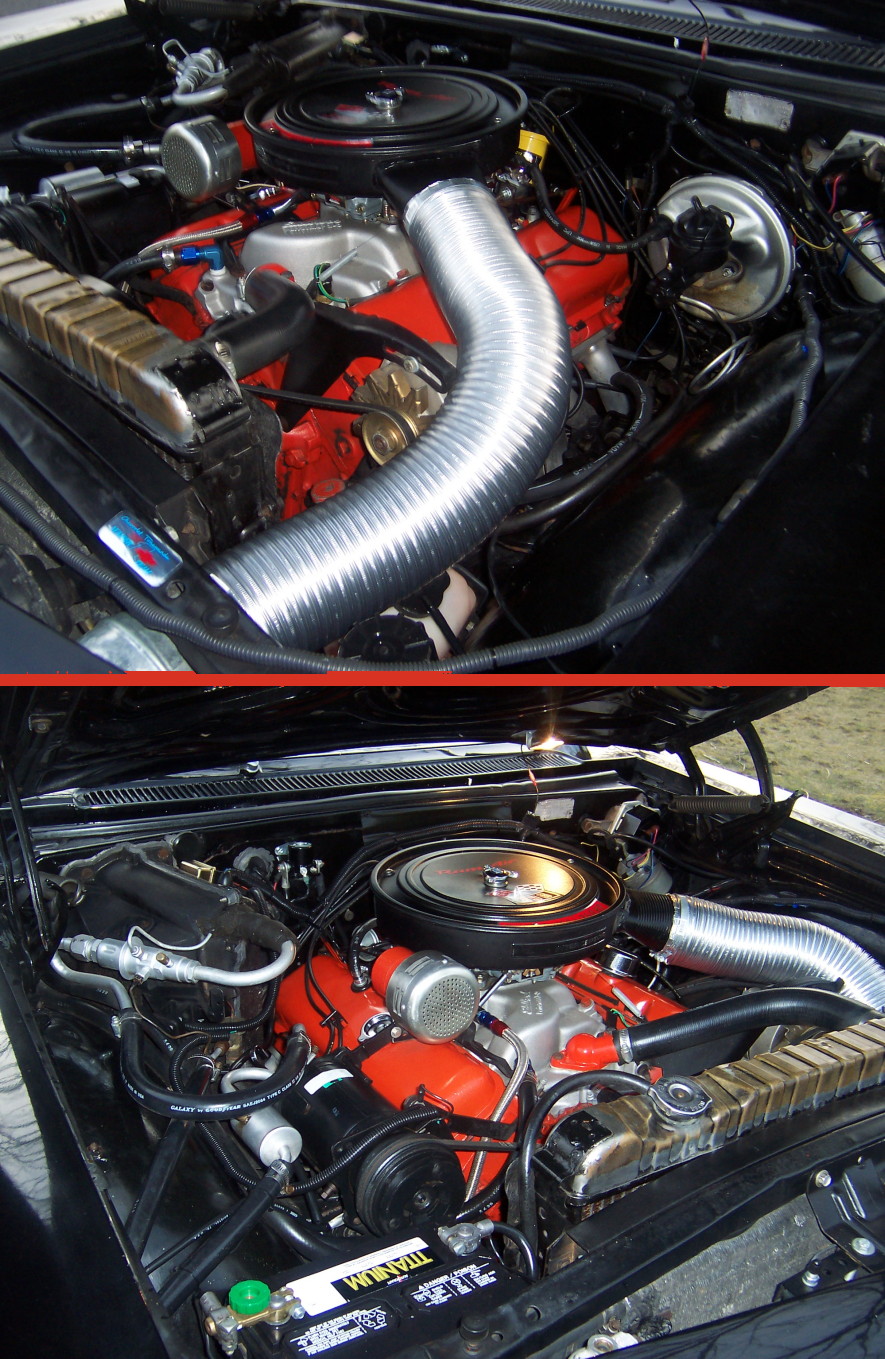
Two pictures of the 396 in present condition. |
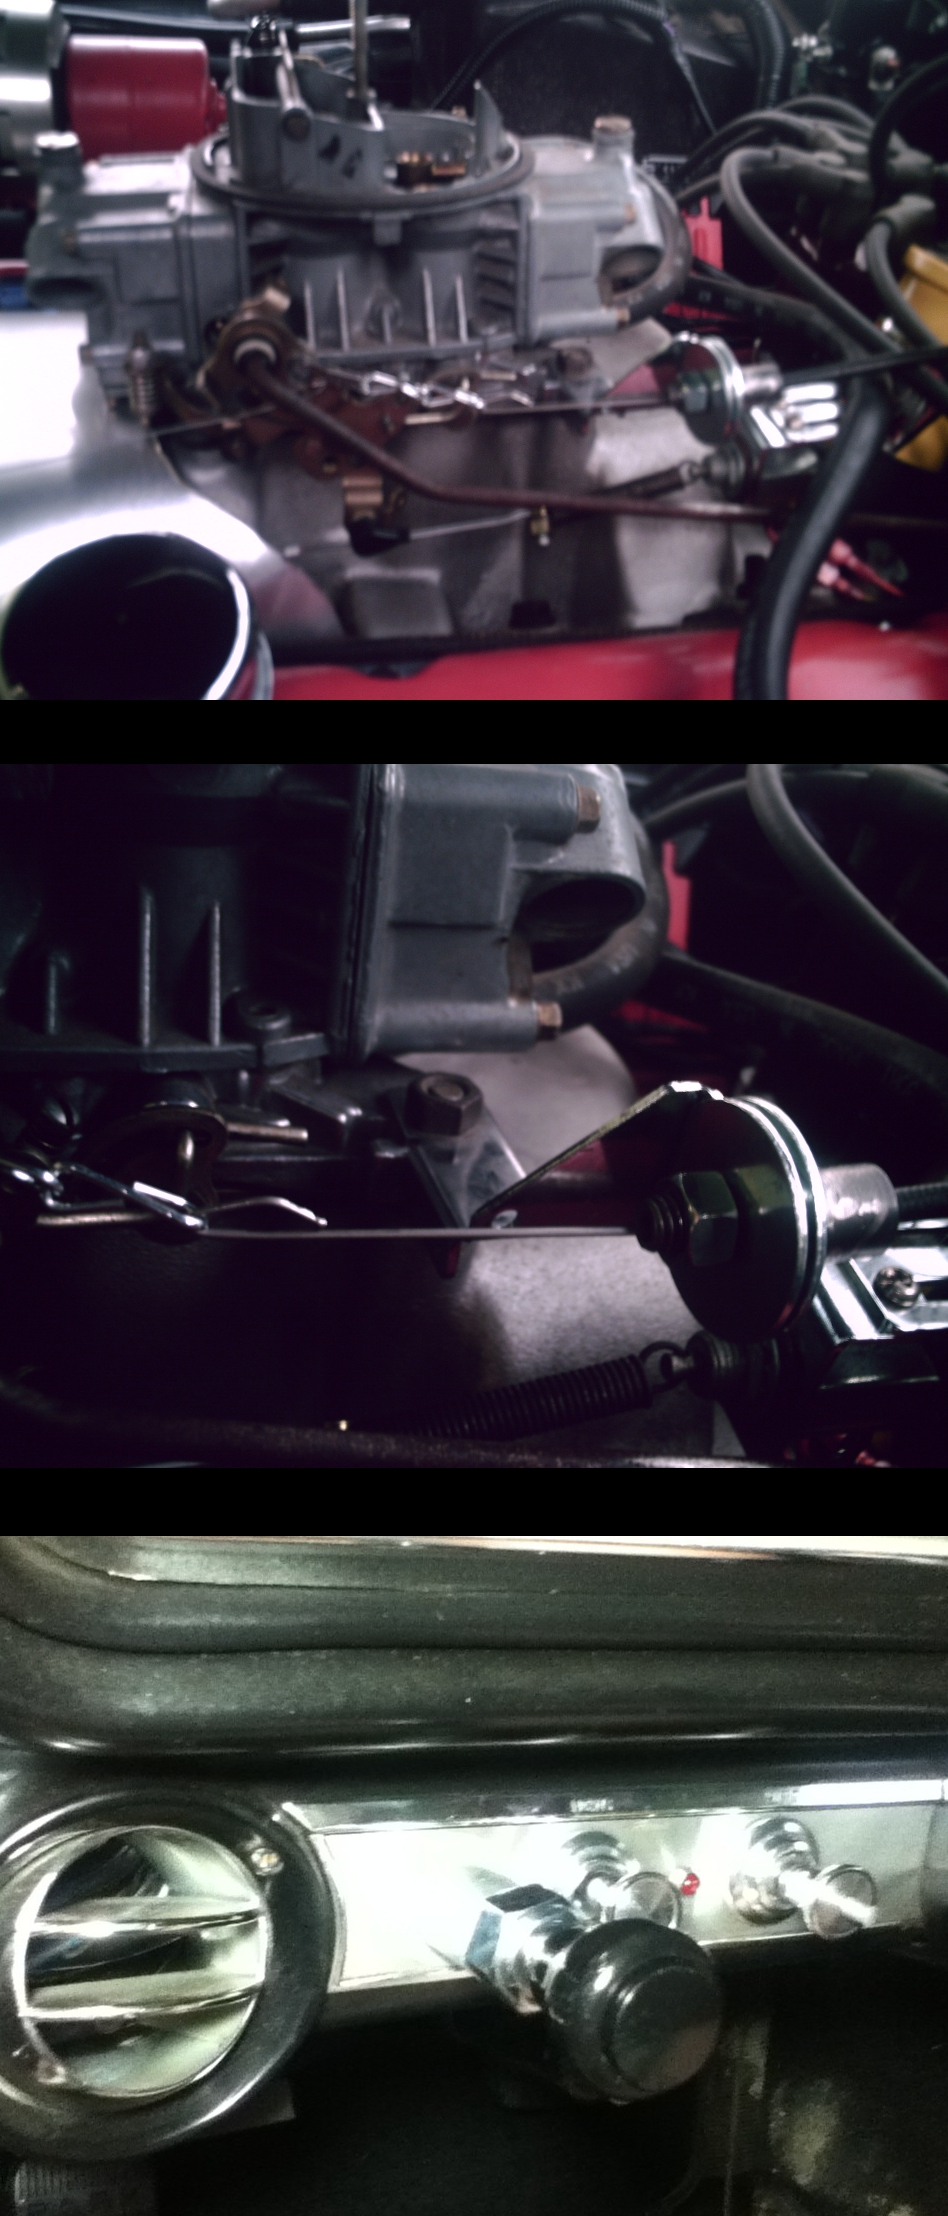
Mechanical "cruise-control" by way of a vernier cable. Works fine so long as it's not too hilly. |
Stereo system, Part 1. Finally
installed a mild stereo system: |
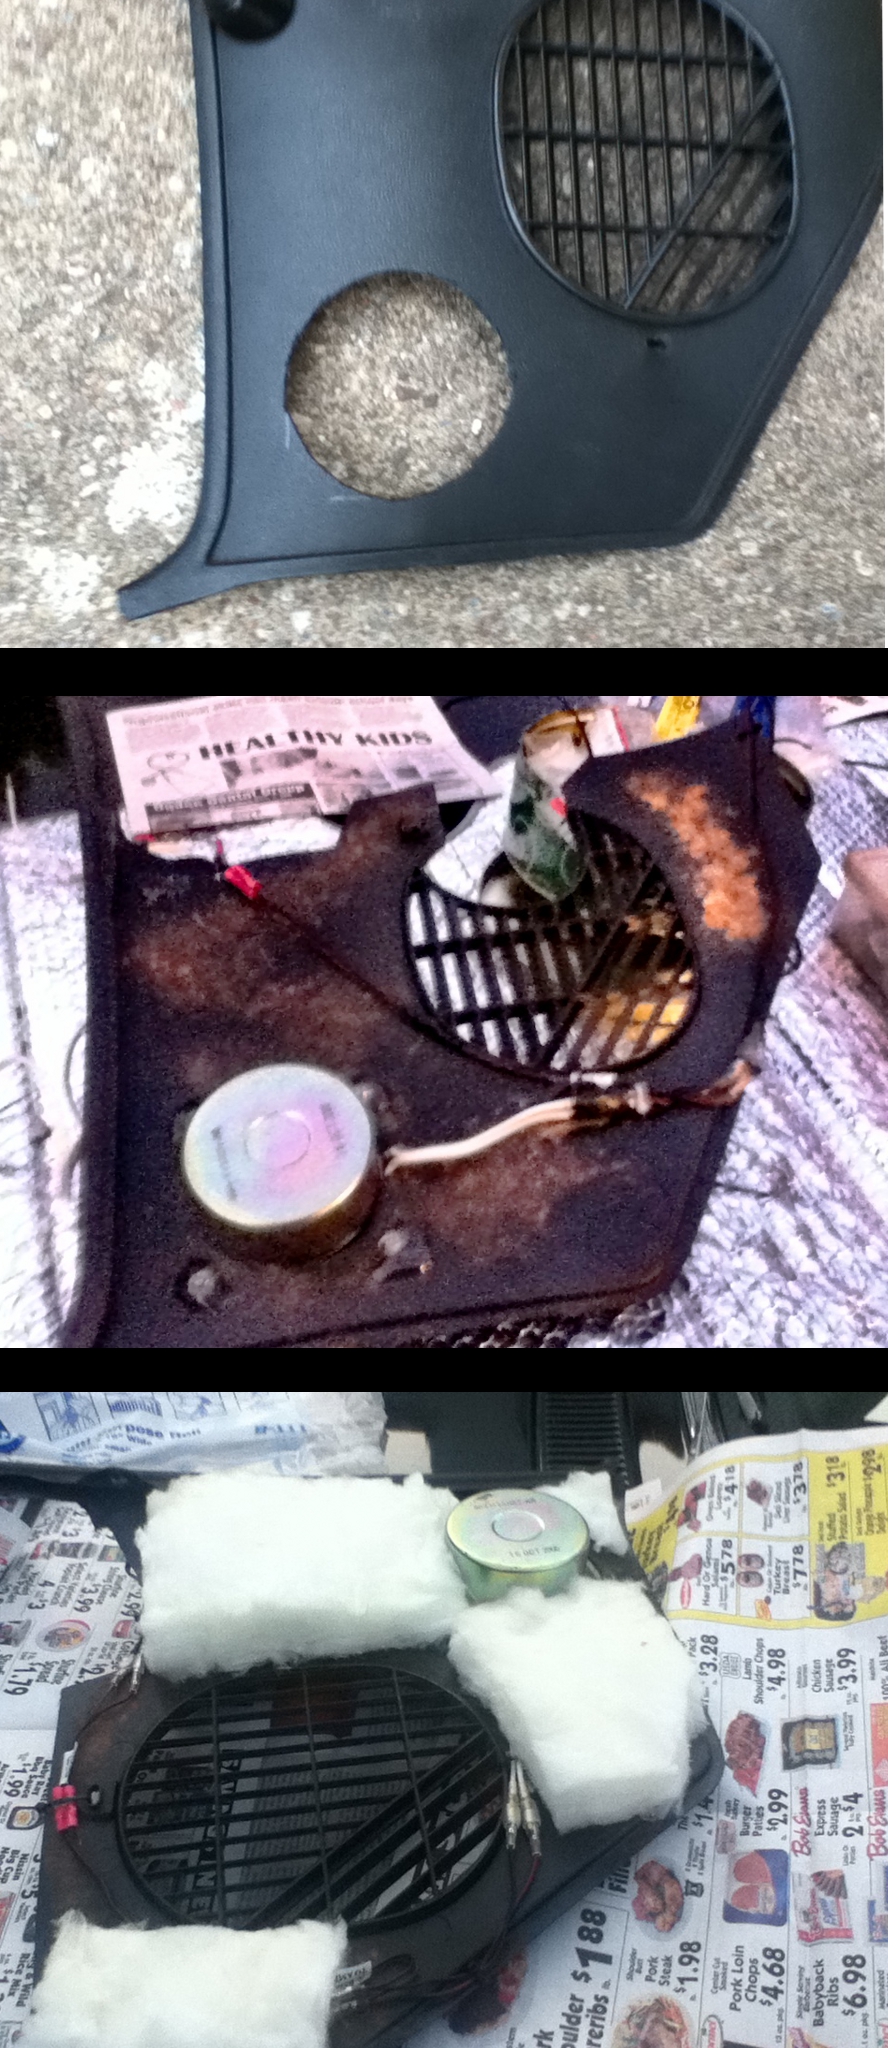
Stereo system, Part 2. Got the
4.5" woofers for 15 bucks. No speaker grills and the
speaker depth meant that I would have to come up with
some way to extend the surface mount out of the kick
panel as they would not fit flush. Came up with the idea
to use some 4" PVC couplings from Lowes. |
Stereo system, Part 3. Had to
cut holes in the kick panels for the 4.5" woofers. Bottom
picture: backside of the kick panel after wiring and
insulation. |
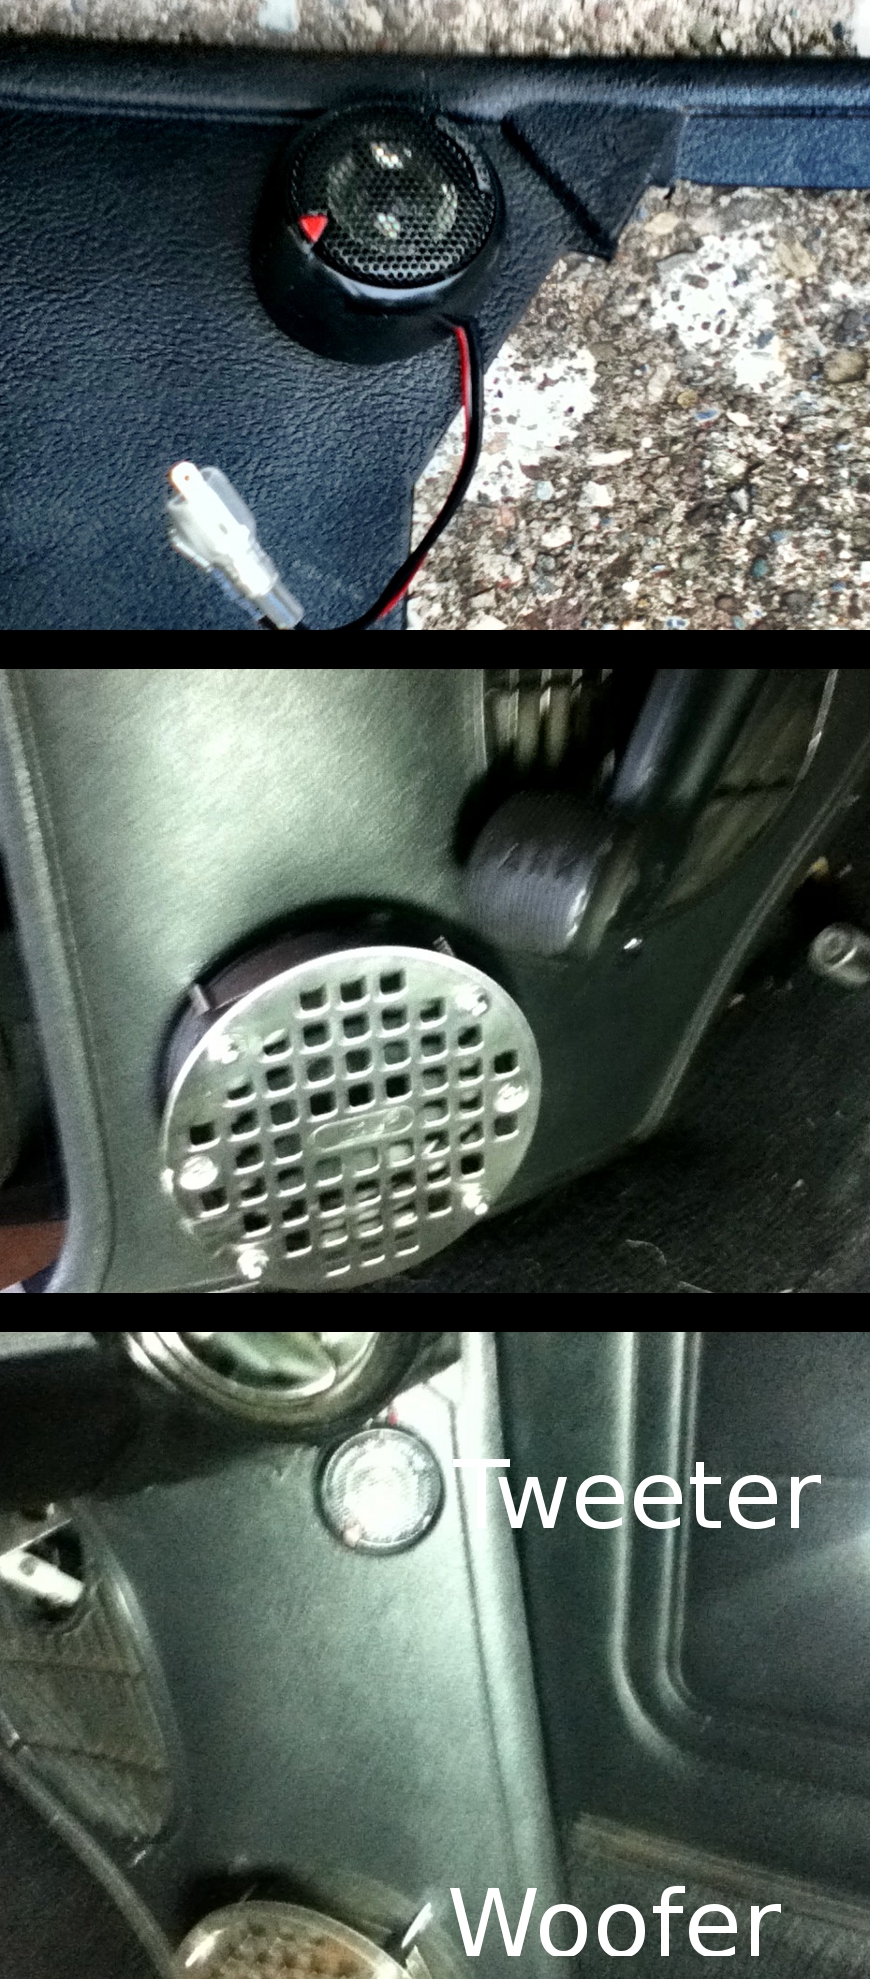
Stereo system, Part 4. Here's
the finished kick panel installation. Bottom picture: shows the tweeters in relation to the woofers. |
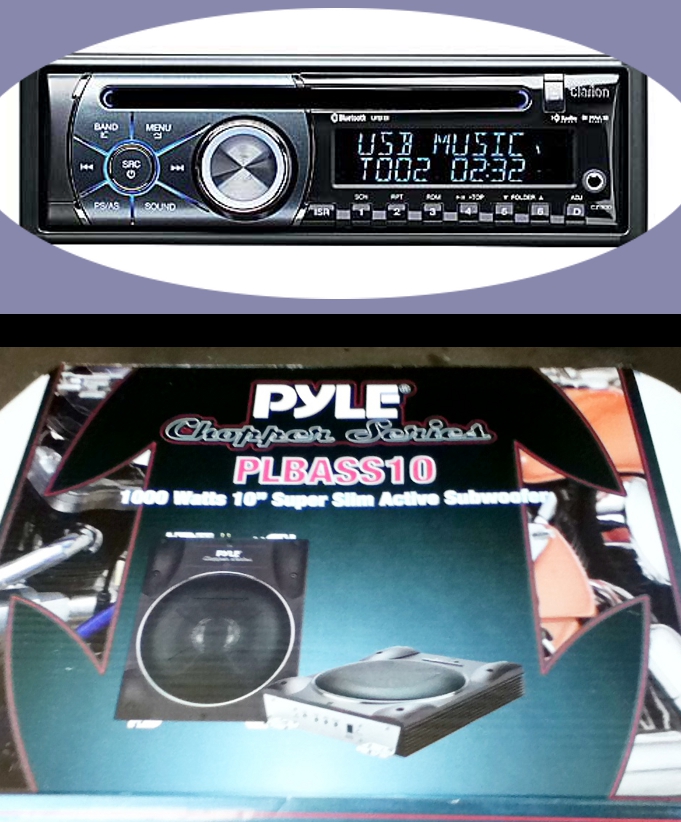
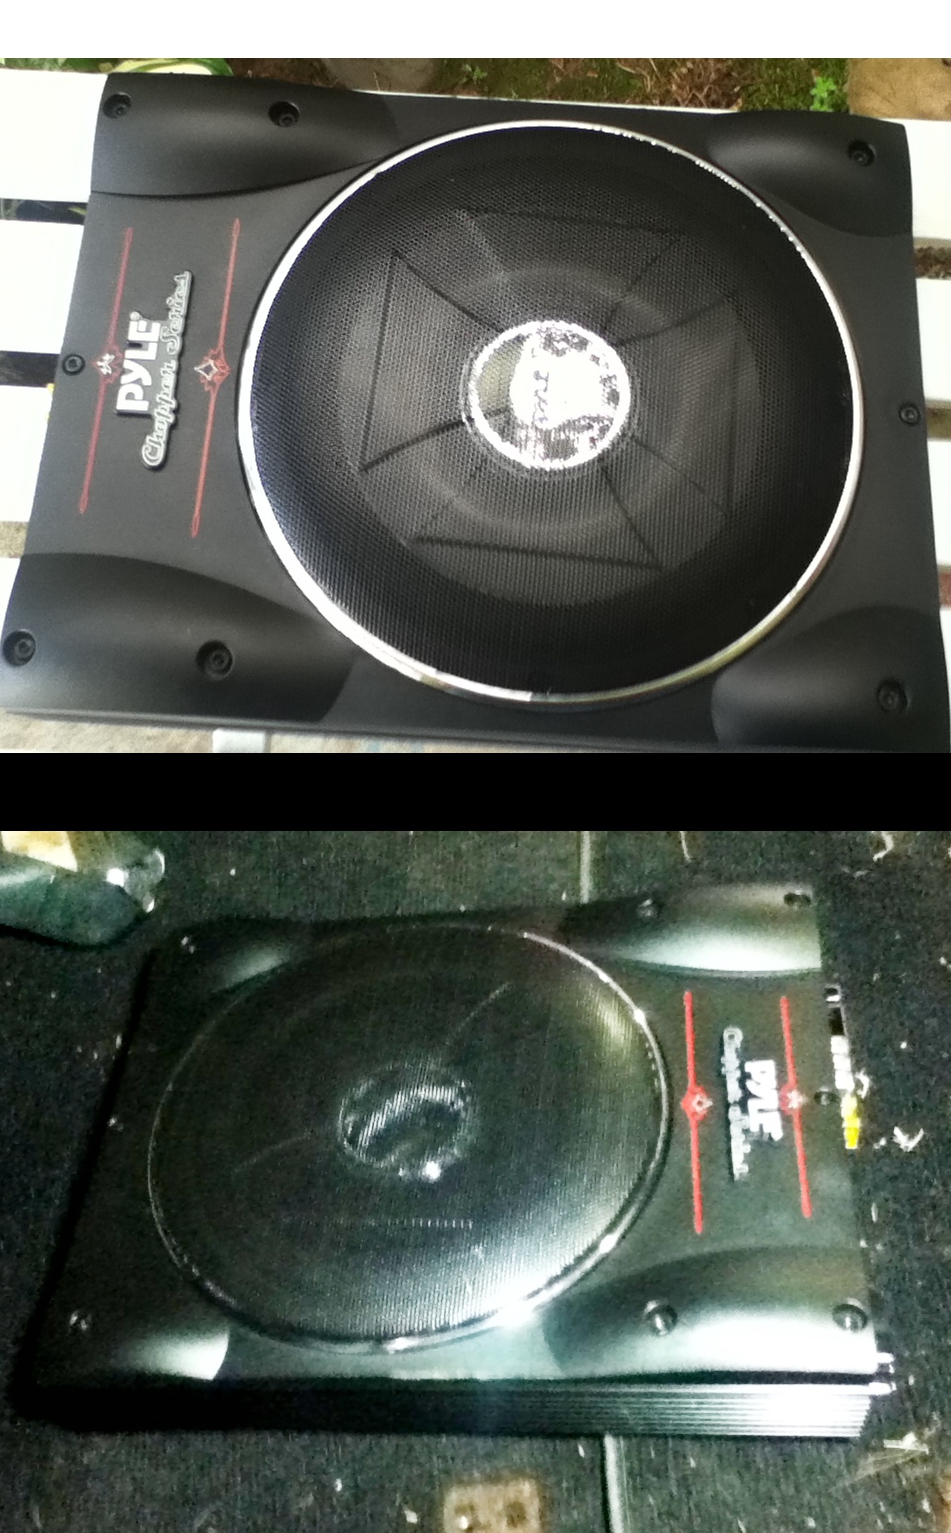
Stereo system, Part 5. The
amplified subwoofer just out of the box |
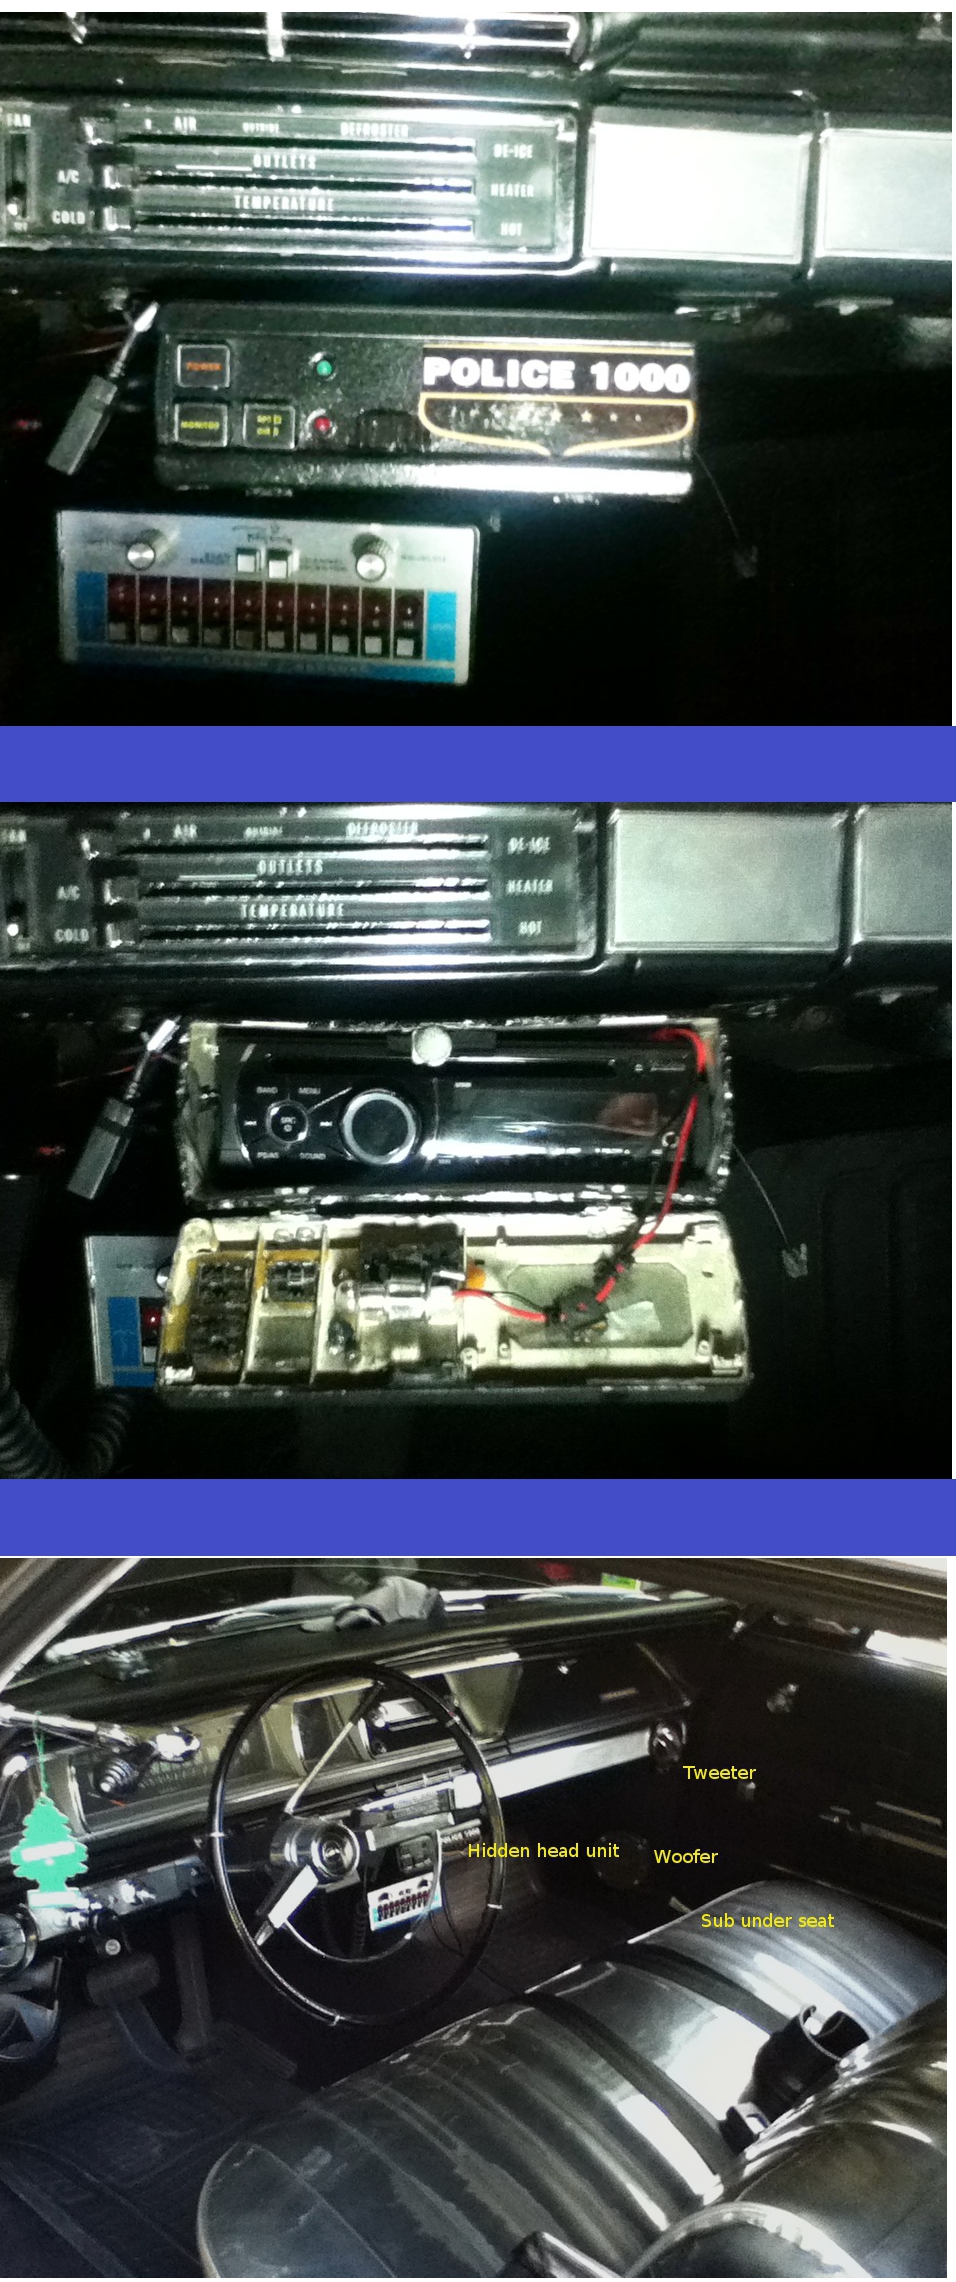
Stereo system, Part 6. The finished system. The head
unit is hidden inside a dummy police radio. |
coming soon! More pictures of the current incarnation of this 1966 Impala sport sedan. |
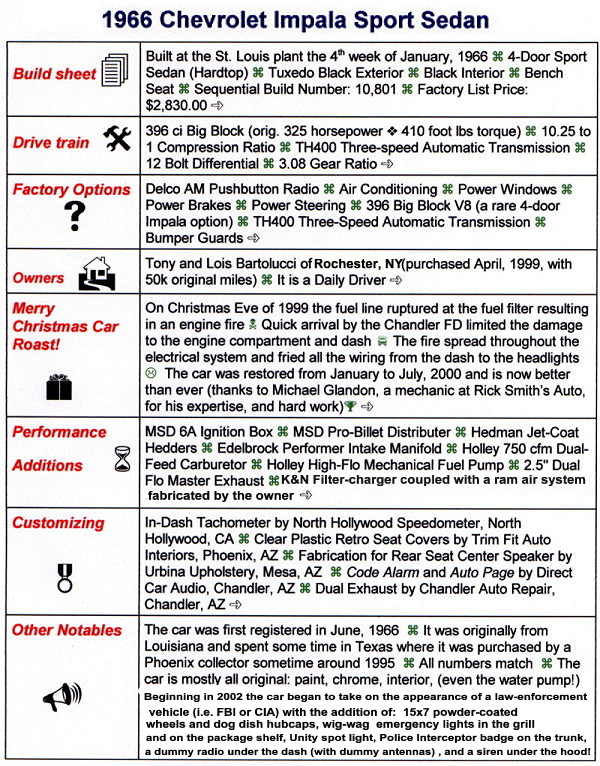 Here's a list of some interesting information about the car. |
 |
 I think it's a Ford! |
|
 |
||
Visitors since February, 2007


