..........The Beast ............
1968
Chevrolet K-20 Pickup
4x4 | 4 speed
| 292 inline six cylinder
*Pictures below*
(I sold this truck 2 years after I acquired it)
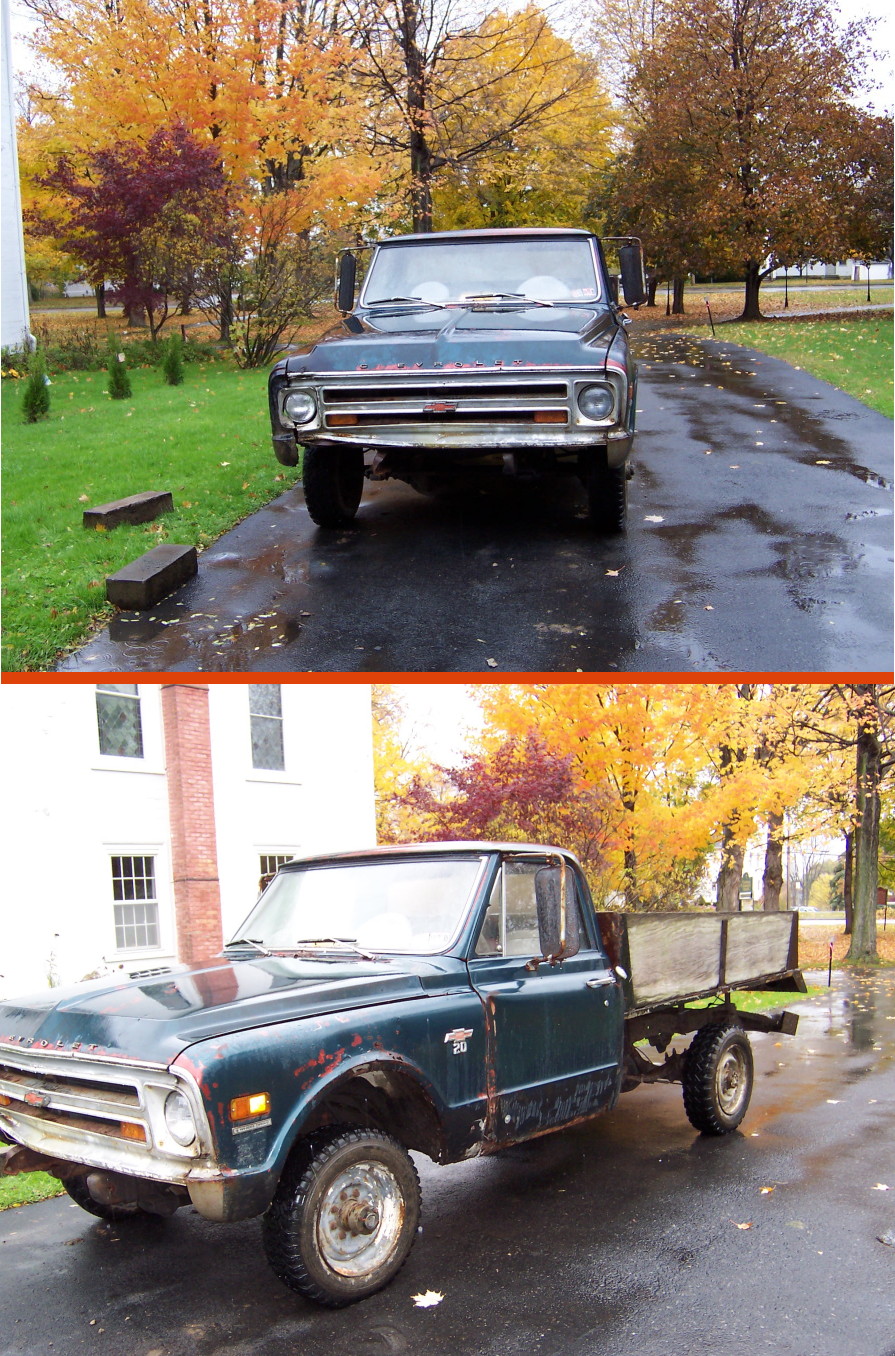
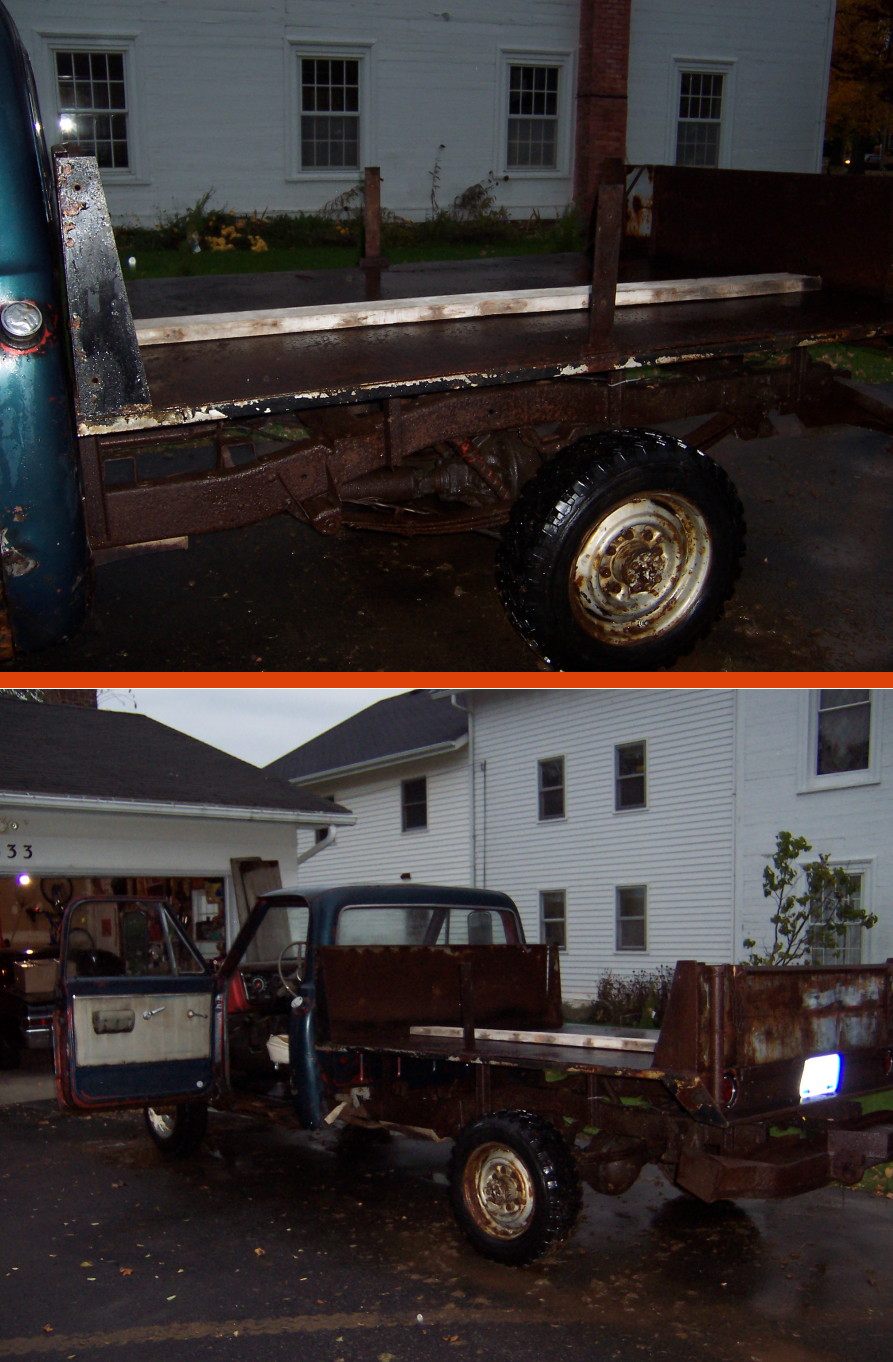
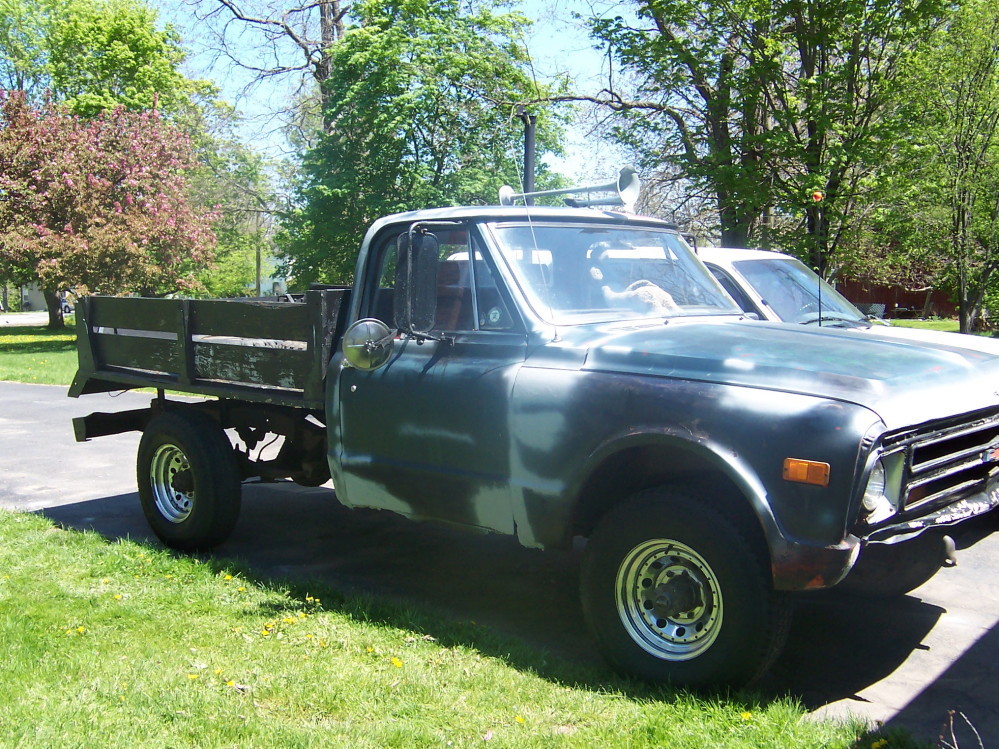
In the fall of 2006 I came upon this truck parked back in the woods adjacent to property owned by one of my wife's relatives in PA. I thought to myself, "This would be a great rat truck." The owner said that it was mine for the taking. It hadn't been on the road since 1990. From 1990 to 2004 it was used as a snow plow on the farm. It had been decommissioned and parked for the past two years.
About two weeks later, me and a friend drove from NY to PA with a trailer to haul it home. The owner's father-in-law drove his big tractor back into the woods with us in tow. We hitched the old Chevy up with a chain and pulled it the 200 yards or so to the road. I rode on the back bumper of the truck and watched as a mouse popped up from the debris in the bed and ran around the bed rails in a panic wondering what was happening to his home.
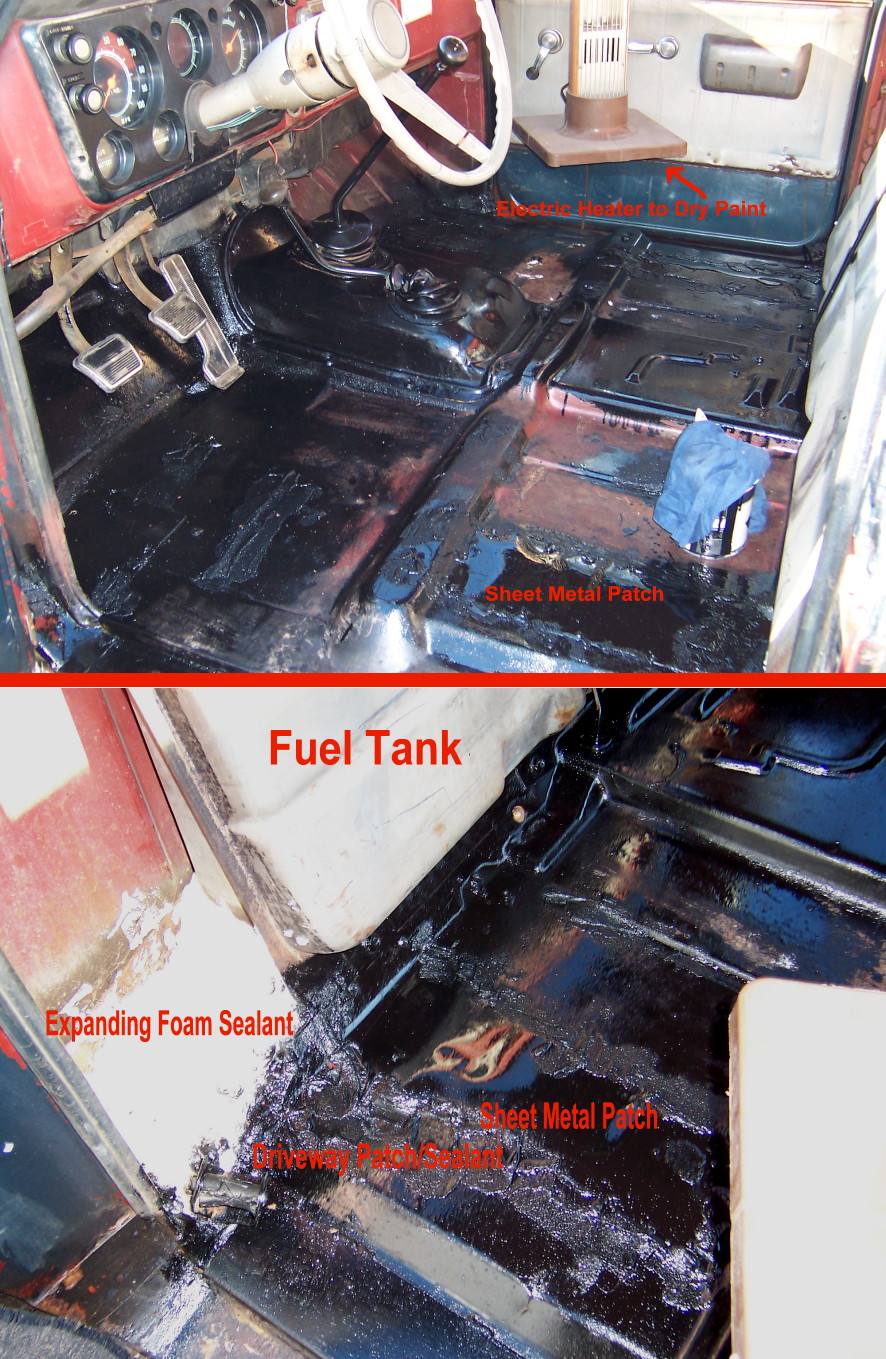
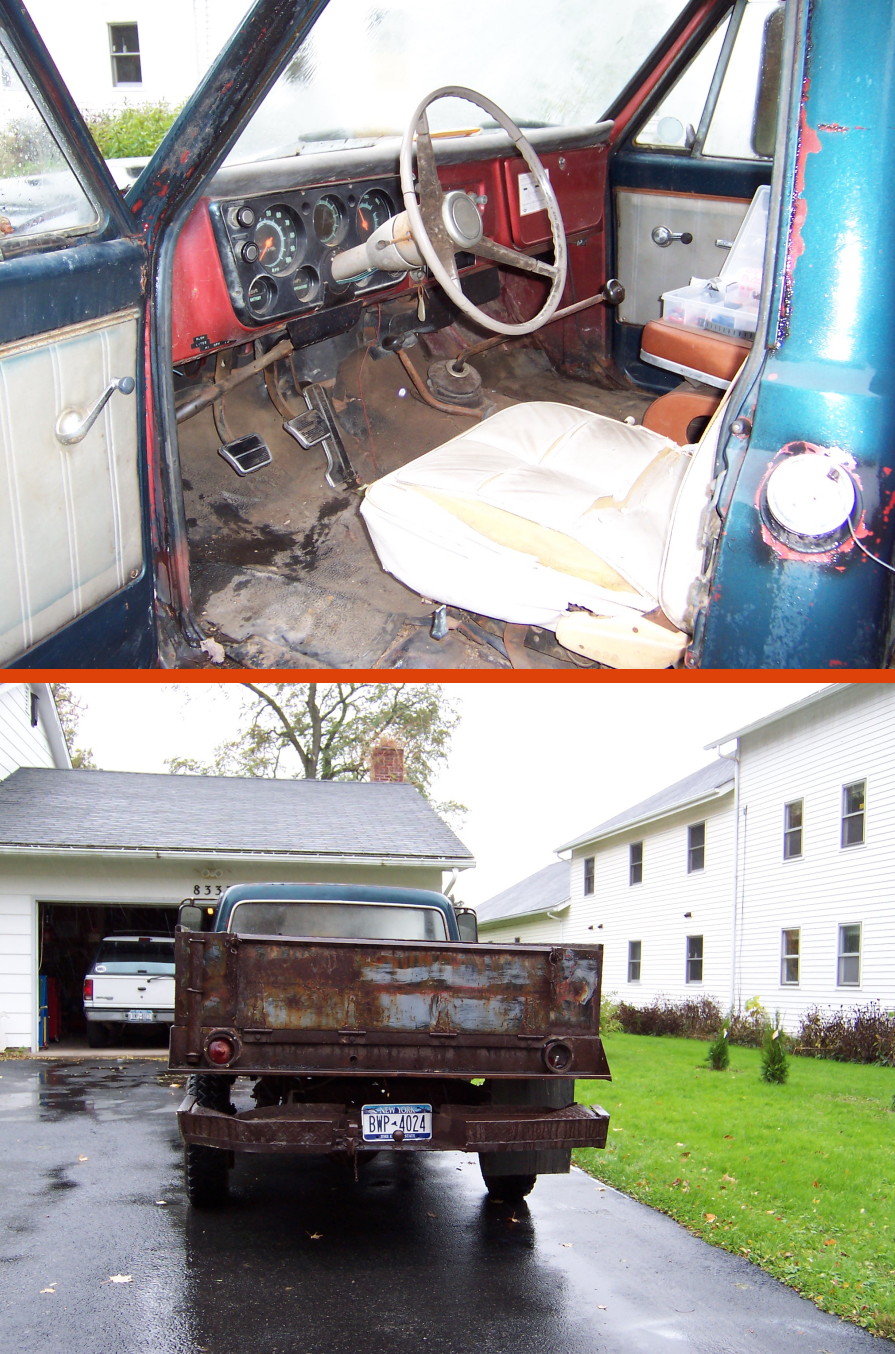
It cost me seventy-five bucks in gas and tolls to get the beast home. I was struck with "buyer's remorse" once we parked it in front of my house and I had time to really look it over. Man, it looked better in the woods that first day I saw her! The truck had been outfitted with a flat-bed. The sides were old, warped plywood. The standard bench seat had been replaced by two bucket seats, both in poor condition and one that had been taken out of a boat. The owner, Mike, told me that he had bought the truck in the 1970s from a company that used it as a utility vehicle. They had replaced the bench seat with a single bucket so that a large tool box could sit on the passenger side. Apparently they also had removed the standard bed and replaced it with a flat-bed. The bed was filled with leaves, sticks and garbage. Mice had obviously made this truck their home; nut shells, seeds and tiny sticks were scattered throughout the cab and engine compartment. The driver's door was bent and wouldn't open all the way (Mike said his brother backed up with the door open and caught a tree). There were small rust holes through both fenders and places where rust had eaten right through the back corners of the cab on either side of the fuel tank which is tucked behind the seat. Holes 10"x10" had once been patched with sheet metal that was itself loose and thin with corrosion. The front end was sans bumper and the sheet metal was in poor condition. I went inside the house and had a sinking feeling in the pit of my stomach that I had made a big mistake. At least the tires (old recaps) had almost no wear on them, albeit they were beginning to crack from dry-rot.
Things started looking up once we got it started a few days later and drove it around the adjacent parking lot.
|
||
 Here are two pictures of what The Beast looked like once I got her home. Nothing worked, initially. No head or tail lights, horn, or turn signals. With a little work (and a battery) we had lights and an engine that ran . . . sorta. The discoloration in the front glass is actually the laminate inside the glass going bad. |
 Even after a vacuuming the interior was a mess. The second pic shows the old rusted out rear can-type tail lamps. Meanwhile, I got the turnsignals to finally work. |
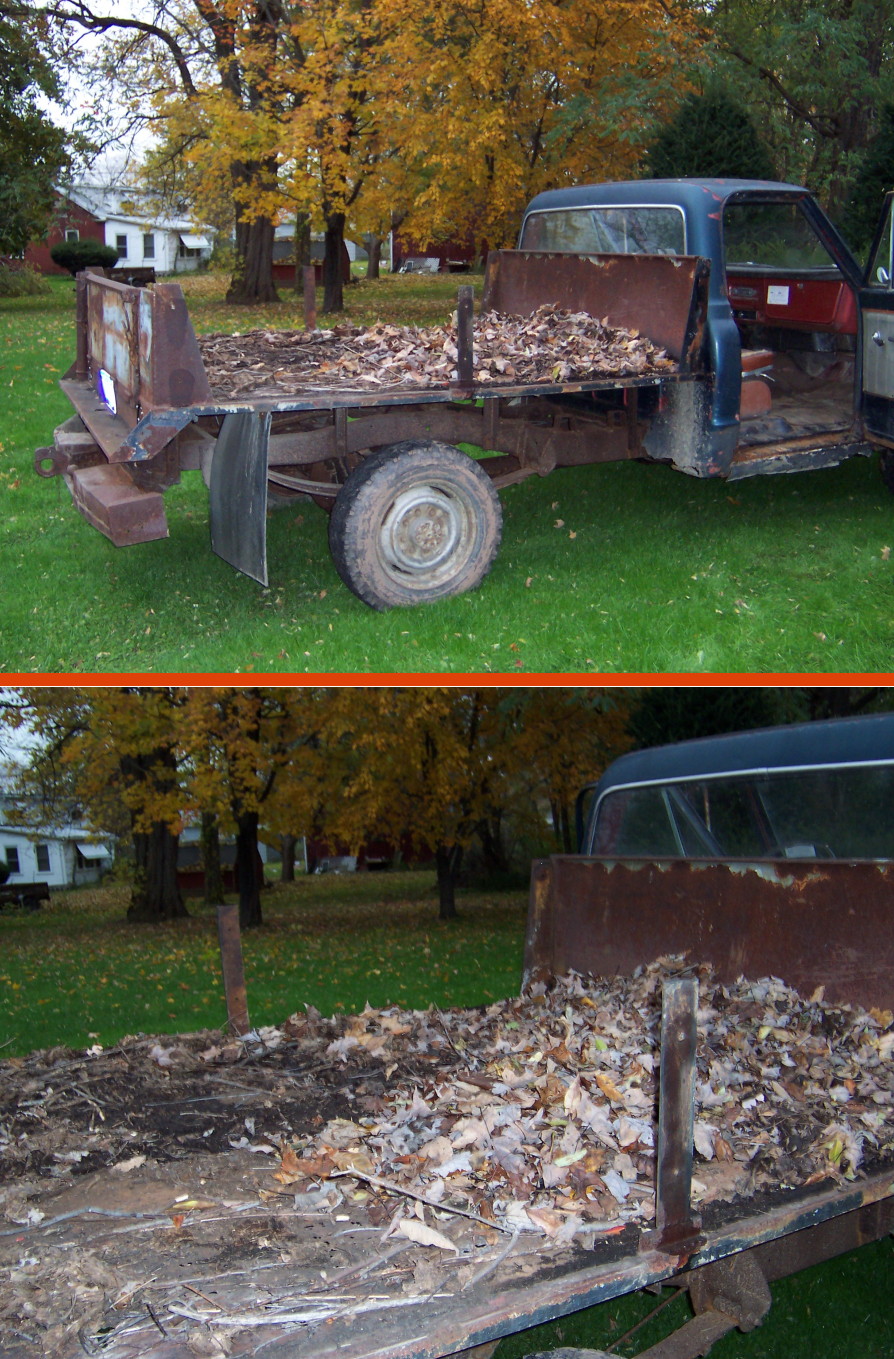 After removing the old plywood sides I'm still left with lots of leaves and other debris. Looks like a job for the power washer! The front end shook like a CA earthquake between speeds of 30 to 35. Rotating the tires solved that problem, but I was shocked to discover that the rag joint (in the steering column) was 90% torn in two. Complete steering failure if that severs. |
 After a hosing down with the power washer I can seek a little more than just dirt and rust! The metal fuel line was paper thin and began to leak. It was quickly replaced (I couldn't afford to lose the gas!). I also replaced the fuel filter and pump. |
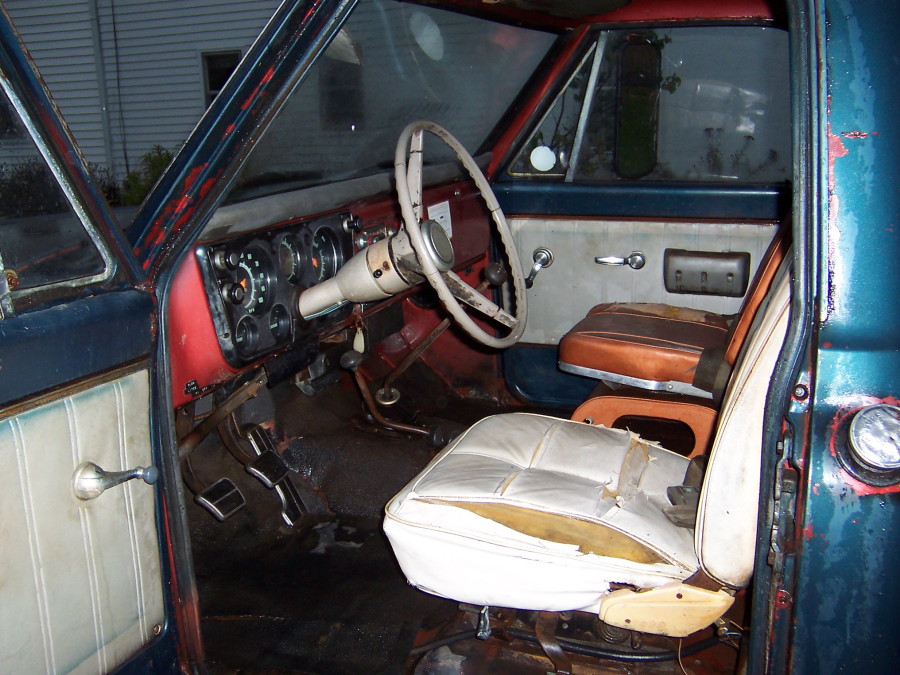 I even power washed the interior! Note the funky white bucket seat coupled with a very odd looking gold seat stolen from someone's boat. About this time I replaced the heater and radiator hoses and flushed out the heater core and installed new heater ducts. |
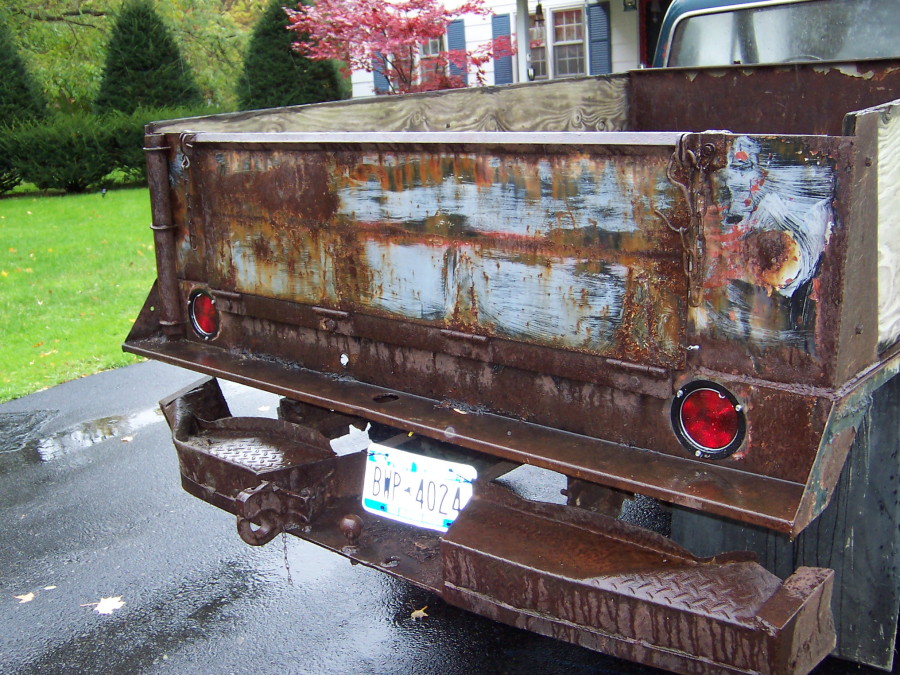 Replaced the rusted out tail lamps with new ones. These are readily available in the same design fastened with three screws each. The lamps had to be totally rewired. At some point in the past someone had attempted to do so with a brown extension cord! That had to be replaced with automotive wire. We also had to replace both front headlights and rewire the high beam switch. |
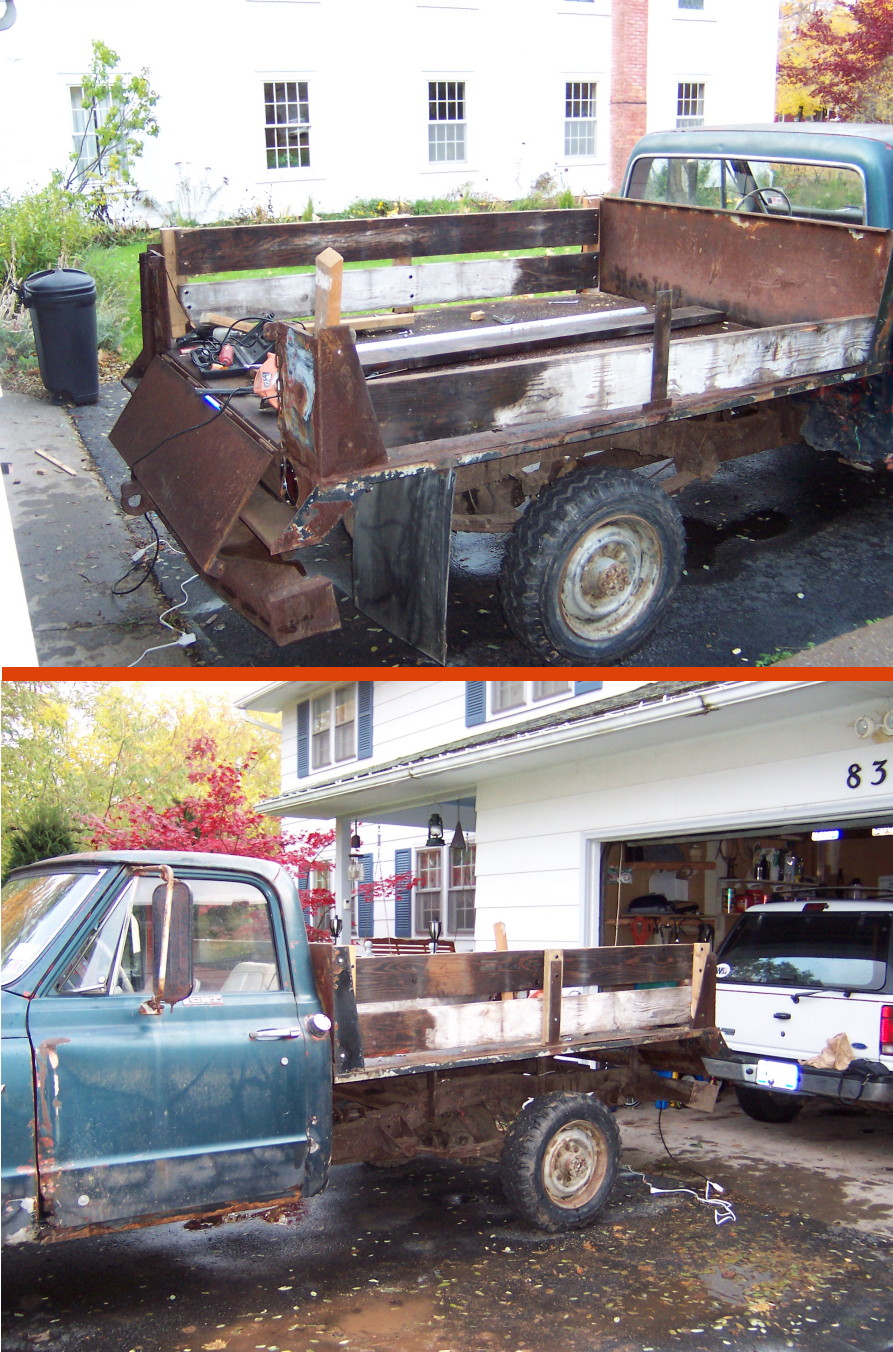 A neighbor supplied some old 2"x8"s that were already cut to nearly the right length. I would use these for new side rails. All along the goal was to spend as little money as possible on this project, so I depended much on donated materials and parts from friends. |
 The finished side rails await a fresh coat of black paint. |
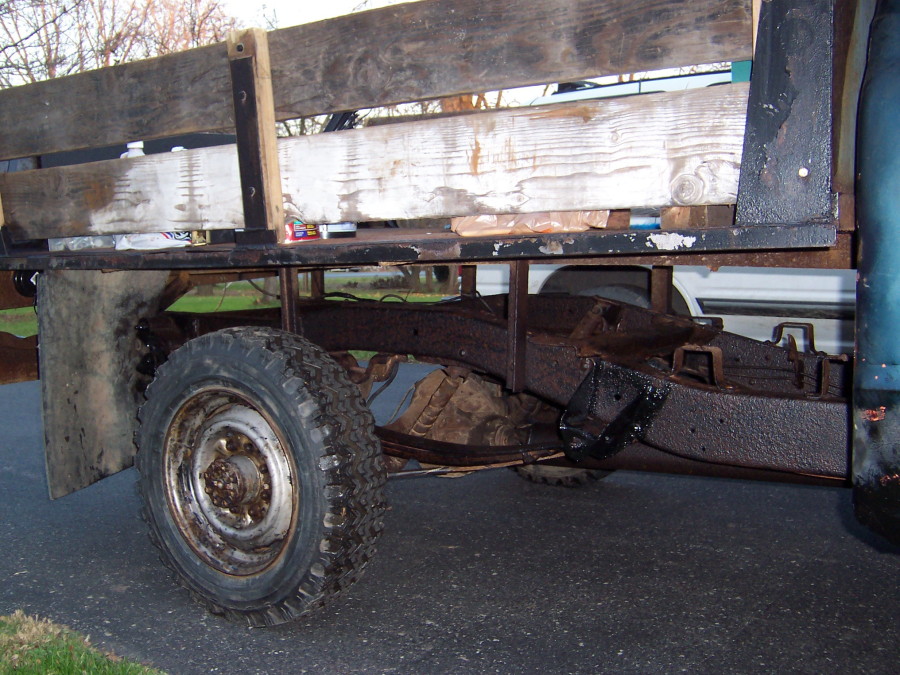
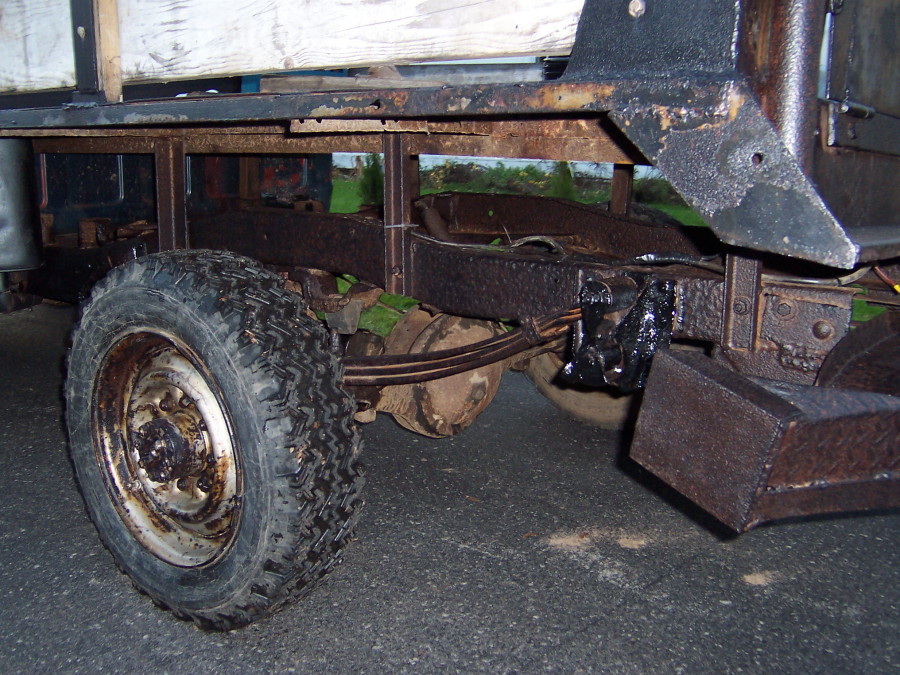 I was intent on saving as much of the steel in this American classic as I could, so I purchased a gallon of rust converter and a quart of Magnet Paint's Chassis Saver. The rust converter seemed to do the trick on the frame rails. I was saving the Chassis Saver for the underside and interior of the cab. |
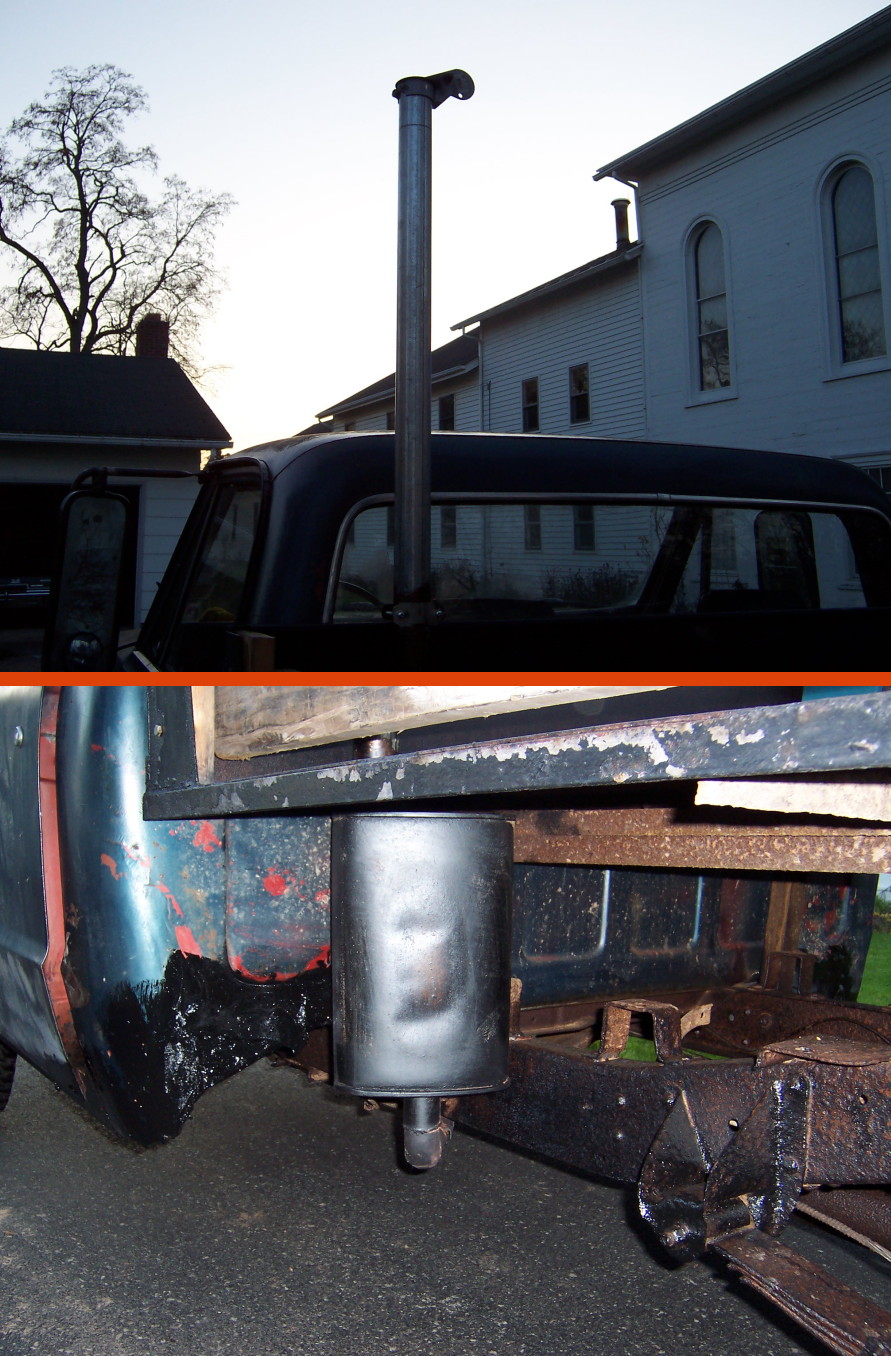 How about a diesel exhaust stack with a flapper purchased at the local Tractor Supply? The second pic shows the vertically installed muffler, one of several parts purloined off of AMC donor cars. |
 The nearly finished and freshly painted side rails. |
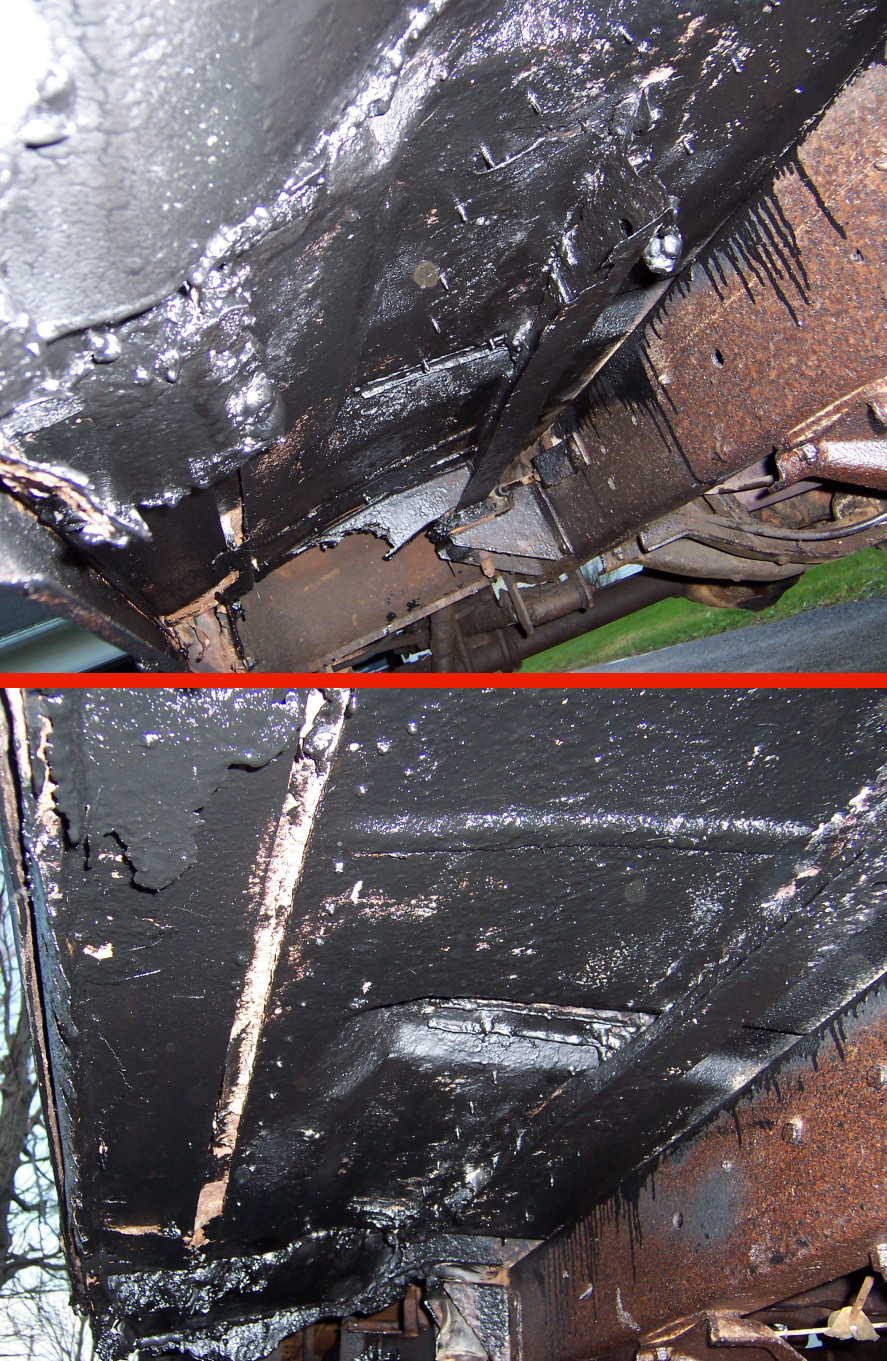 Here you can see the thick Chassis Saver paint under the cab. This paint can be applied right over rust. I highly recommend it, but be forewarned, wear old clothes and gloves. I ruined a brand new ASU T-shirt and it took two weeks for the stuff to wear off my hands! |
The floor board also needed attention. Two pieces of sheet metal, some driveway patch, followed by a coat of Chassis Saver. Both back corners of the cab on each side of the fuel tank were rotted through. I filled both holes with copious amounts of expanding foam sealant and covered that with Chassis Saver inside and out. |
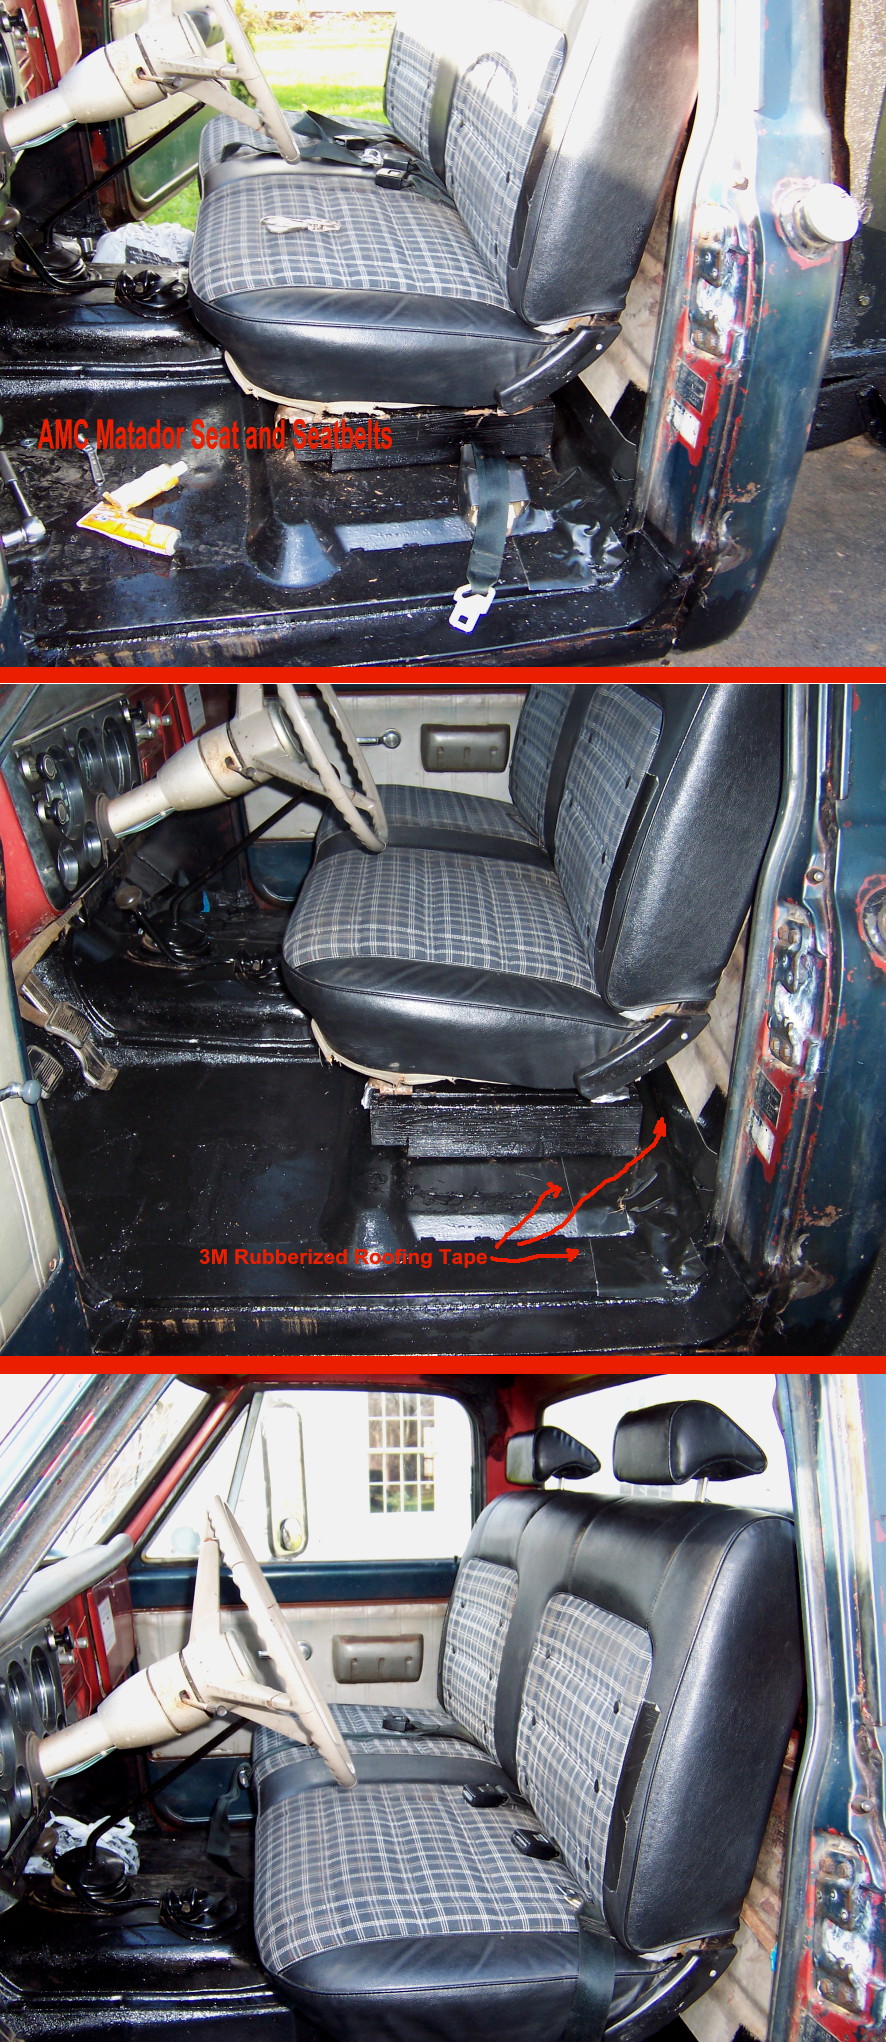 The seat and seatbelts came from a 1978 AMC Matador donor car. Two 4x4s helped raise the seat to a comfortable position. When it came time to install the seatbelts,however, I was dismayed to find out that raising the seat height made the seatbelts too short. Two 8" pieces of chain were used as extensions. I also covered the ugly expanding foam sealant with some 12" wide 3M rubberized roofing "tape." It has a pre-applied adhesive on one side and covered the rear of the cab quite nicely. The cab is fairly air-tight now! |
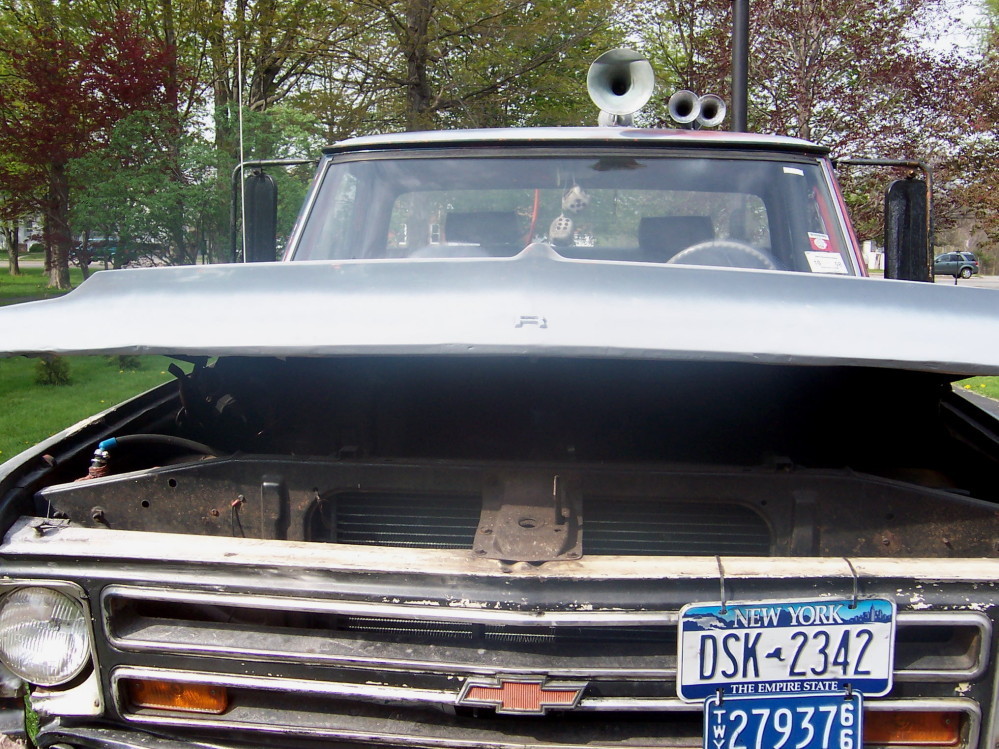
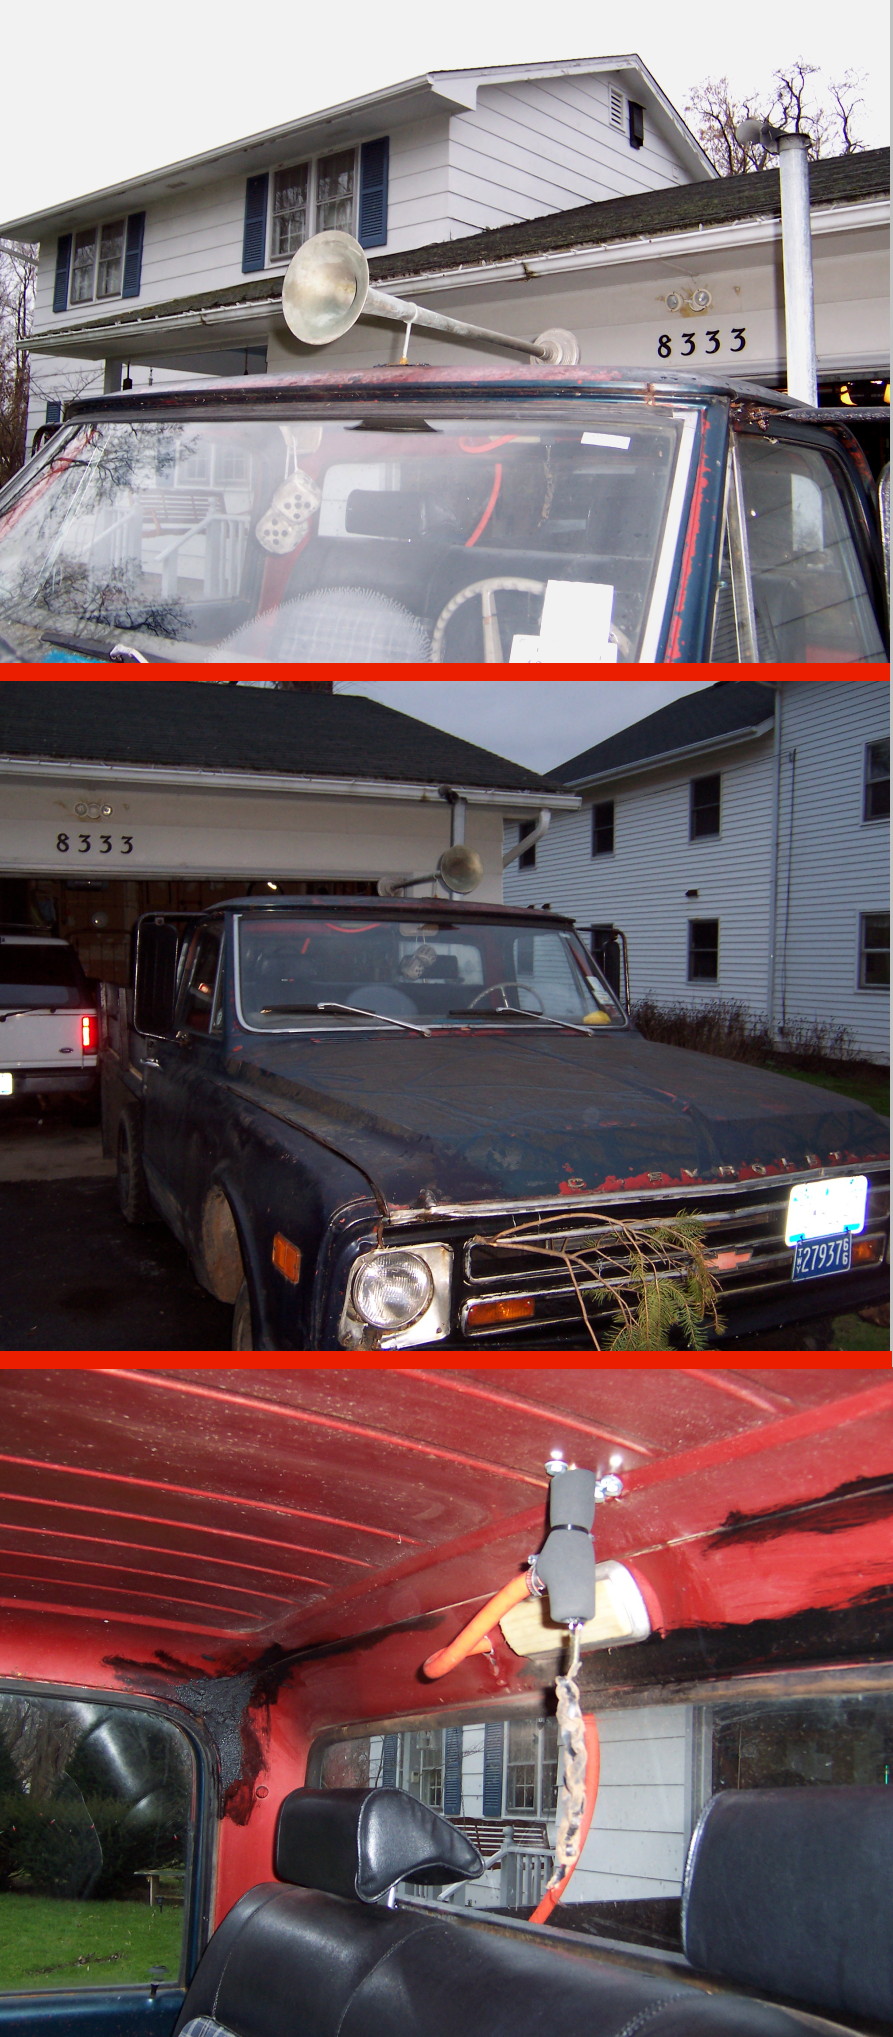 The horn didn't work. Pondering what to do about this resulted in an epiphany: how about an air horn? A real one! After a few bids on Ebay I acquired a vintage single trumpet about two feet long off an old semi. The air source is a 7 gallon tank behind the cab. 80 to 100 pounds of air and a pull on the cord (third pic) gets lots of attention! I later added a second smaller set of horns to the left of the single trumpet for asthetic purposes. |
|
||
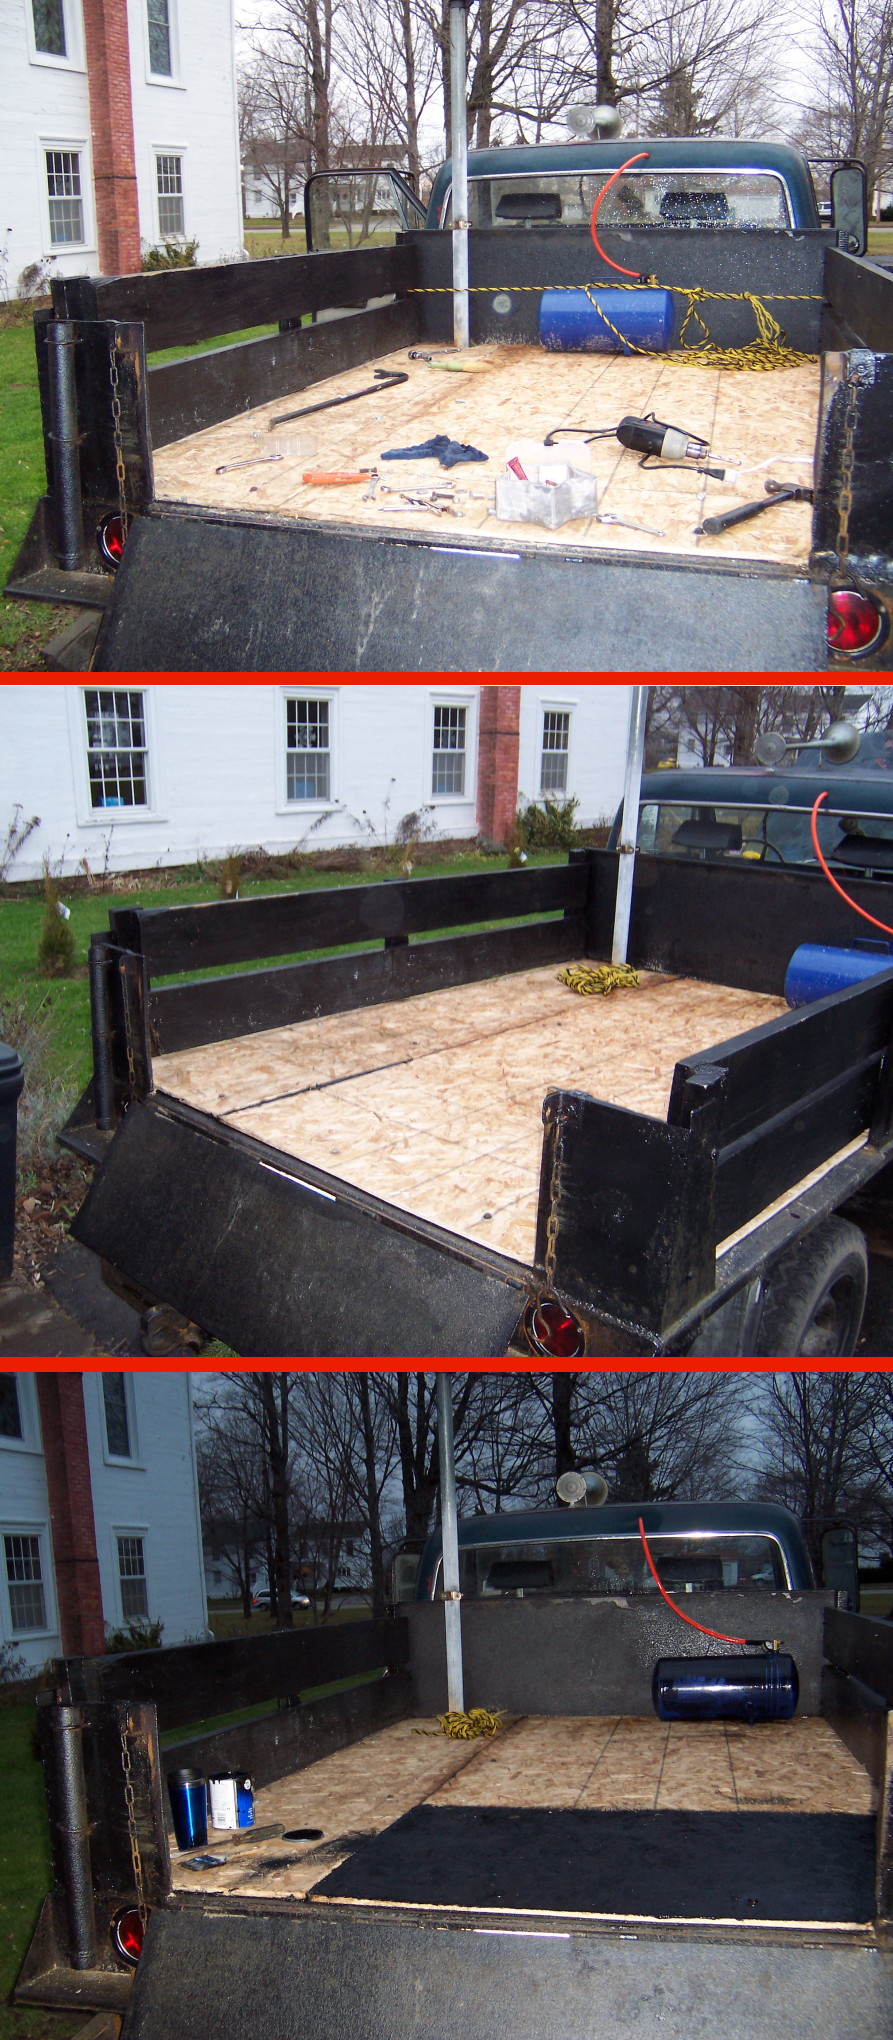
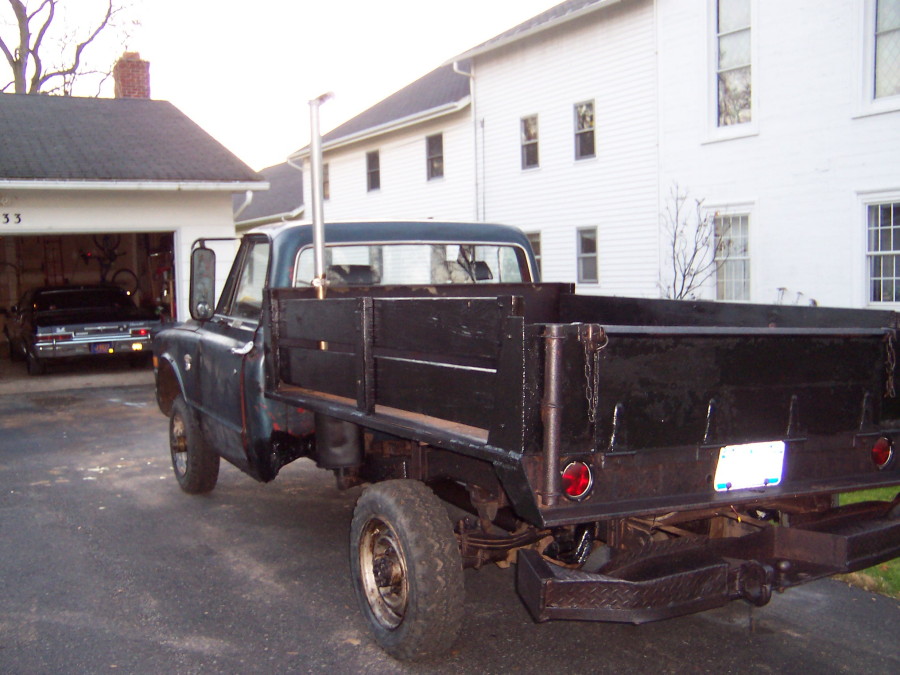
The steel on the flat bed was thin and rusting through in places. Some strand board, bolts and black paint made a nice inexpensive floor. Note the blue air tank for the air horn. |
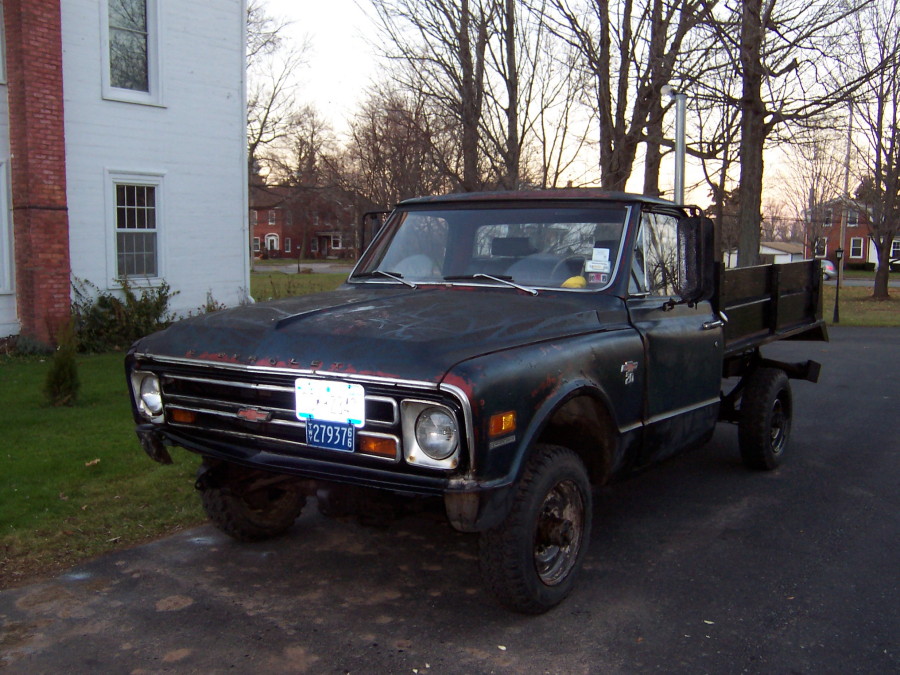
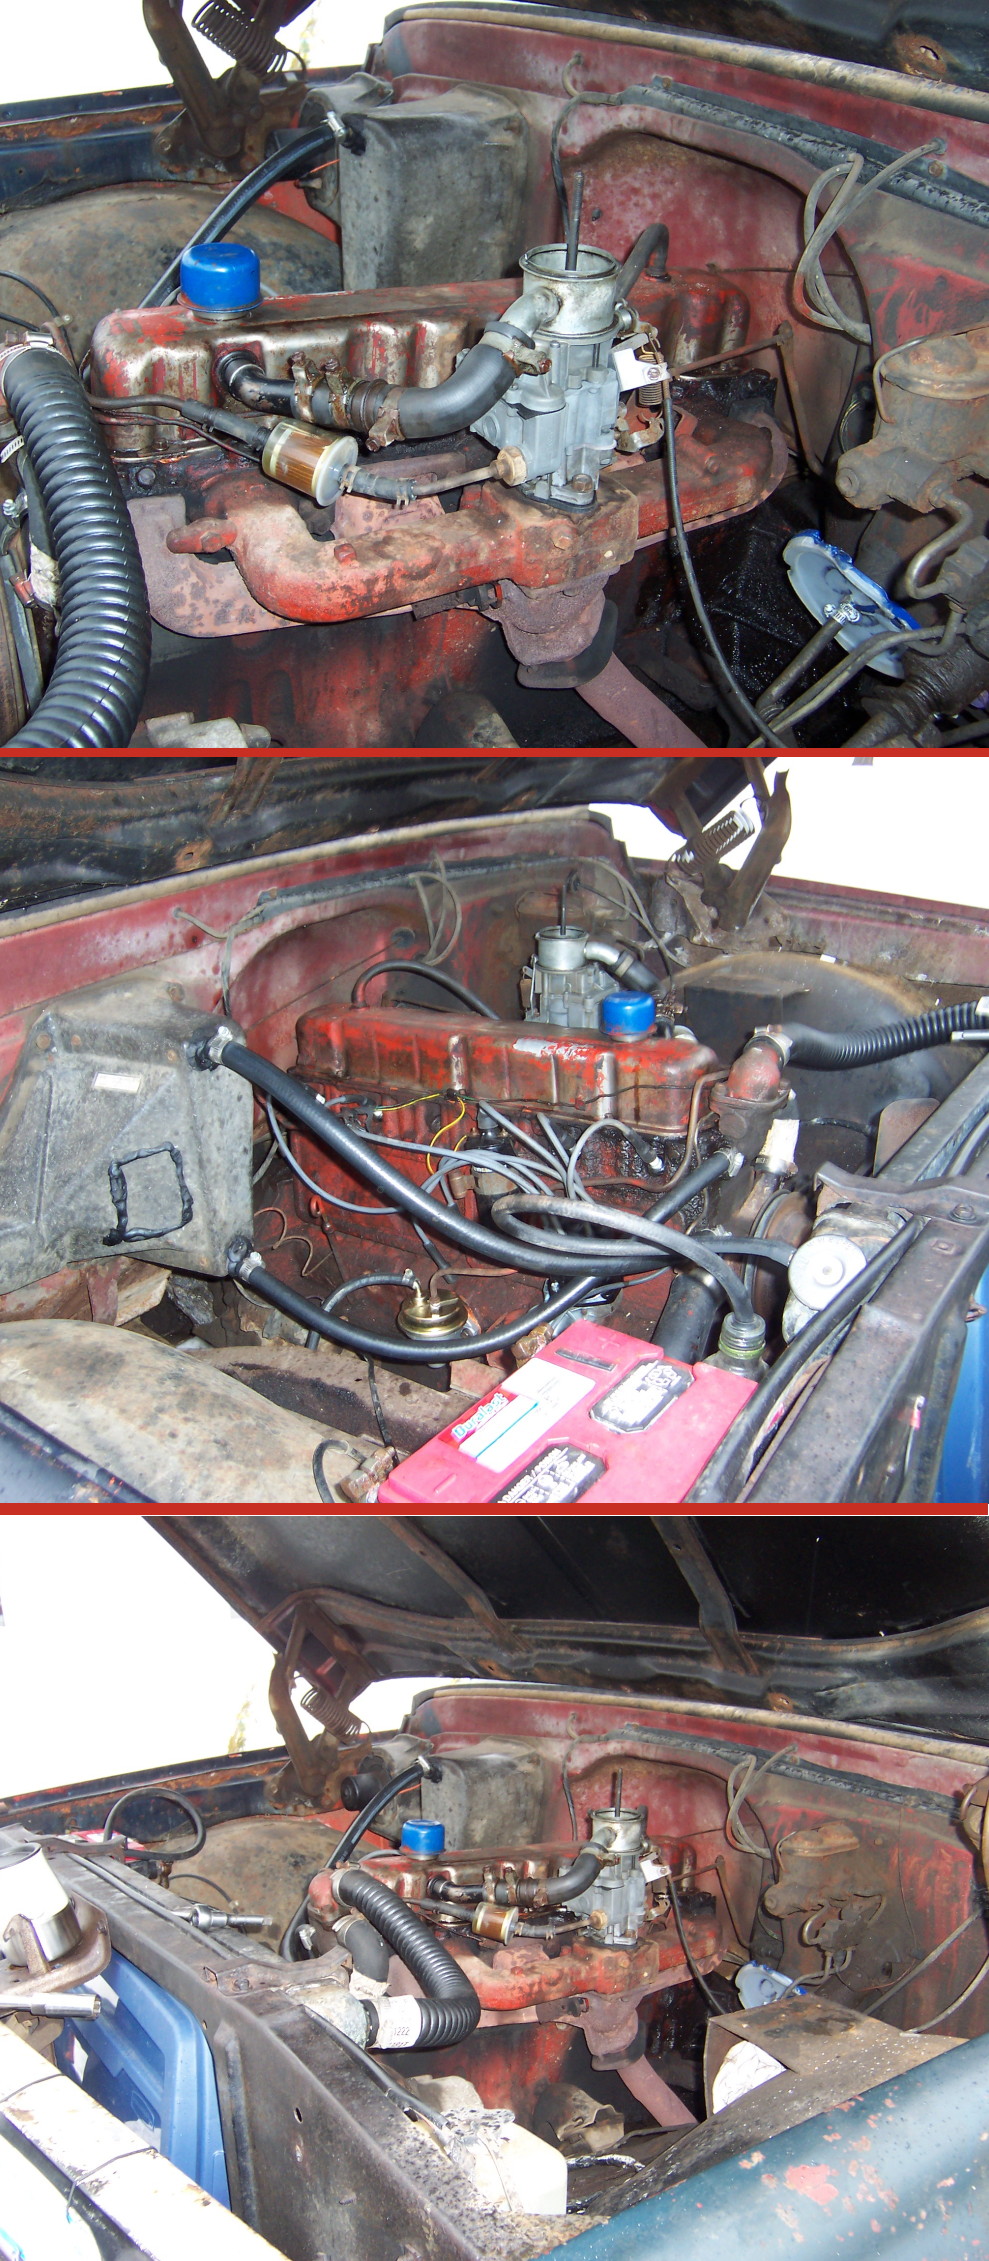
The Beast has come a long way to this point! With the addition of a new antenna and speaker the AM radio works fine. |
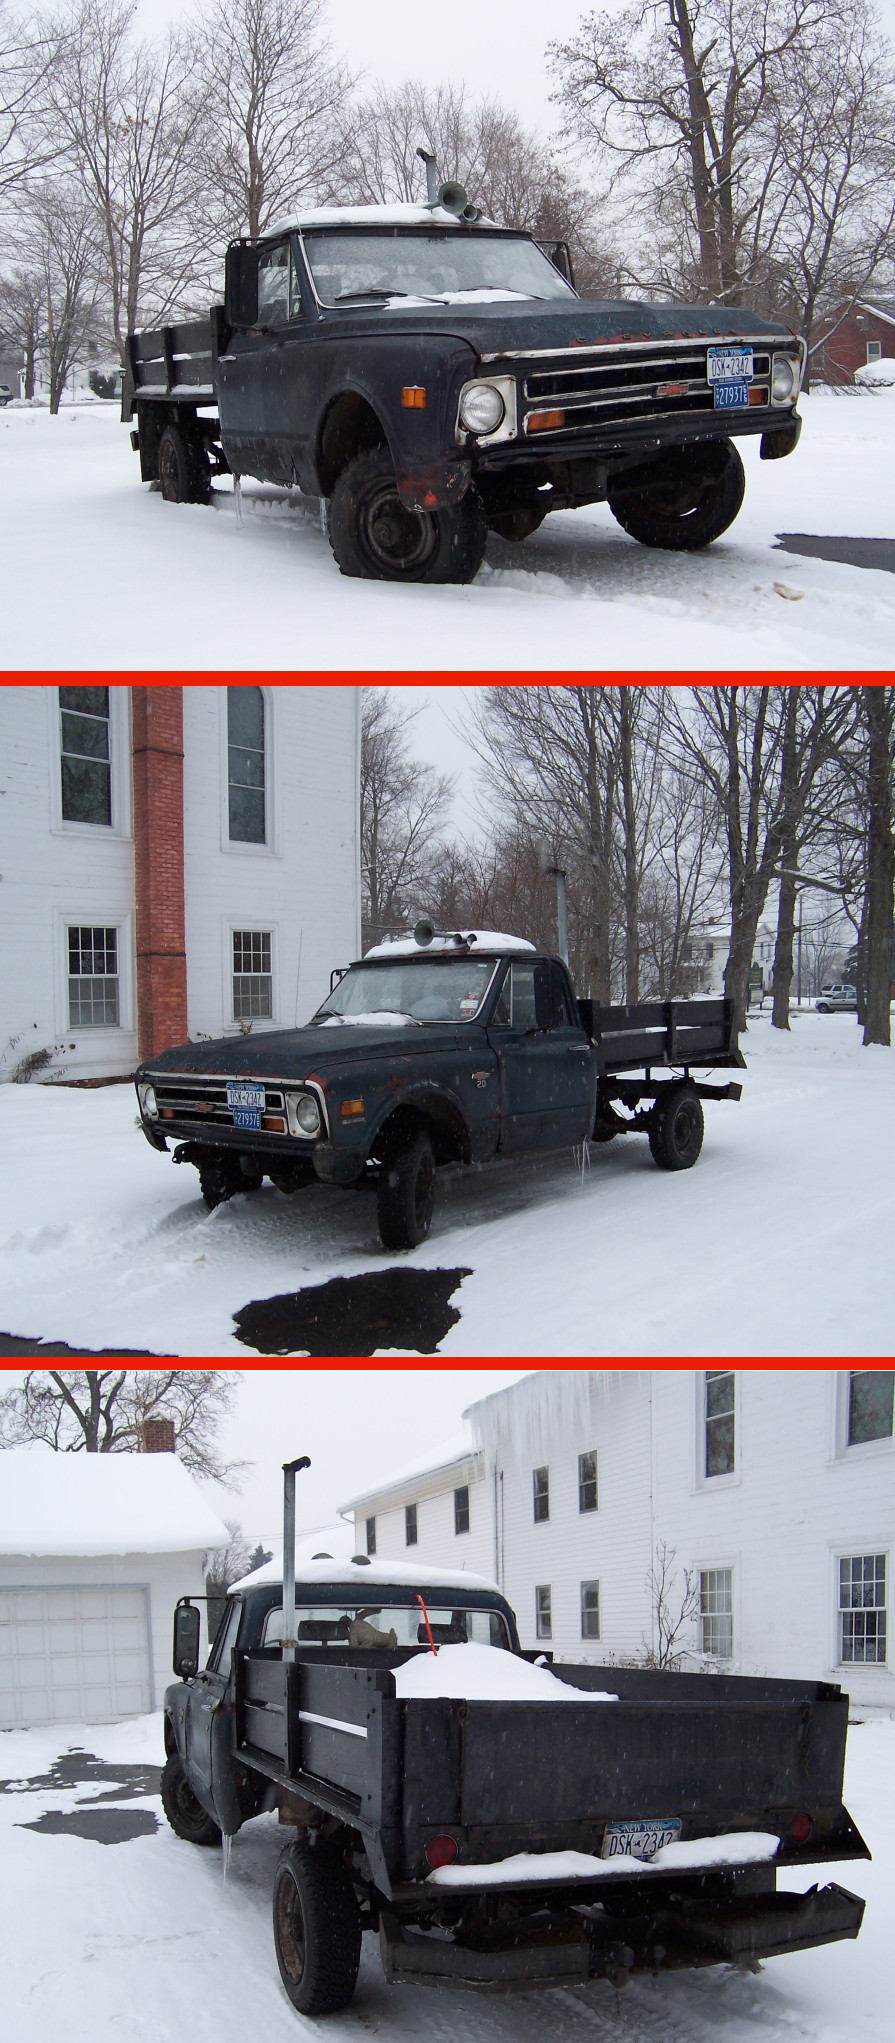
Three pictures taken on my birthday, February 2, 2007. You can see the additional set of non-functional air horns to the left (driver's side) of the single trumpet. Note the bed full of snow in the third picture. As of the above date The Beast is grounded. I had removed her carburator the day before in order to rebuild it. |
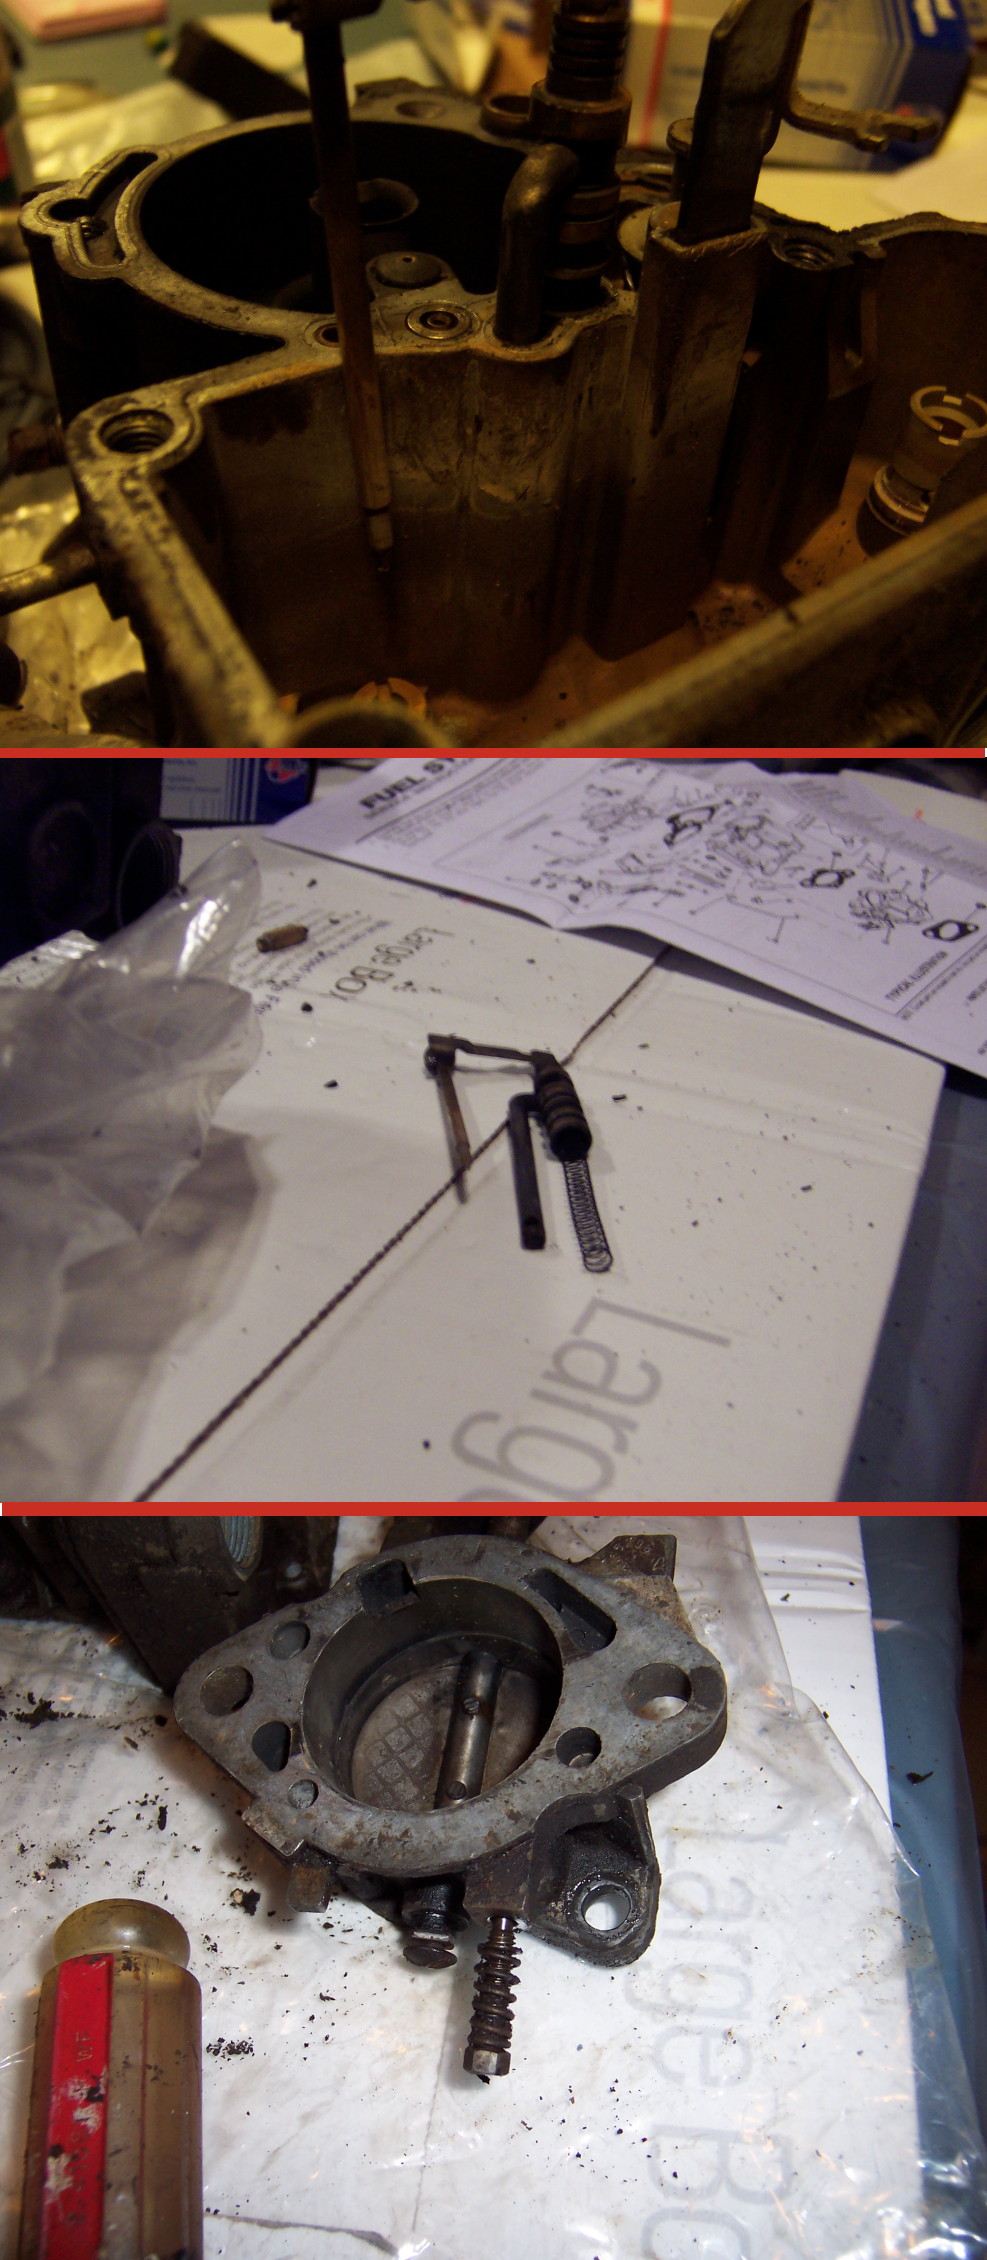 Carb Rebuild, Part One A helpful voice from BAT Auto Tech (www.batauto.com) suggested that I take pictures of the rebuild process. I'm exceedingly glad that I did as the carb kit had extra parts and the diagram was a bit confusing. So being my first time rebuilding a carb, the pictures were very helpful. |
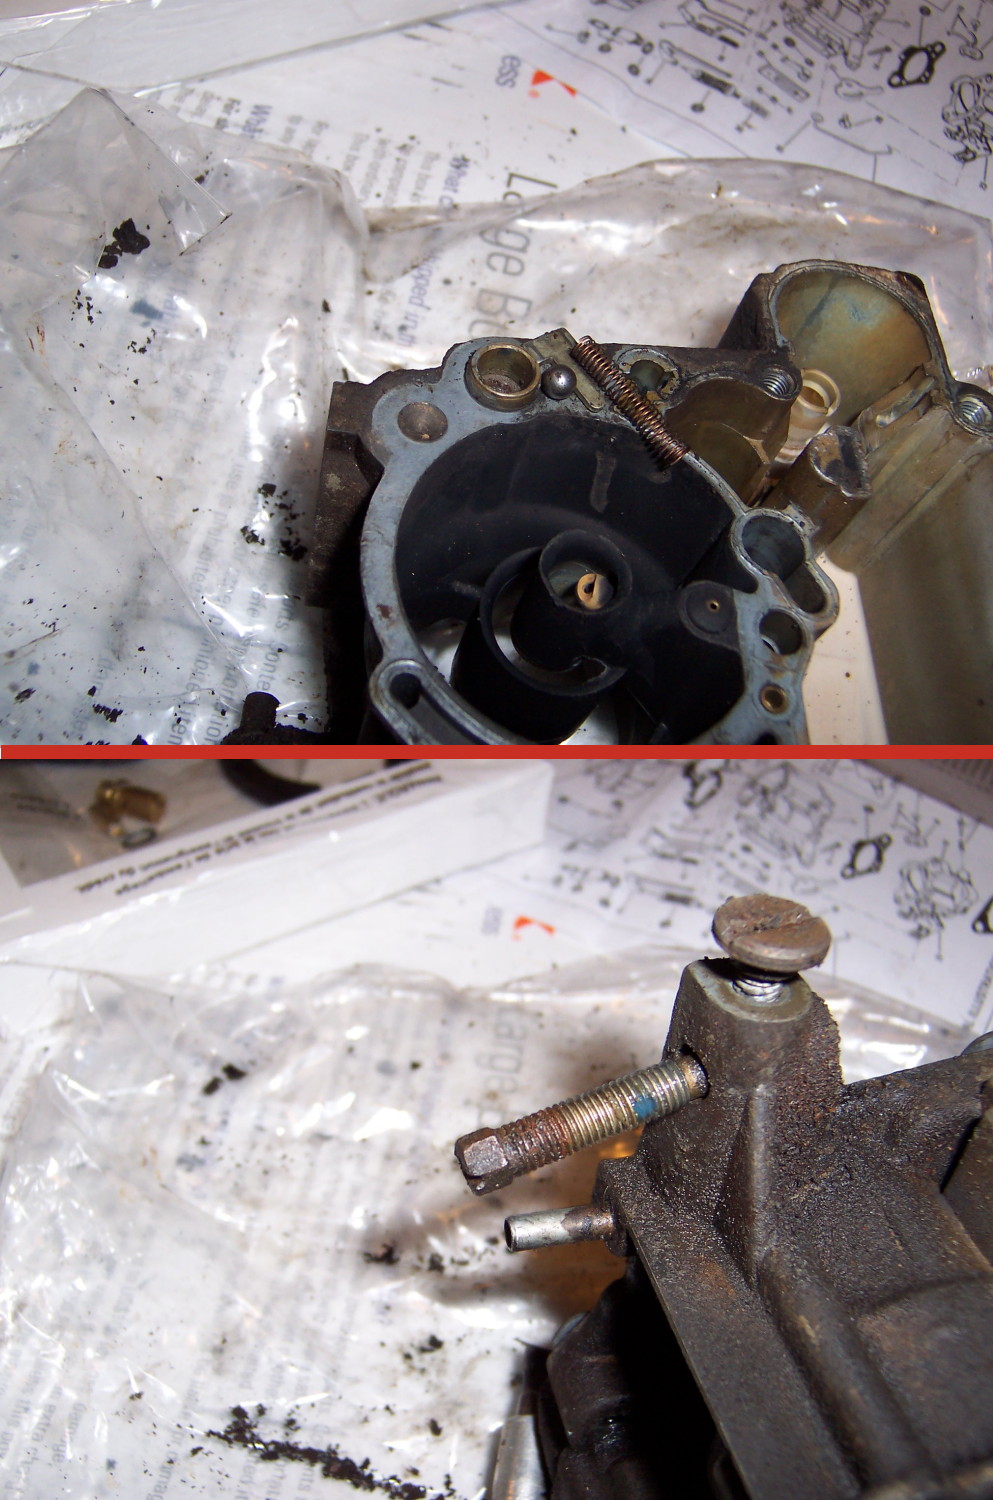 Carb Rebuild, Part Two I did the rebuild with my laptop computer next to me so that I could toggle through the pictures I had taken of the carb at several stages of disassembly. The auto mechanics at the BAT Auto Tech website were indispensible in helping me work through this project. In my opinon, this is the best automotive site on the web. |
 Carb Rebuild, Part Three Here's a picture set of the finished product. I can hardly believe how good the truck runs now and I'm glad that I took on the project of rebuilding it myself. Not only did I save about $100.00, but there's satisfaction in knowing that I did it myself and still have the original Rochester MonoJet carb on the vehicle. |
|
||
 I decided to paint the Beast. Before I did that, I figured I would do some minor body work to slow down the progression of the rust. |
 Nothing fancy or too perfect. About this time I added an HEI ignition. |
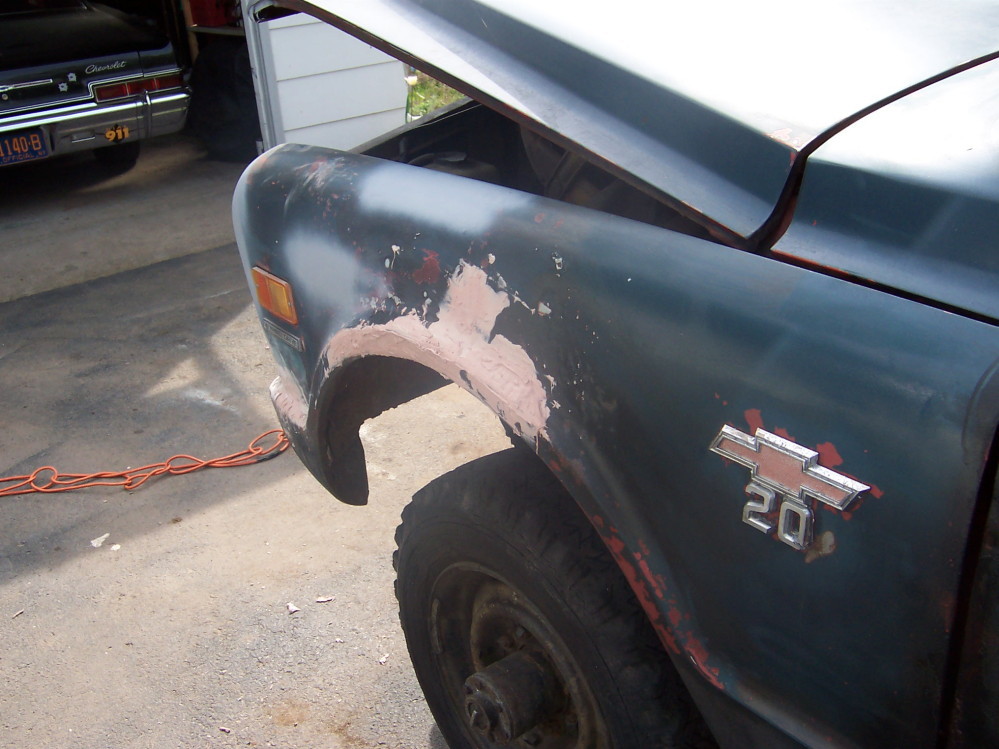 This fender had more holes that a slice of Swiss Cheese! |
 I was missing about 1/3 of the letters spelling "CHEVROLET." I decided to fill in the holes and leave the lone "R." |
 I got a good deal on these used 16" rims and tires off of Craig's List. They are taller and the ride is much improved. Seems to have helped with the gearing and gas mileage - although the mpg couldn't have gotten much worse! |
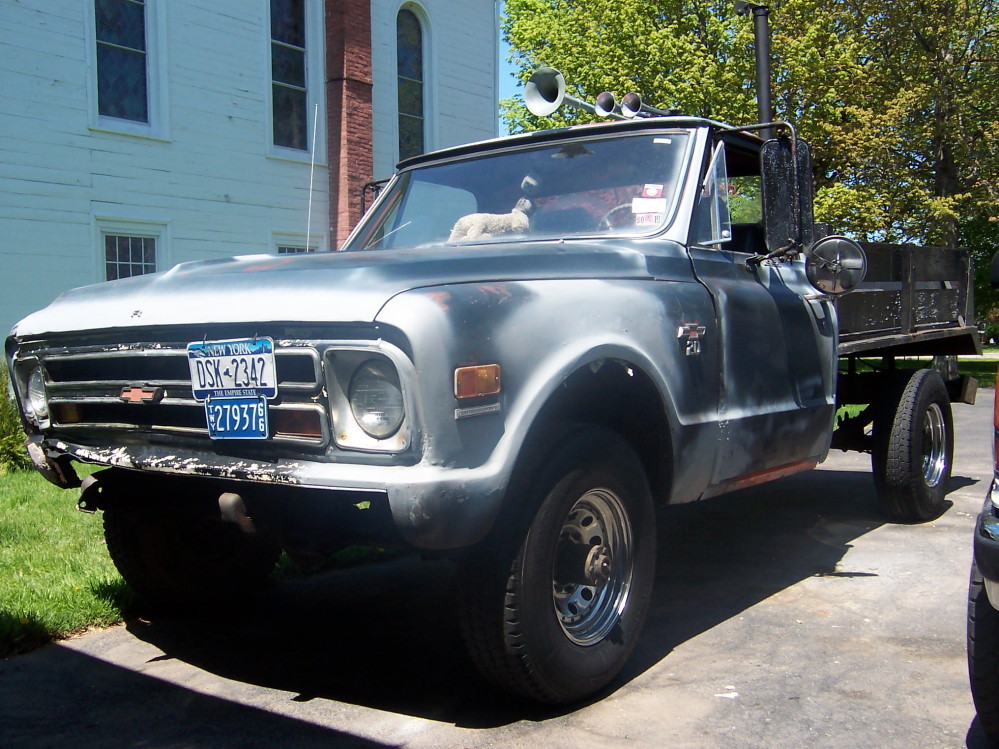 The body work is just about done. Now she's ready for a coat of paint! I now have almost $1,000 into this project. |
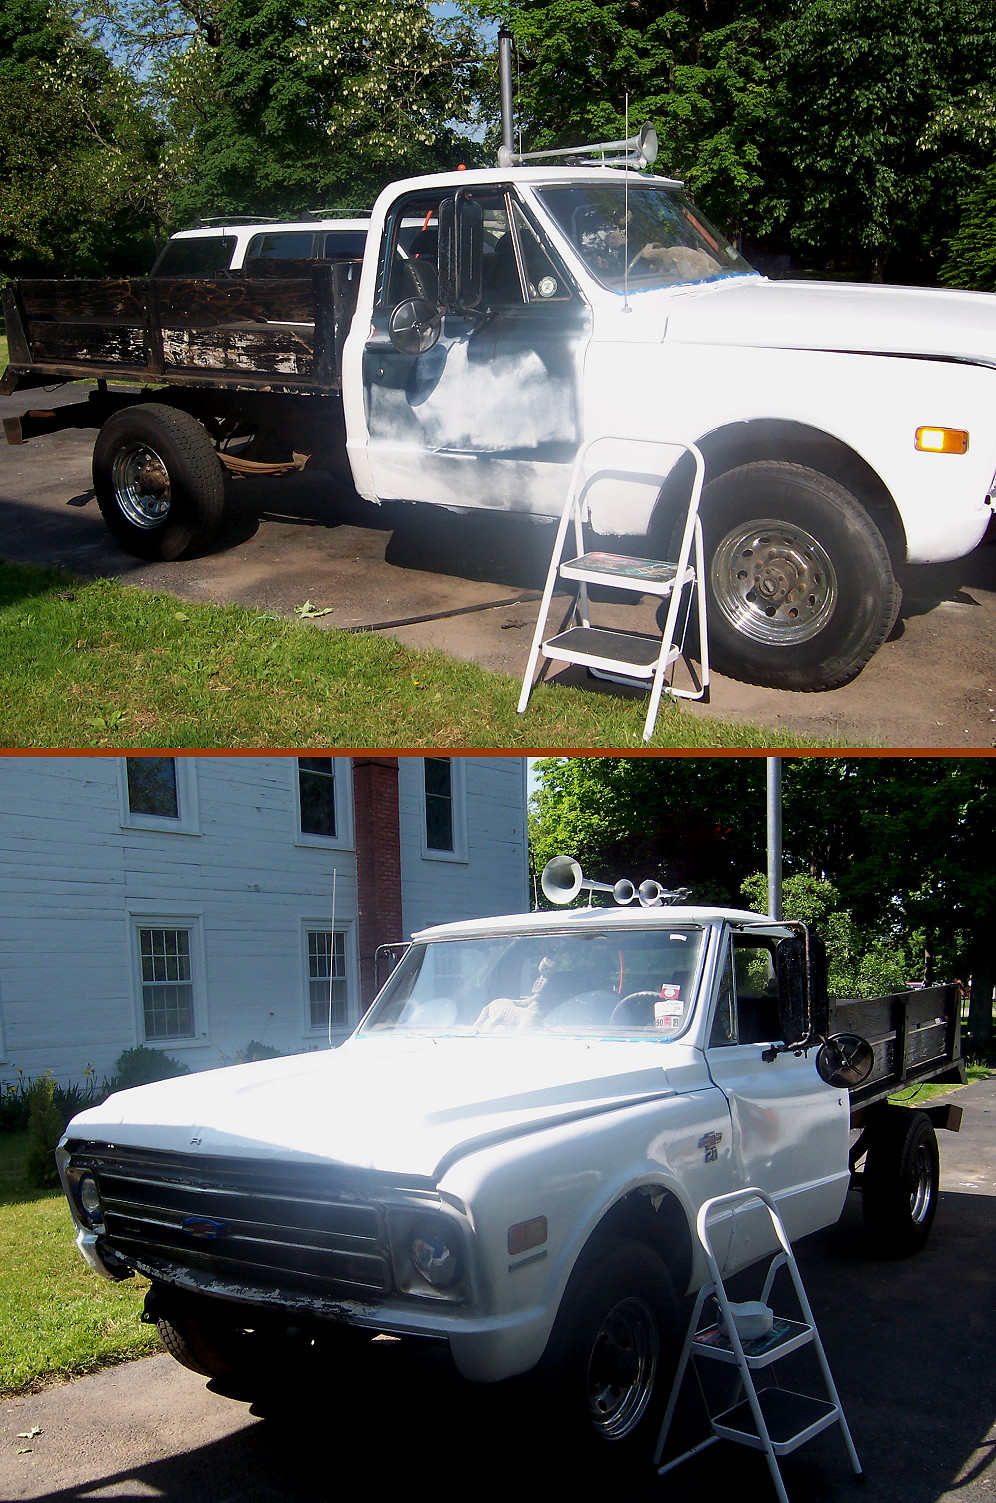 Paint, Part One I decided to go with machinery paint from the local Tractor Supply store. The stuff is durable and goes on nicely, smoothing out while drying. You might note the new exhaust stack visible in both pictures. I was backing up and caught the old one in a tree limb! This one's taller and greater in diameter. I'll have to watch the trees better! |
 Paint, Part Two A friend volunteered to help me spray the truck, but I have always wanted something worthy of a painting with a brush. Yeah, sounds silly, but not as bad as a car I once saw covered completely with duct tape! (I had a friend in High School whose brother painted their old truck with a dozen cans of silver spray paint. Didn't look so good.) But this is a winter truck and the paint is really more for protection from the elements. This paint is so good to work with. The brush marks virtually disappear when it dries. Hey, it's a beast. |
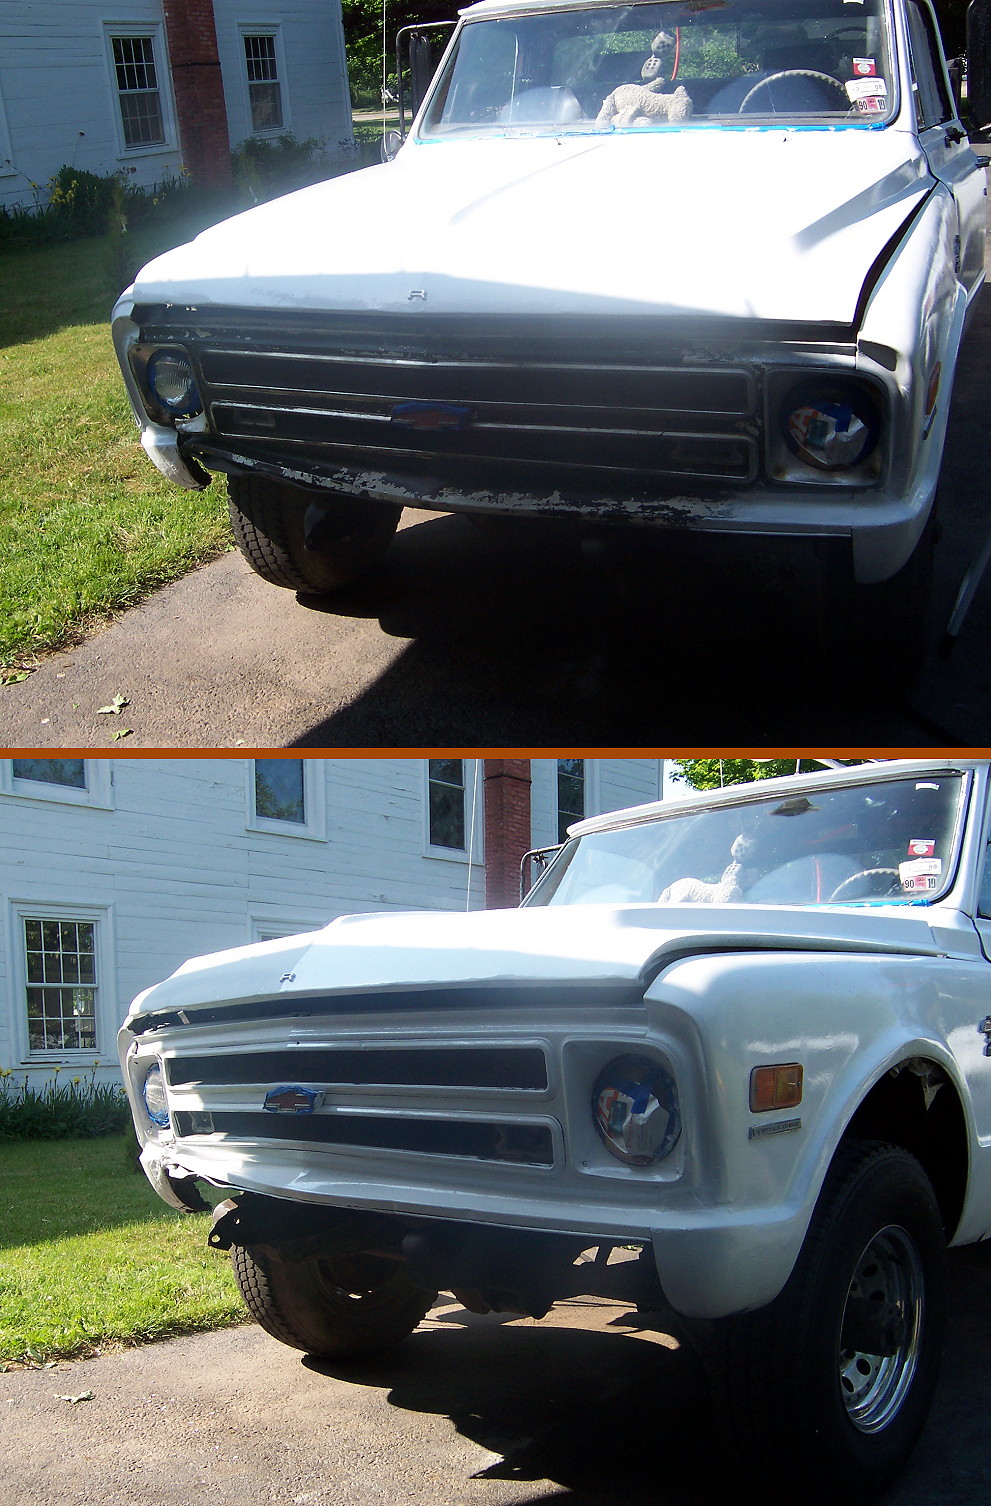
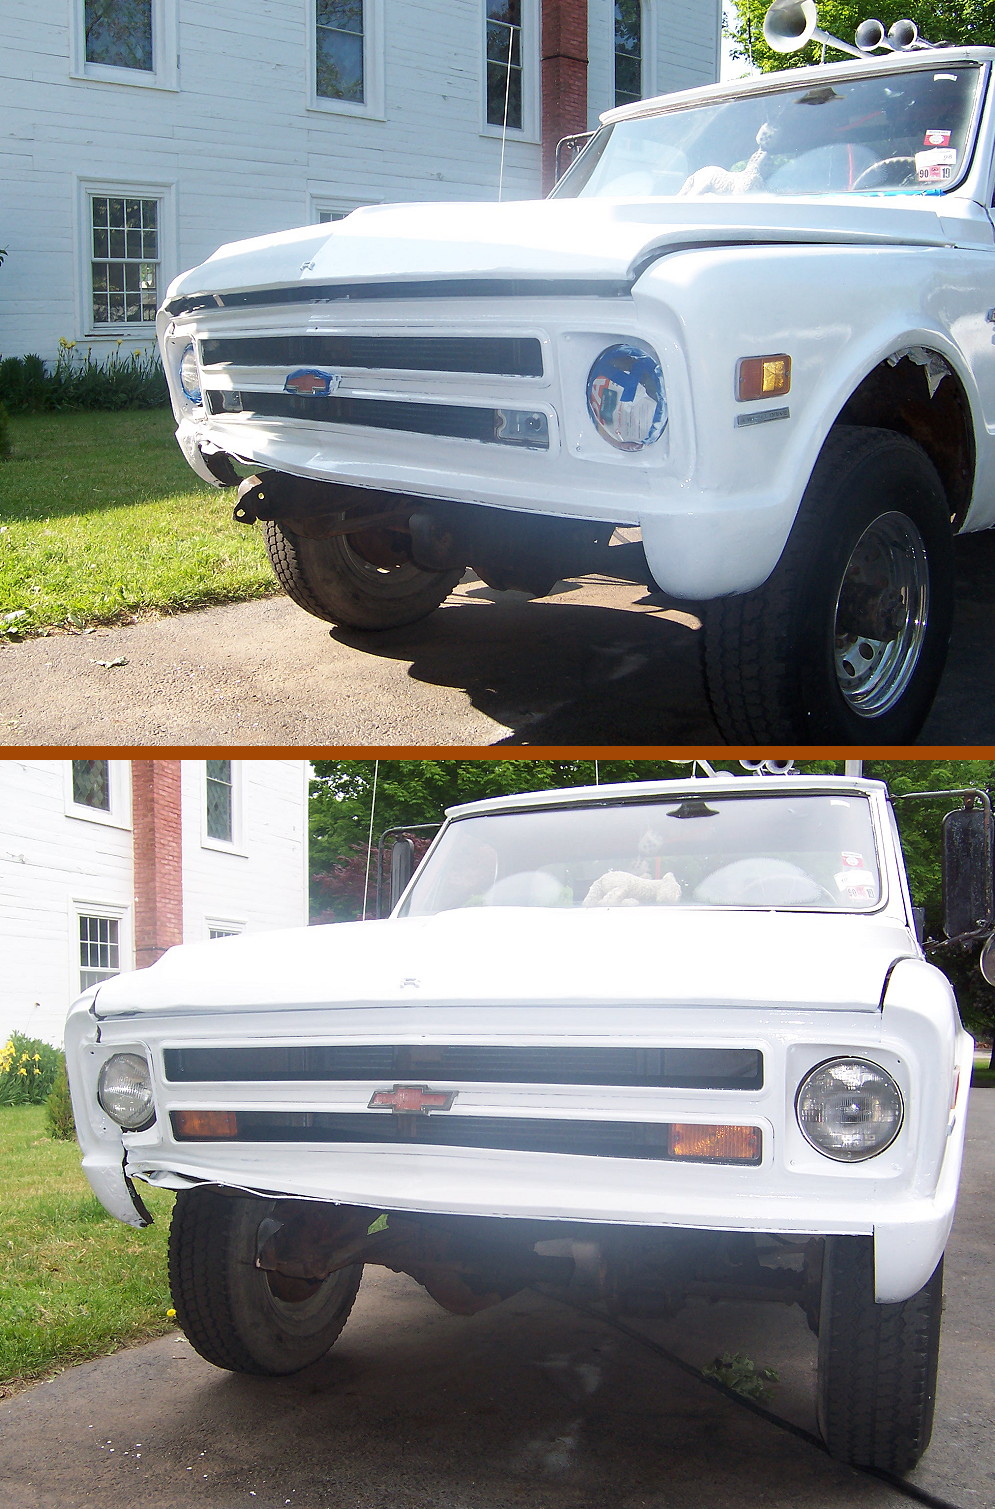 Paint, Part Three I figured that I would paint the front headlight doors and grill area white. It actually looks pretty good as you can tell from the bottom picture. I filled in the grill with black paint. |